2 Setting up the R ecosystem
2.1 Objectives
At the end of this section, you will have:
Installed R
Installed RStudio
Installed your first packages
Created an RStudio project for the course
2.2 Installing R & RStudio
How do we install R and RStudio on our computers?
It depends
operating system (Windows, Mac, or Linux)
administrative privilege & network permissions
2.2.1 References
R Cookbook, 2nd edition, “Getting Started and Getting Help”, https://rc2e.com/
Danielle Navarro, running R on your own computer
- A series of videos on youtube, with installation instructions for different operating systems (Mac, Windows, and Ubuntu linux), as well as loading and installing packages from both CRAN and GitHub (where many in-development packages are available)
2.3 Step 1 - Installing R
Open https://posit.co/download/rstudio-desktop/ in your browser.
Click on Step 1: Install R’s button “DOWNLOAD AND INSTALL R” which will take you to https://cran.rstudio.com/
If you need to select a CRAN mirror site, choose one near you or the top one listed as “0-Cloud,” which tends to work well for most locations (https://cloud.r-project.org/).
-
Click on relevant “Download R for …” link (e.g., Linux, macos, Windows)
Windows: click on “base”, then the link for the latest version of R (an .exe file)
Mac: click on the link for the latest version of R (an .pkg file), under “Latest Release:”
When the download completes, double-click on the .exe file (Windows) or the .pkg file (macOS) and answer the usual questions.
2.4 Step 2 - Installing RStudio
Open https://posit.co/download/rstudio-desktop/ in your browser.
Click on Step 2: Install RStudio Desktop’s button for downloading the latest version of RStudio.
When the download completes, double-click on the .exe file (Windows) or the .pkg file (macOS) and answer the usual questions.
2.5 Step 3 - Install first packages
Packages are collections of R functions, data, and compiled code in a well-defined format. The directory where packages are stored is called the library. R comes with a standard set of packages (~30) such as {base}, {datasets}2, {graphics}, {stats}, {utils} and many more. Literally thousands more packages are available to be downloaded and installed. Once installed on your computer, they have to be loaded into the R session so that the functions in that package can be used.
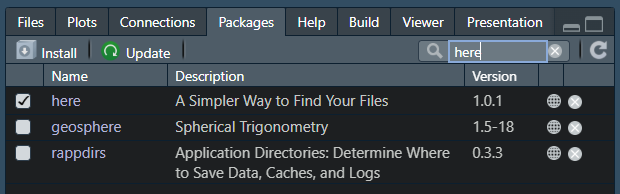
To see what packages are currently installed, click on the Packages Pane (near the Files Pane) on bottom right, or use library().
library()2.5.1 Installing new packages
Beyond the base packages that install with R, some of the packages we will use in this course include tidyverse (a special package of consistent packages that work together), here (simpler way to find files), lubridate (dealing with dates more easily), readxl (to read data from an Excel file), and janitor (data frame cleaning and exploring).
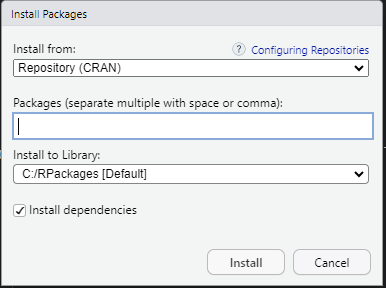
To install a package:
- click on the Packages Pane and then Install.
- Install from: Repository (CRAN)
- Packages: Type in the package name(s)
- Install to Library: {folder location} [Default]
- Install dependencies: checked
- click “Install”
Or, we can use the function install.packages(). For example, to install the package called {here}, we could enter the following in our console:
install.packages("here")
The reference page for the {here} package: https://here.r-lib.org/
2.5.2 Package: {tidyverse}
For this course, we will be working extensively with the packages that are part of the tidyverse. To make our lives easier, the core tidyverse packages are bundled together and can be installed in one step, with a package called tidyverse
tidyverse: Easily Install and Load the ‘Tidyverse’
-
With tools in the tidyverse, we will be:
wrangling with {dplyr} & {tidyr}
visualization with {ggplot2}
importing with {readr} & {readxl}
working with variables with {forcats}, {lubridate} & {stringr}
install.packages("tidyverse")2.5.3 Packages: others
Other packages that we will be using include the utilities {janitor} and {glue}. We will be adding more packages to our collection as the course progresses.
Here’s the code to install {janitor} and {glue}. You can copy this line, and paste it into your console and then press
install.packages(c("janitor", "glue")2.5.4 Updating existing packages
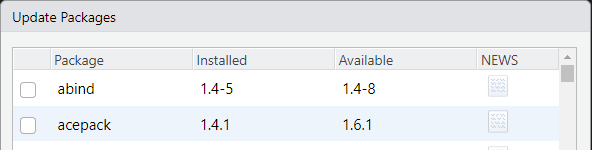
Updating packages is very easy. Simply click on the Packages pane, then Update. Anything that has a newer version will be listed. You can select all, one or some, then choose “Install Updates”.
Alternatively, if you know which package(s) you want to update, use the install.packages() function.
2.5.5 Loading packages
To use a package’s functions, we can “call” the function by naming it:
four <- 4The above calls the {base} package’s assignOps function “<-”. This operator assigns the numeric value 4 to an object called “four”. It saves that object in your environment.

Now, use the here() function from the {here} package to find the value that object (i.e., the object called four).
here(four)You get an error:

To use a package, you must have it installed on you computer (a one-time action). However, every time you open RStudio (i.e., every session), you must load a package to use it (unless it is a base package, which are loaded automatically). We use the library() function to load the packages, which gives us access to the functions within that package.
Now that the {here} package has been loaded, try using the here() function again to see where four is.
here(four)## [1] "E:/github_uvic/UVic_DAMS302/4"2.6 Projects in RStudio
An R project is a special and very useful way to keep your work together. The main benefit of using a project (as opposed to a bunch of unlinked scripts/RMD files and data) is that importing data is much easier: a project pre-defines a relative working directory (the place R looks for files) in the folder containing the .Rproj file.
If you do NOT have an R project set up, you will need to set the working directory, which means (probably long) path names that may change over time and that are sensitive to the computer and it’s operating system (e.g., PCs and Macs use different slashes in file paths; different computers may have different drives, etc.). This will save time for you down the road or others who may need to reproduce your work.
Another benefit is that R projects can allow for version control and collaboration (i.e., GitHub).
2.6.1 How to create a project:
- Open RStudio.
- Click on File and choose “New Project”.
- Choose “New Directory”.
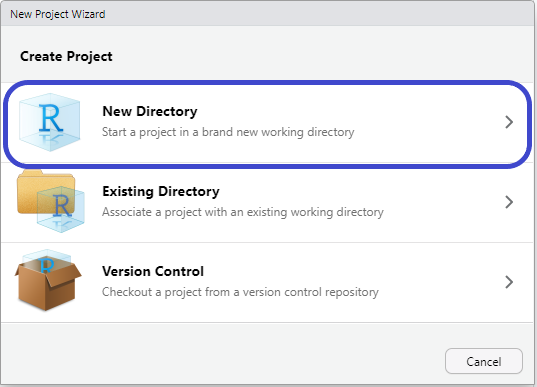
- Choose “New Project”.
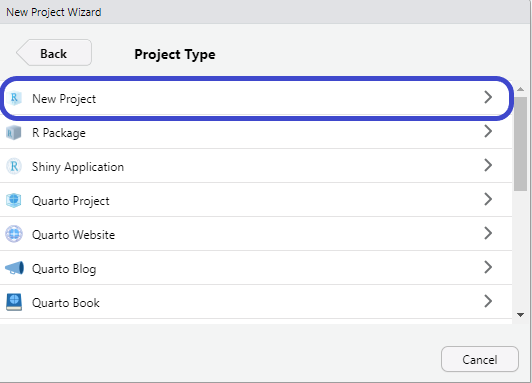
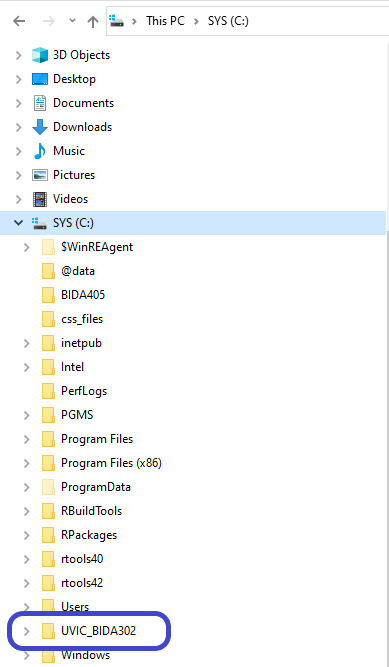
- Name the project (i.e., directory name) and browse to where you want it. In this example, the directory name is the name of the course (“UVIC_BIDA302”) and the directory is going to be in the C:/ drive. 5b. IF you want this to be a GitHub repository, check the “Create a git repo” box.
- Check the box “Open in new session” at the bottom left.
- Click “Create Project” button.

Your newly created project will open in a new RStudio session. It will have created an .Rproj file.

To open this project next time, navigate to where you saved it and double-click the .Rproj file.
2.6.2 How to open an existing project:
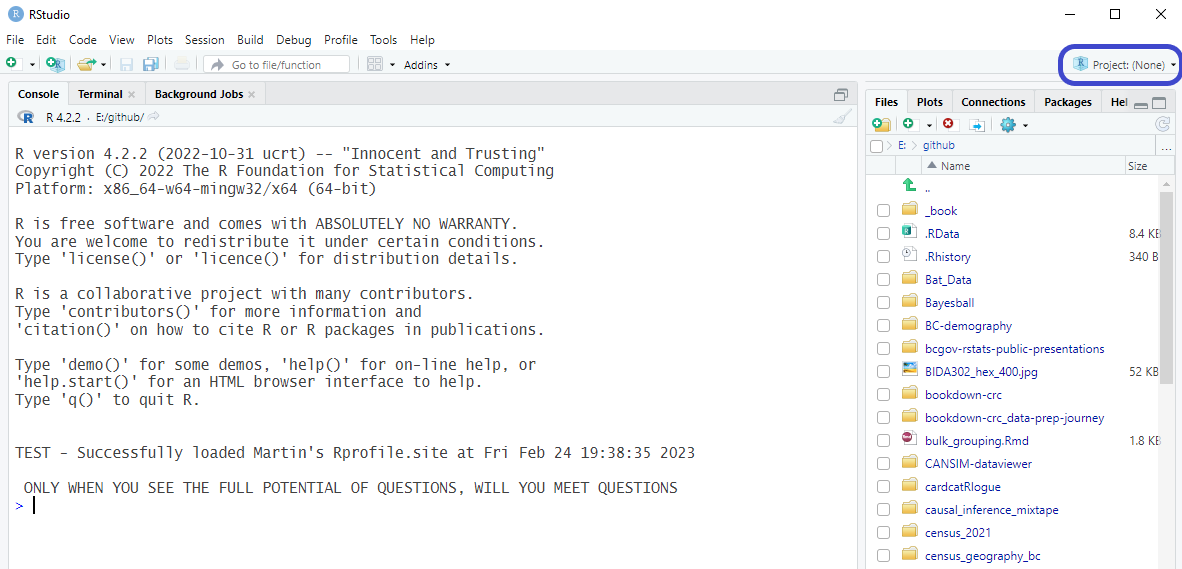
If you opened RStudio from the desktop icon or start menu, you will see “Project: (None)” in the corner instead.
Click on “Open Project” (or click on File > “Open Project…” and browse to the .RProj you want).
Once RStudio is open, click on the file you want in the Files pane (e.g., “02_projects_and_packages.Rmd”).

2.6.3 How to tell if you are in a project:
If you opened this file by opening the project and then clicking on the file, you should see “UVIC_BIDA302” in the far right top corner. A down arrow beside it allows you to start a new project, close the project, or open a different project, etc.
2.6.4 Further reading
For more about RStudio projects:
the chapter “Workflow: scripts & projects” in R For Data Science, 2nd ed.
“Creating a New RStudio Project” in the R Cookbook (2nd ed.)
-30-