2.2 Downlaod and Install R and RStudio
It is simple to download and install both R and RStudio.
R Download and Installation
To download R, please either directly from here (http://cran.us.r-project.org/bin/windows/base) or your preferred CRAN mirror (https://cran.r-project.org/mirrors.html). If you have questions about R like how to download and install the software, or what the license terms are, please read the answers to frequently asked questions (http://cran.r-project.org/faqs.html).
Once you have chosen a site and click the download, you will will see Figure 2.3,
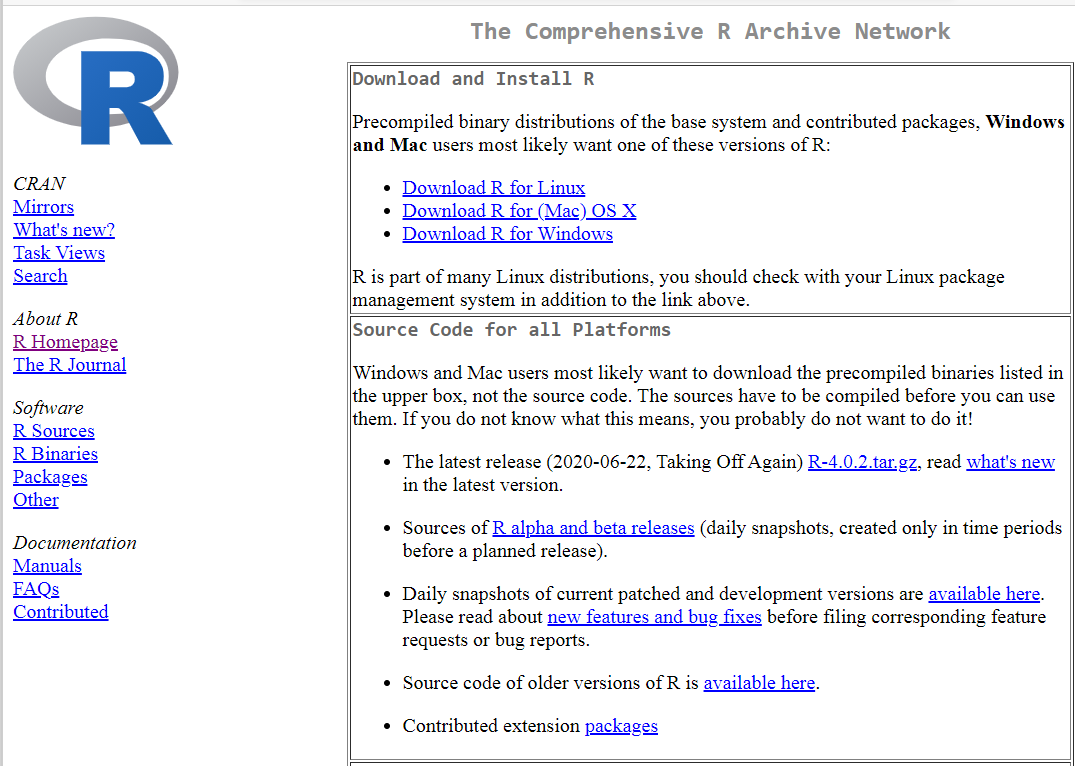
Figure 2.3: Screen capture of R dowanload papge from CRAN
Pick up your platform and download the latest version (4.0.2), follow instruction to install it (assume you choose Windows). In Windows, double click downloaded executable file, you will see this (as shown in Figure 2.4),
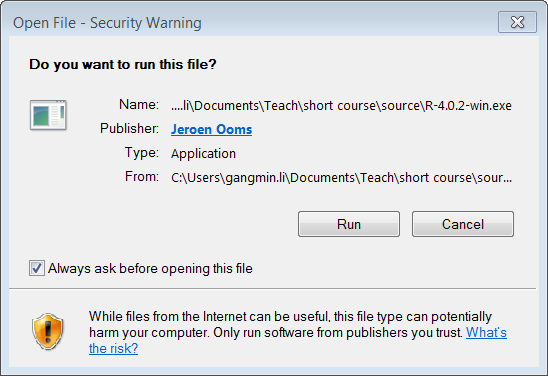
Figure 2.4: Screen capture of R install in Windows
Click ‘Run’, and answer the security message with ‘Yes’. Choose your language (English),
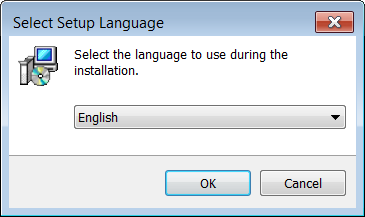
Figure 2.5: Screen capture of R install in Windows
Click ‘Ok’. And follow the instructions on screen by click ‘Next’, until the whole process is complete, click ‘Finish’. You now have a version (choose 64bit) R installed. The installation program will create the directory “C:\Program Files\R\<your version>”, according to the version of R that you have installed.
The actual R program will be “C:\Program Files\R\`\bin\\Rgui.exe". A windows "shortcut`” should have been created on the desktop and/or in the start menu. You can launch it any time you want by click on it.
RStudio Download and Installation
To download RStudio, to go Rstudio products Web page (https://rstudio.com/products/rstudio/). Choose “RStudio Desktop” between “RStudio Serve” and “RStudio Desktop”. See, Figure 2.6,
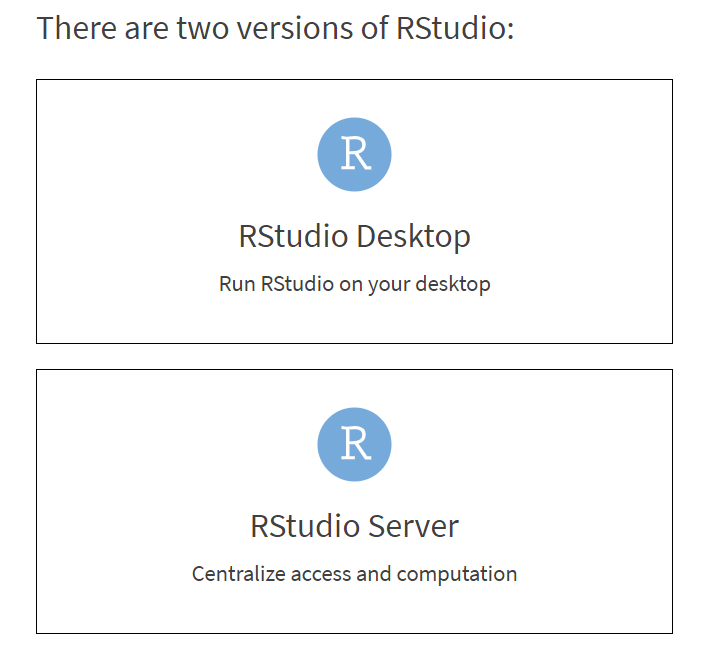
Figure 2.6: Screen capture of RStudio selection
After choosing the desktop version it will take you to a page (http://www.RStudio.org/download/desktop). Where several possible downloads are displayed, different one for each operating systems. However, the webpage was designed that it can automatically recommends the download that is most appropriate for your computer. Click on the appropriate link, and the RStudio installer file will start downloading.
Once it is finished downloading, open the installer file and answer all on screen questions or click “next” in the usual way to install RStudio.
After it is finished installing, you can launch RStudio from windows "start" button.
As we explained in the previous section, Rstudio is a comprehensive and integrated development environment. It can be overwhelming for people who contact it in the first time. Next section we will introduce its interface in great details.
Familiar with RStudio interface
Open RStudio and you will see a rather sophisticated interface. Apart from the usual top level manual like “File Edit ...”, there are four panes. I labelled 1 to 4 on the Figure 2.7), these panels are called pane in RStudio.
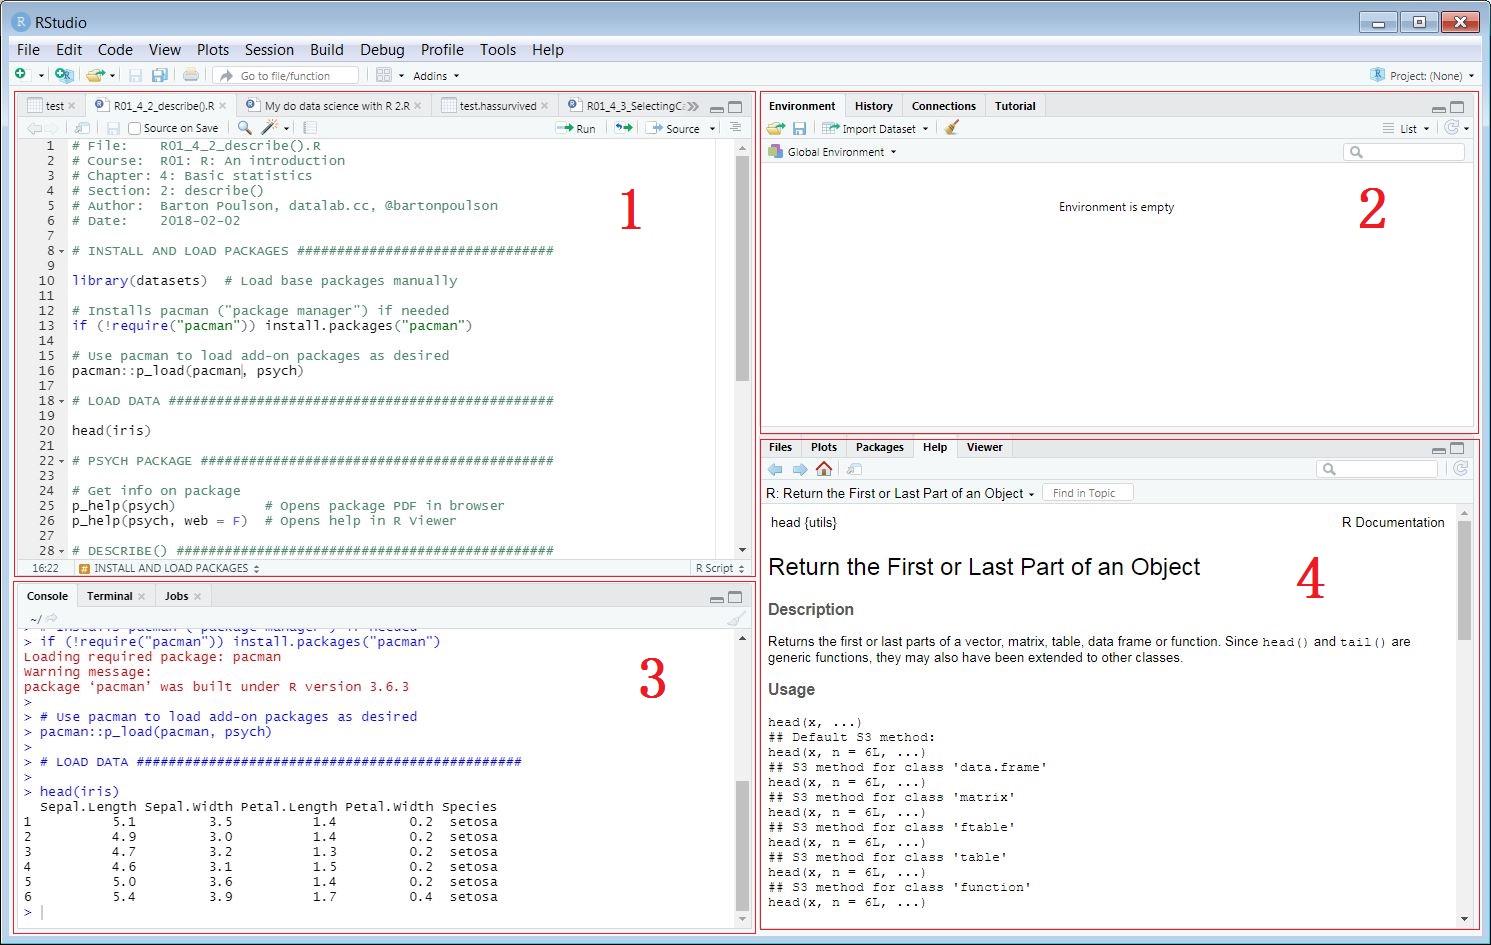
Figure 2.7: RStudio interface
RStudio does allow you to move panes around in the options menu, and also select tabs you want. Before you can missing around and lost yourself on the way. Let us stick on this default layout ion the moment. It is what you see when you first lunch it, so we’ll act as though it’s standard.
Pane 1: Script Pane - View Files and Data
Script pane appears by default in the top left of the RStudio interface. it is where you enter your script and code, you can edit and debug your code or your script.
This pane also display files When you click on a data file in the Workspace pane (top right, number 2 on the above image), or open a file from the Files pane (right bottom, number 3 on the above image), the results will appear in Pane 1. Each file opens in its own tab, and you can navigate between tabs by clicking on them (or using keyboard shortcuts).
Pane 2: WorkSpace Pane - Environment and History
Workspace pane appears by default in the top right of the RStudio interface. It has four tabs by default: Environment, History, Connection and Tutorial. among these 4, the Environment is the default and it is selected. It shows a list of all the objects you have loaded into your workspace. For example, all datasets you have loaded will appear here, along with any other objects you have created (special text formats, vectors, etc.). see this image (Figure 2.8):
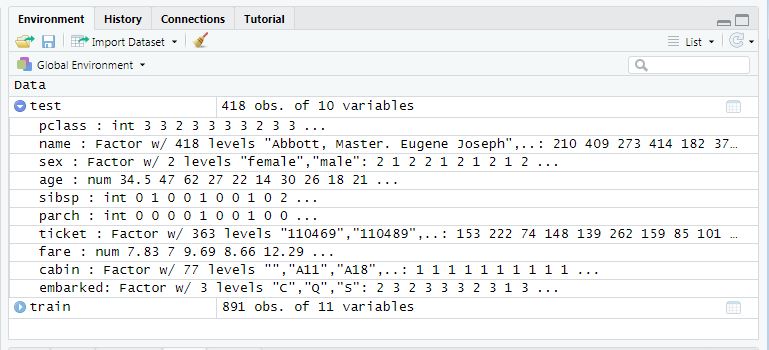
Figure 2.8: RStudio Environemnt Tab in WorkSpace Pane
If you click on the History tab, you will see the complete history of code you have typed, over all sessions, as in this image (Figure 2.9):
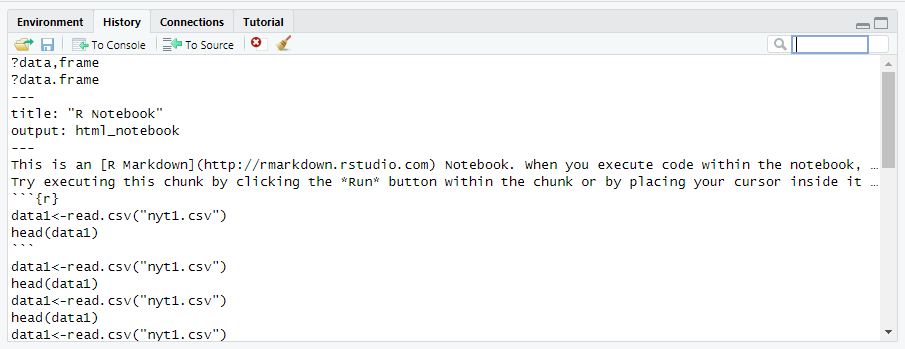
Figure 2.9: RStudio Histroy Tab in WorkSpace pane
The history is searchable, so you can use the search box at the upper right of the pane to search through your code history. If you find a line of code you want to re-run, just select it and click the “To Console” button as shown below (2.10):
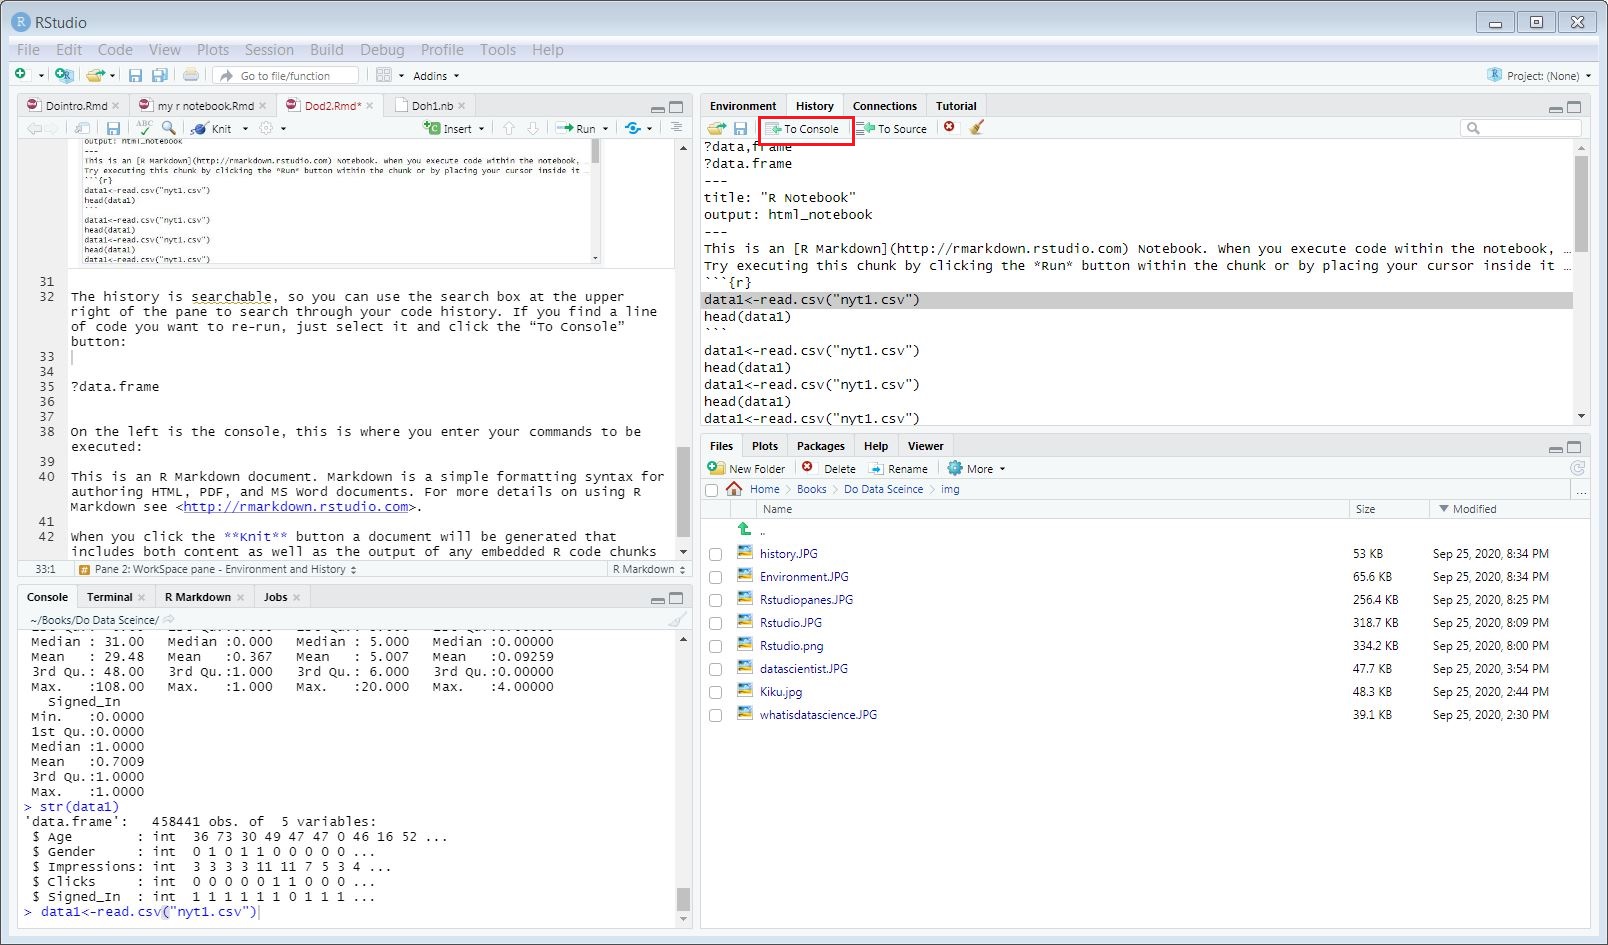
Figure 2.10: RStudio “To Console” button under History Tab in WorkSpace Pane
You can also select any number of lines of scripts (by click with holding shift key) and click the “To Source” button, they will inset into source, See Figure 2.11,
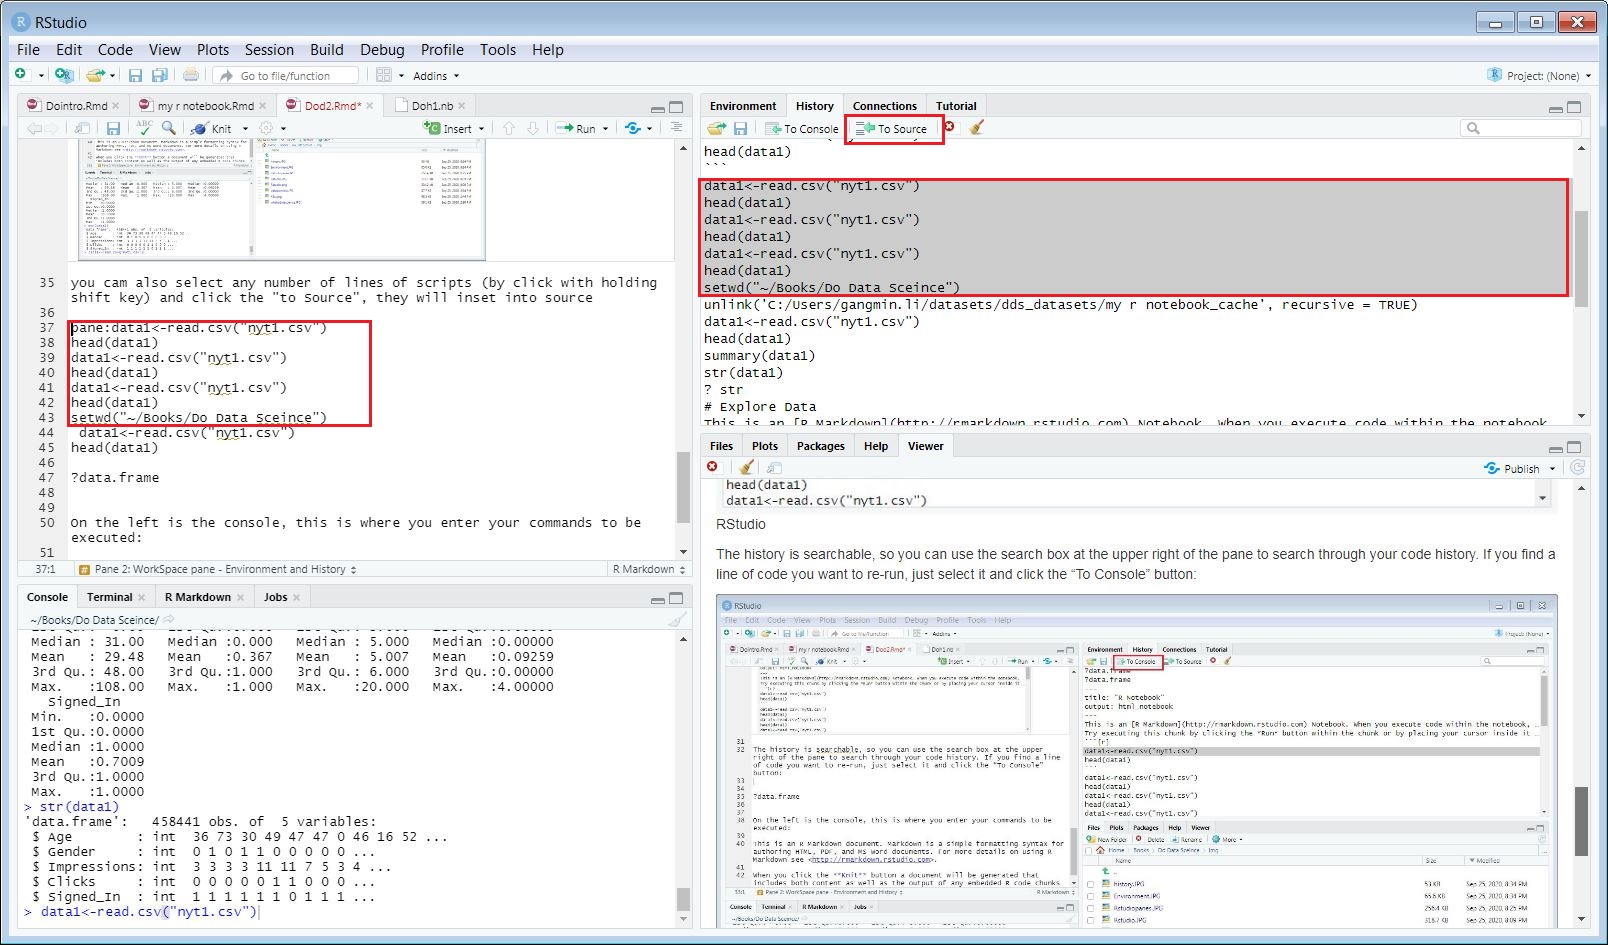
Figure 2.11: RStudio “To Source” button under History Tab in WorkSpace Pane
Pane 3: Console Pane
By default console pane appears at the bottom left. Console pane is the most important pane – the Console! This is where you enter your commands to be executed or your R code to do everything in the curriculum. The rest of the document will be largely concerned with working in the Console, with occasional references to other panes.
By default it also has 4 tabs: Console, Terminal, R markdown and Jobs. Apart from console, Other three, as their name suggested, they are the interface between you and other systems. Terminal is the interface between you and operating system, where you can have a direct interaction with OS, in our case it is the Windows. R markdown1 is interface between you and the markdown compiler, if authoring a markdown file, every time you compile (knitr2) the code, system will report status in that window. Jobs is th interface between you and your job execution system. it is generally running on a remote server.
Basically Console pane is the communication interface between you and systems. The information appears here are generally important if any problem occurs.
Pane 4: Multifunction Pane
The multifunction pane appears by default at the bottom right. It has many tabs. By default it opens the Files tab. My version it has File, Plots, Package, Help and Viewer tabs.
Files tab
This tab works like your file explorer. It shows you all the files you have in your RStudio account (your document in windows). The buttons underneath the tab allow you to do operations on the files like create a new folder, delete files. rename files and many more functions. which you normally do on file system.
Plots
When you run code in the Console pane that creates a plot, the plots tab will be automatically selected and the result of the plot generated will be displayed. See Figure 2.12)
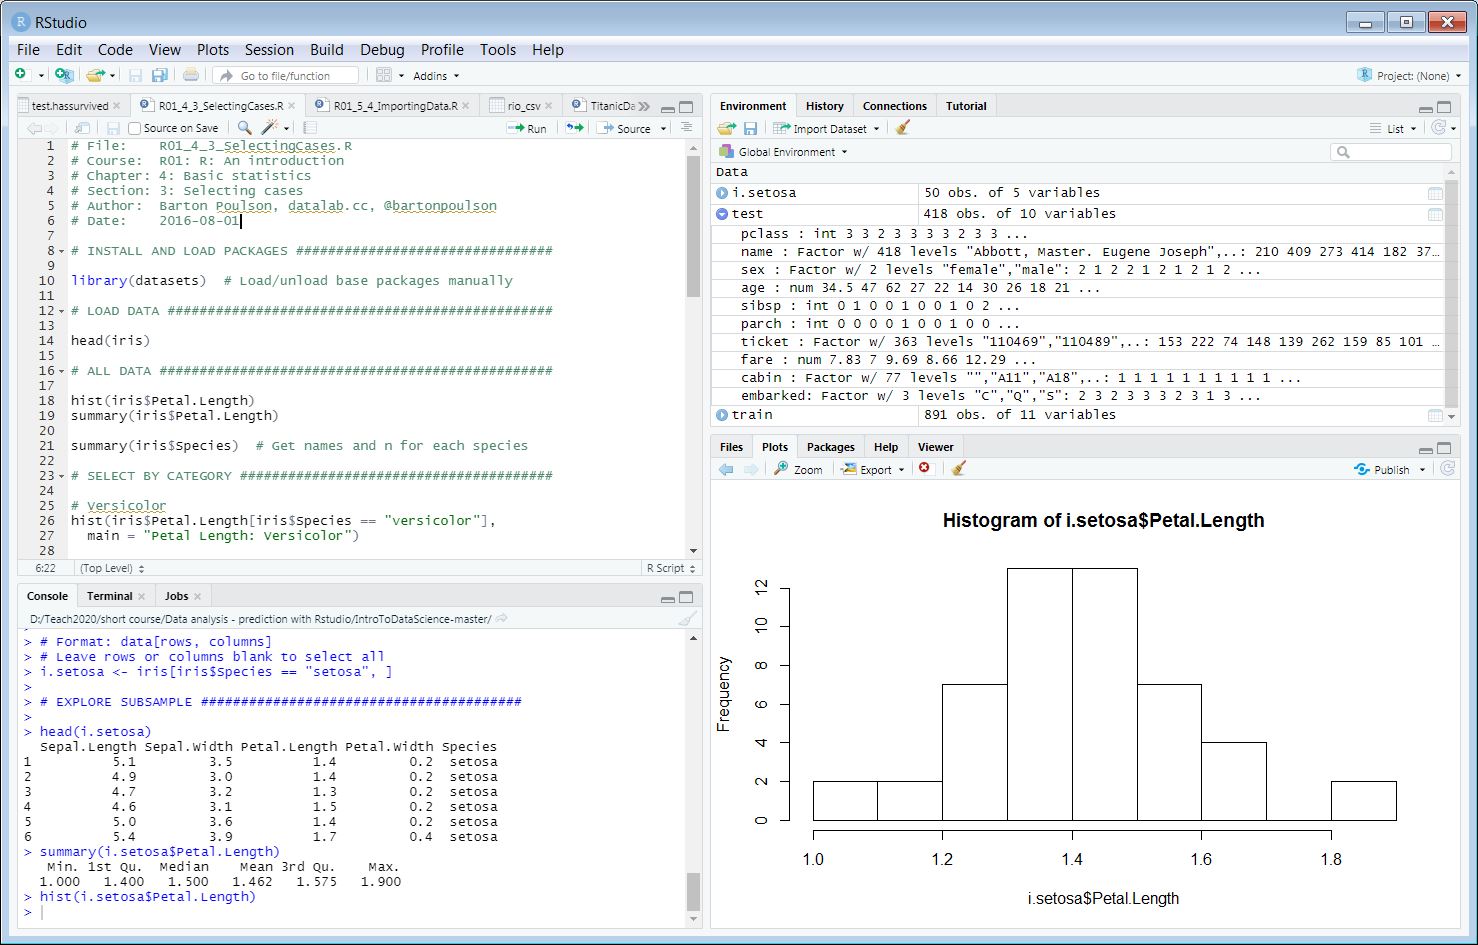
Figure 2.12: RStudio Plot Tab under History Tab in Multifunction Pane
Any time you want to view plots, you can select this tab manually, but it will be selected when you run plot code. Notice the arrow buttons at the top left of the pane; these allow you to scroll through all the plots you have created in a session.
Packages
This tab allows you to see the list of all the packages (add-ons to the R code) you have access to, and which are loaded in already. You can also check packages in your system (installed) and the version of them.
Help
This tab will be automatically selected whenever you run help code in the Console, by type in console ? function or type in script help(function). It is very useful for beginner to get quick reference on any function or command you are not sure of. here is an example of asking help with plot function:
help(plot)You can access it at any time by clicking on the tab “Help” to see what the “Help” tab can offer. See Figure 2.13,
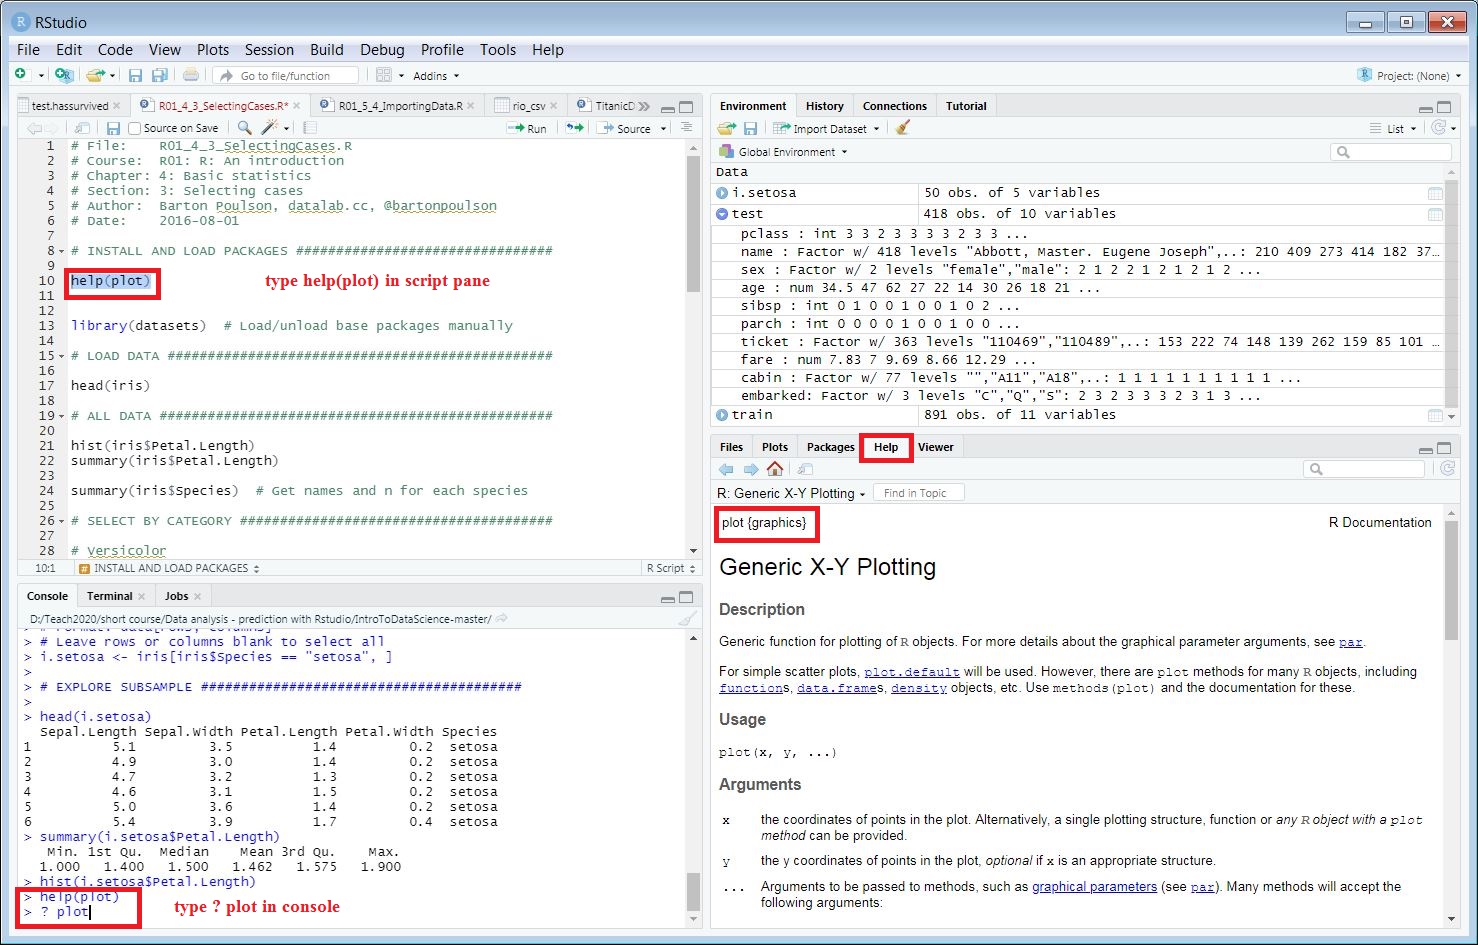
Figure 2.13: RStudio Help Tab under in Multifunction Pane
If you want to use the “Help” without using the help command, you can also use the search bar at the upper right of the tab to search within the R documentation.
Viewer
The Viewer tab in the multifunction pane is designed for view or display R markdown results. If you are authoring a R notebook3 or any Markdown file, your Knit results can be viewed by select “Preview in Viewer Pane”. Once this selection is made, you will see the notebook or your Markdown document will be displayed in the Viewer window and you will notice that the Viewer tab is automatically selected and the viewer window is also maximized. See Figure 2.14
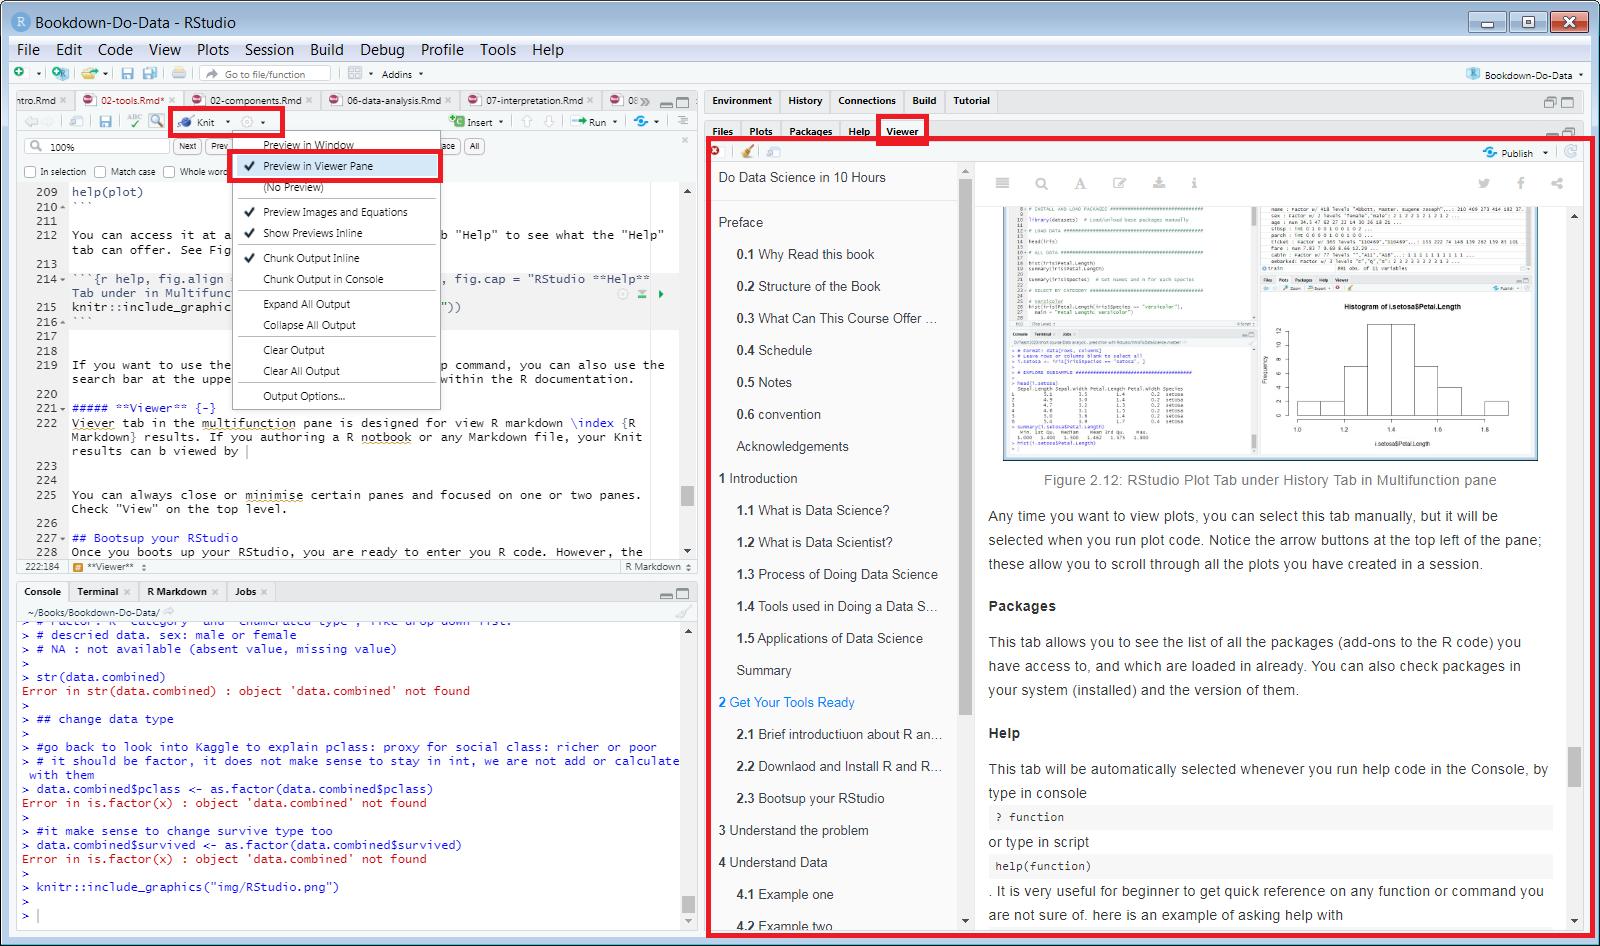
Figure 2.14: RStudio Viewer Tab under in Multifunction Pane
RStudio allows a user to close or minimize certain panes or windows and focused on one or two panes. It also allows users to customize tabs in each pane. Check top level menu “View” for details. Figure 2.15 illustrate the function.
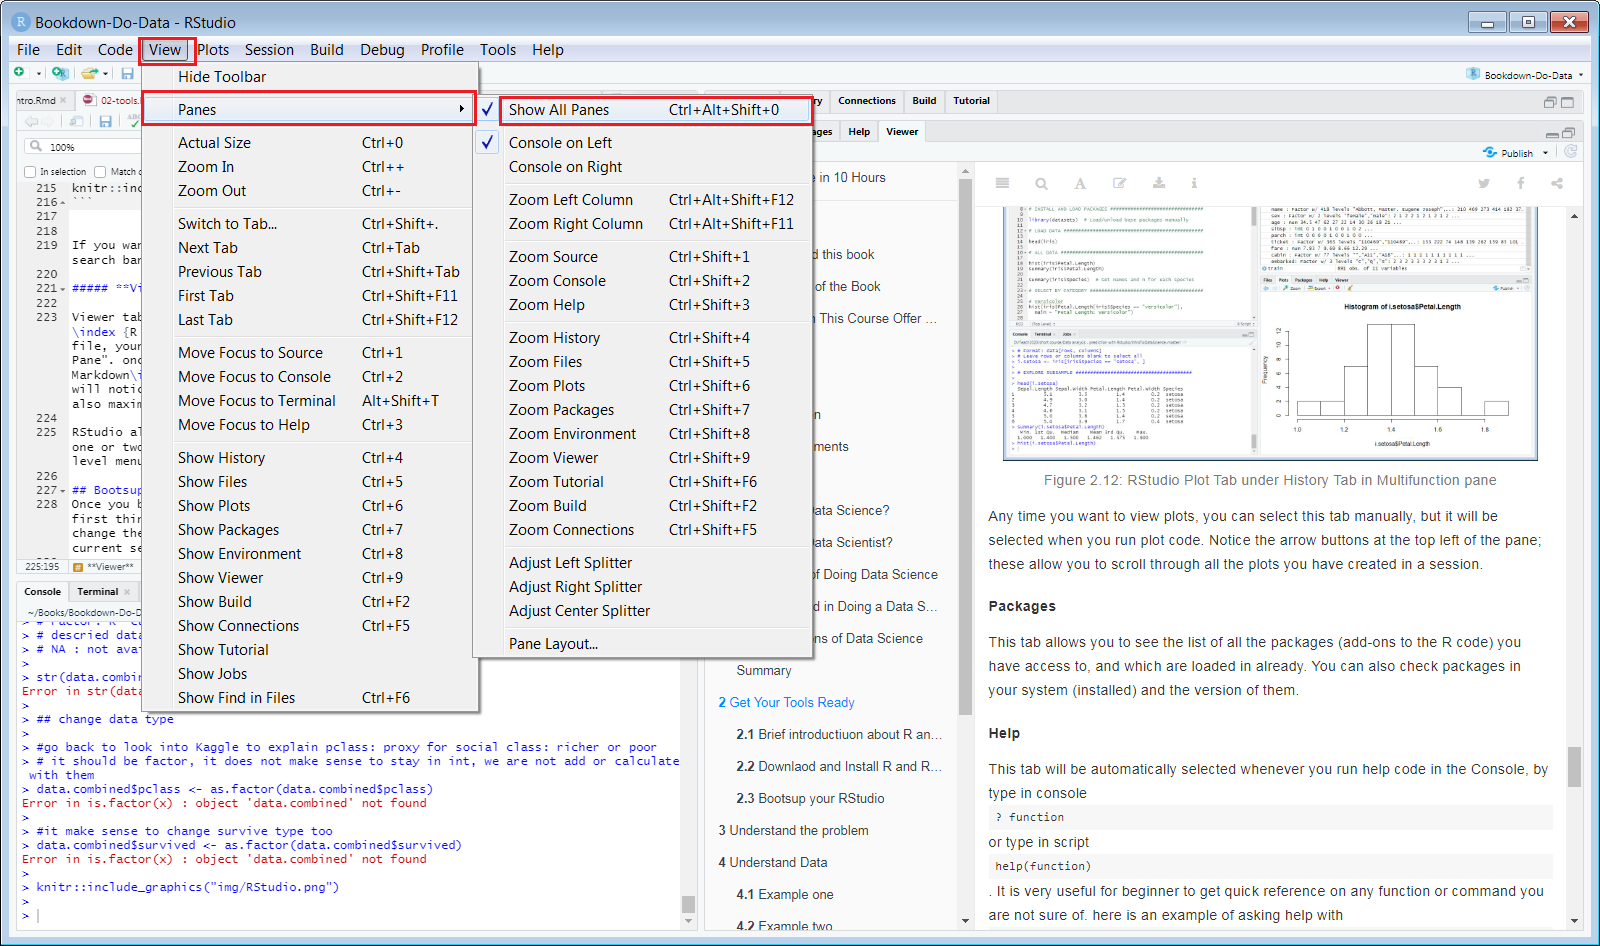
Figure 2.15: RStudio Pane change under the top level memu View
RStudio provides large number of help functions, which can be explored under Help top level menu. One help is the keyBoard shortcuts help. I find it is very useful. Figure 2.16 shows the shortcuts.
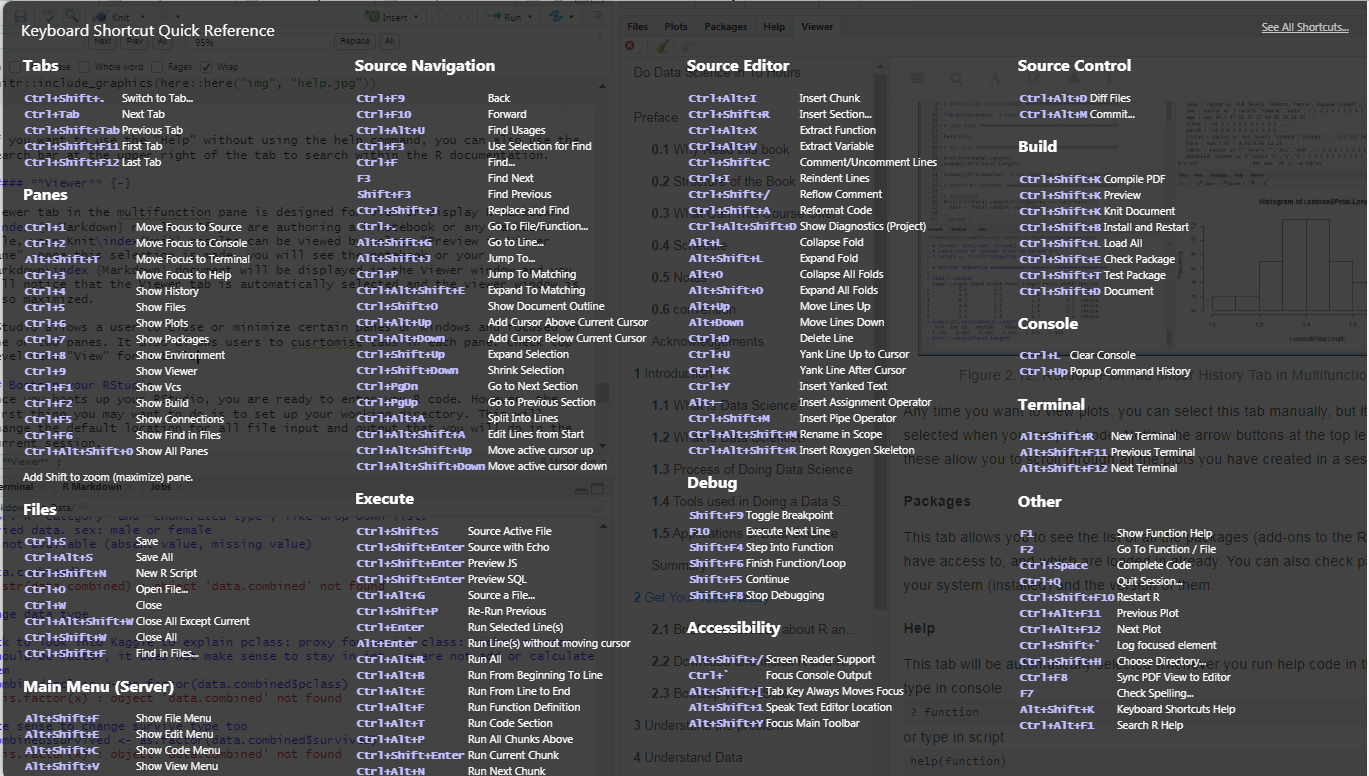
Figure 2.16: RStudio KeyBoard Shortcuts
RStudio is a complicated, comprehensive IED for R, R Markdown, R Notebook and many other R language developments and other languages like Java, Python developments too. Its powerful functions can only be revealed and made useful after you have used it for a while. The more use it, the more likely you will find it is so easy to use. I will leave this for you to explore.
R Markdown is an authoring framework for data science. Using a single R Markdown file, data Scientists can save, execute R code and generate high quality reports that can be shared with other people.↩︎
knitr is an engine for dynamic report generation with R. It is a package in the programming language R that enables integration of R code into LaTeX, LyX, HTML, Markdown, AsciiDoc, and reStructuredText documents.↩︎
R Notebooks are an implementation of Literate Programming that allows for direct interaction with R while producing a reproducible document with publication-quality output.↩︎