Week 1 Intro to R
1.1 Getting started with R
A good test developer should not only be well-versed with measurement theory and psychometric methods. Nowadays, programming skills are also essential. Building, analyzing, and evaluating a test often require:
- Data wrangling: in particular, working with response data from tests or surveys;
- Functional programming: creating and calling functions that can perform desired statistical analysis;
- Simulations: generating “fake” data sets that allow you to test a statistical method (before putting it into operation).
We designed the lab sessions so that you can learn these programming skills and get hands-on experience.
1.2 The R Programming Language
We will be using R:
- A statistical programming language that is free and open-source.
- Started from S (by Bell Labs). The idea is to quickly turn ideas into software.
R is now the second most popular programming language for data scientists (FYI — No.1 is Python, but R is easier to get started with and more popular among applied statisticians and behavioral scientists). You can take advantage of:
- Built-in statistical functions (e.g., hypothesis tests, descriptives, plots, probability distributions)
- Sophisticated, specialized add-on “packages” (16,000+)
- Straightforward, easy-to-learn programming language: this allows you to flexibly create tools and functions of your own, if they aren’t already available;
- A large number of tools for data wrangling, analysis, and visualization.
- Create written reports, talks, and webpages embedded with your data analysis outputs using R Markdown (yep - this ebook is made with R Markdown).
1.3 Getting Started
To start, you will need to download and install two things:
- R: Choose the right one for your operating system (e.g., Mac or Windows) and follow the installation steps.
- RStudio: The free version. Likewise, choose the right one for your OS and follow the installation steps.
Essentially, R is the “skeleton” of the software. You can certainly work in it, but it looks like something that predates you:

RStudio provides a user-friendly “interface”, called an IDE - integrated development environment. When you are done installing RStudio, open it, and you’ll see something like the following:
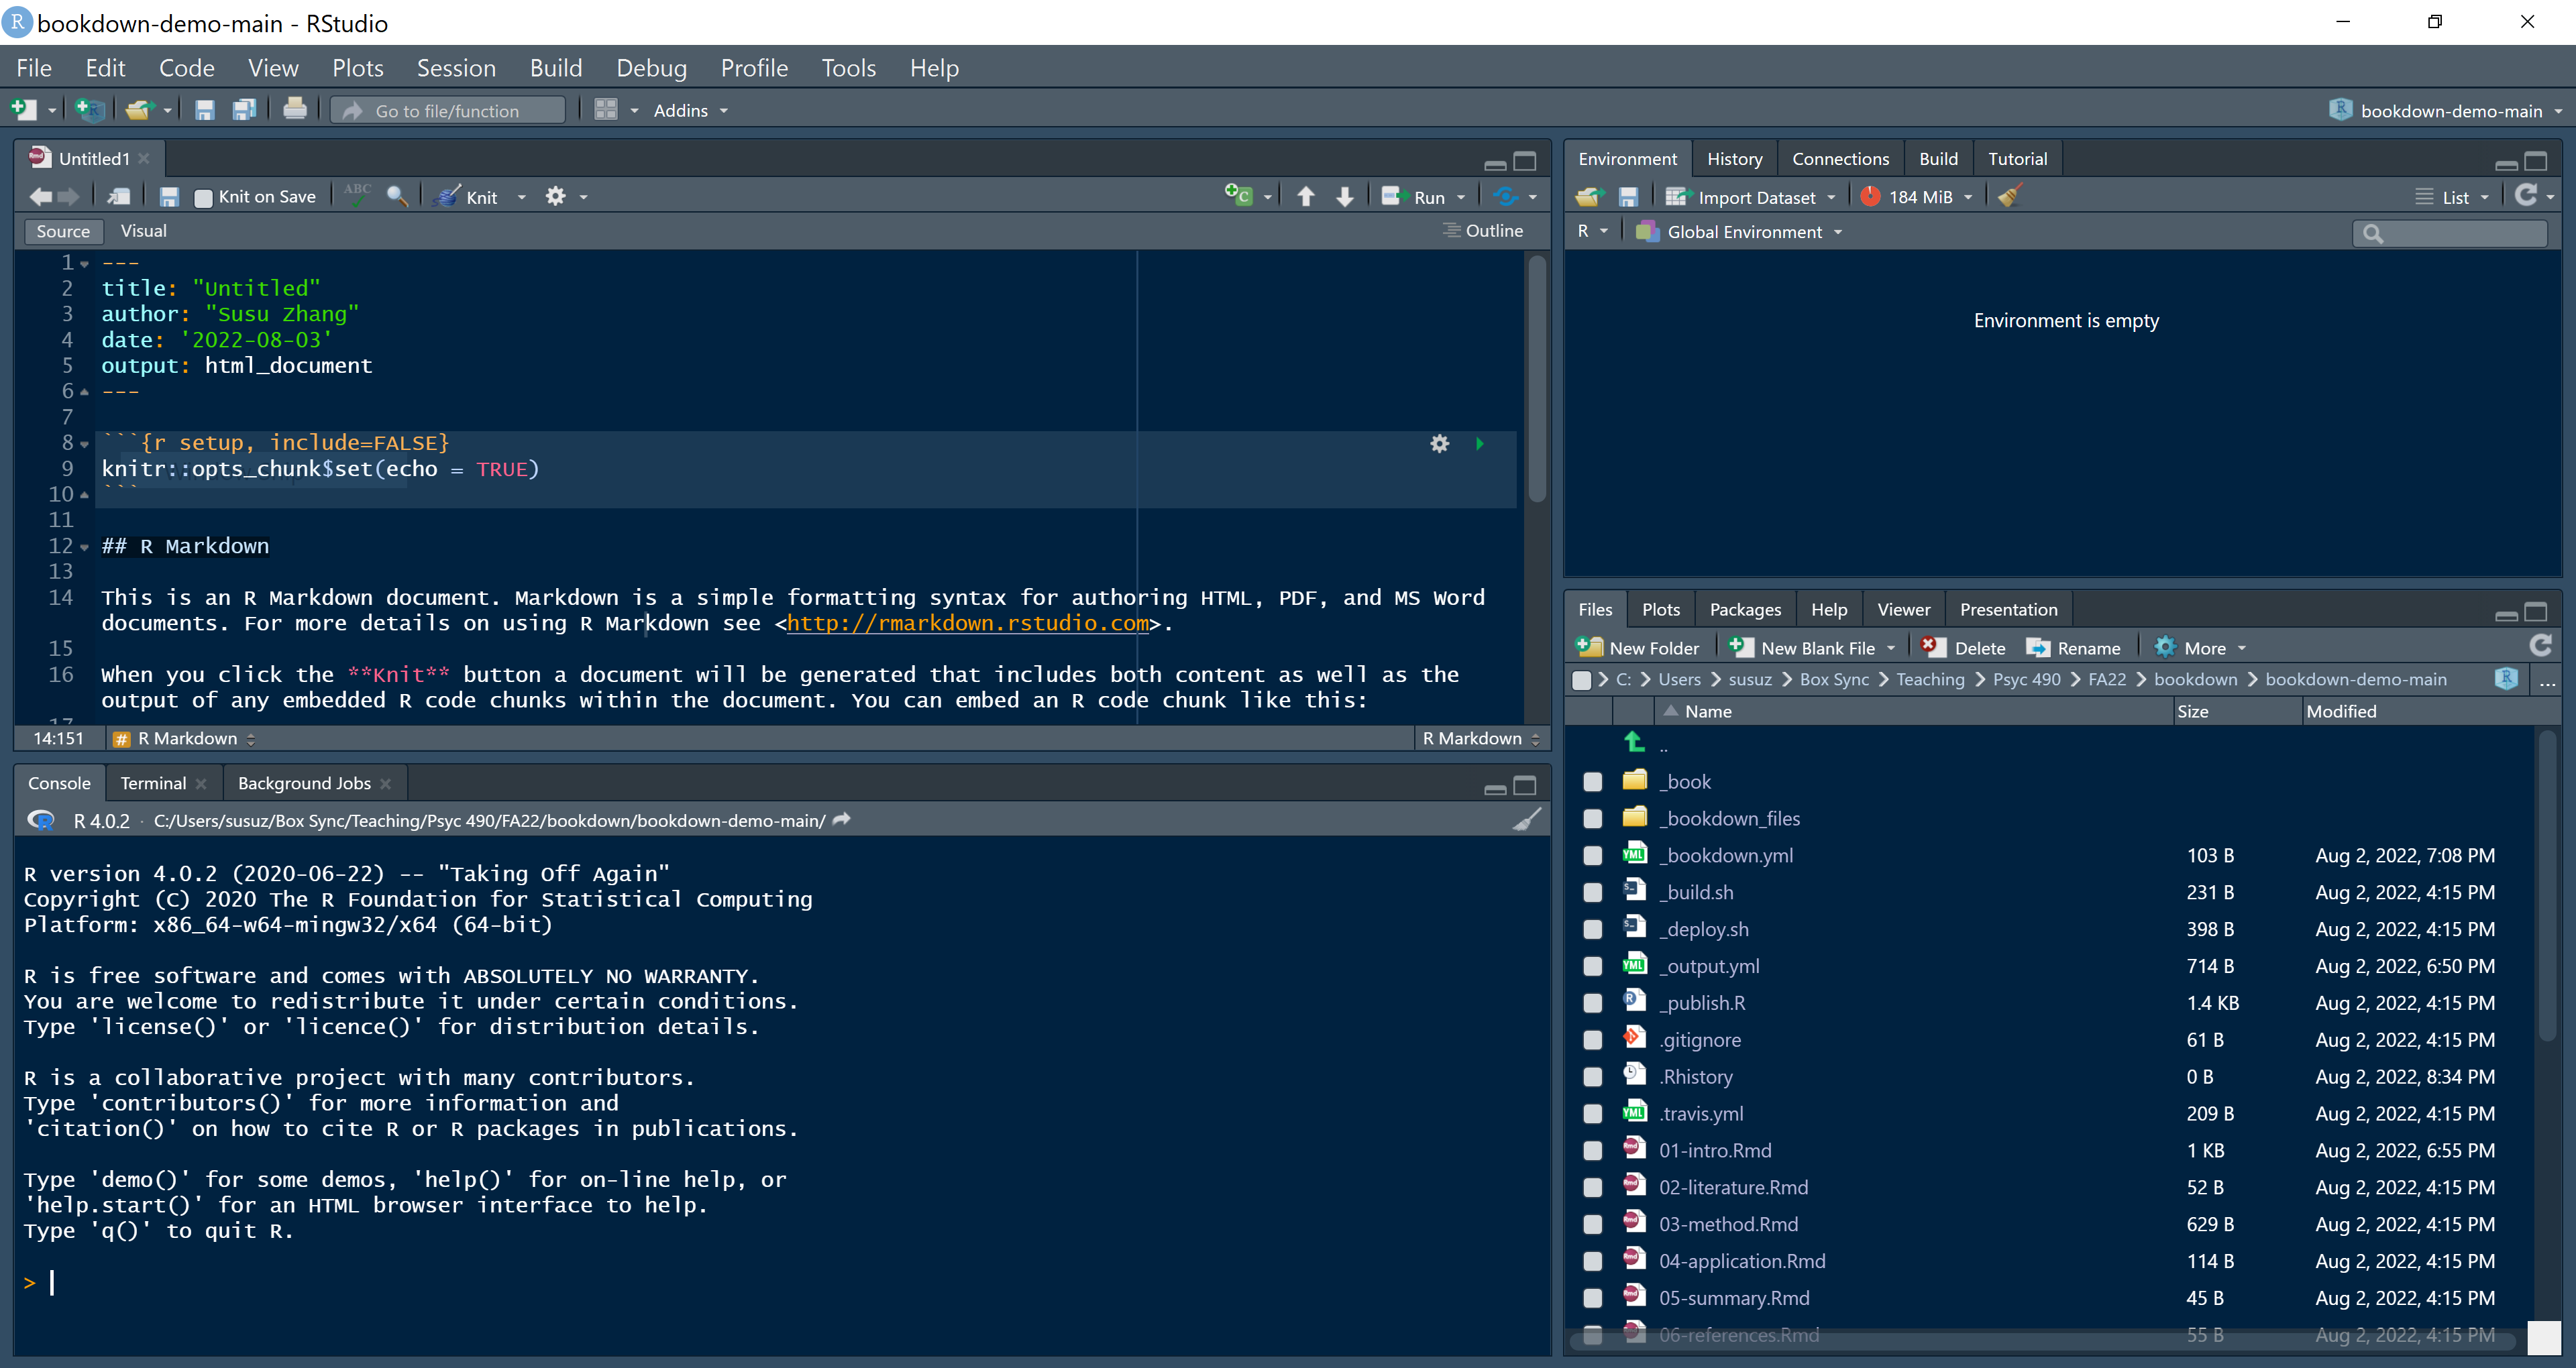
(yours will look slightly different, e.g., having a white-and-blue theme by default and a different list of files and subpanes)
Here, you see 4 panes:
- Source (top left): Also called the editor. You need to open or create a file (see the New File button?) for it to show. Here, you can write and modify a document, such as:
- An R Script (
.R): a plain text file that you save R code in.
- An R Markdown document (
.Rmd): a file for generating reports, websites, and presentations, where you can include text, formula, figures, and embed R code chunks. Code you write in the source pane will not be executed unless you press Run (or equivalent.)
- Console (bottom left): The place where R is waiting for you to tell it what to do (a command) and show you the results. What you run in the source will show in the console. You can also directly run commands in a console. For example, in the console, try typing
3+2and pressEnter. - Environment (top right): It shows you the stored objects of the current session, e.g.:
- a function you wrote in source and ran in console;
- a data set you imported called
cats; - an atomic object (like a scalar, vector, matrix), e.g., try typing
a = 3+2in the console and pressEnter.
- Viewer (bottom right): It allows you to view many things:
- List of Files under a directory;
- Plots, like a histogram of your data generated from the
hist()function; - Packages that are installed on your computer
- Help - documentations of functions in R, e.g., try typing
?histin the console and pressEnter.
1.4 Getting used to RStudio
Before we begin programming in R — you might want to adjust your RStudio interface to your liking:
- Go to View -> Zoom In/Zoom Out to adjust the font size.
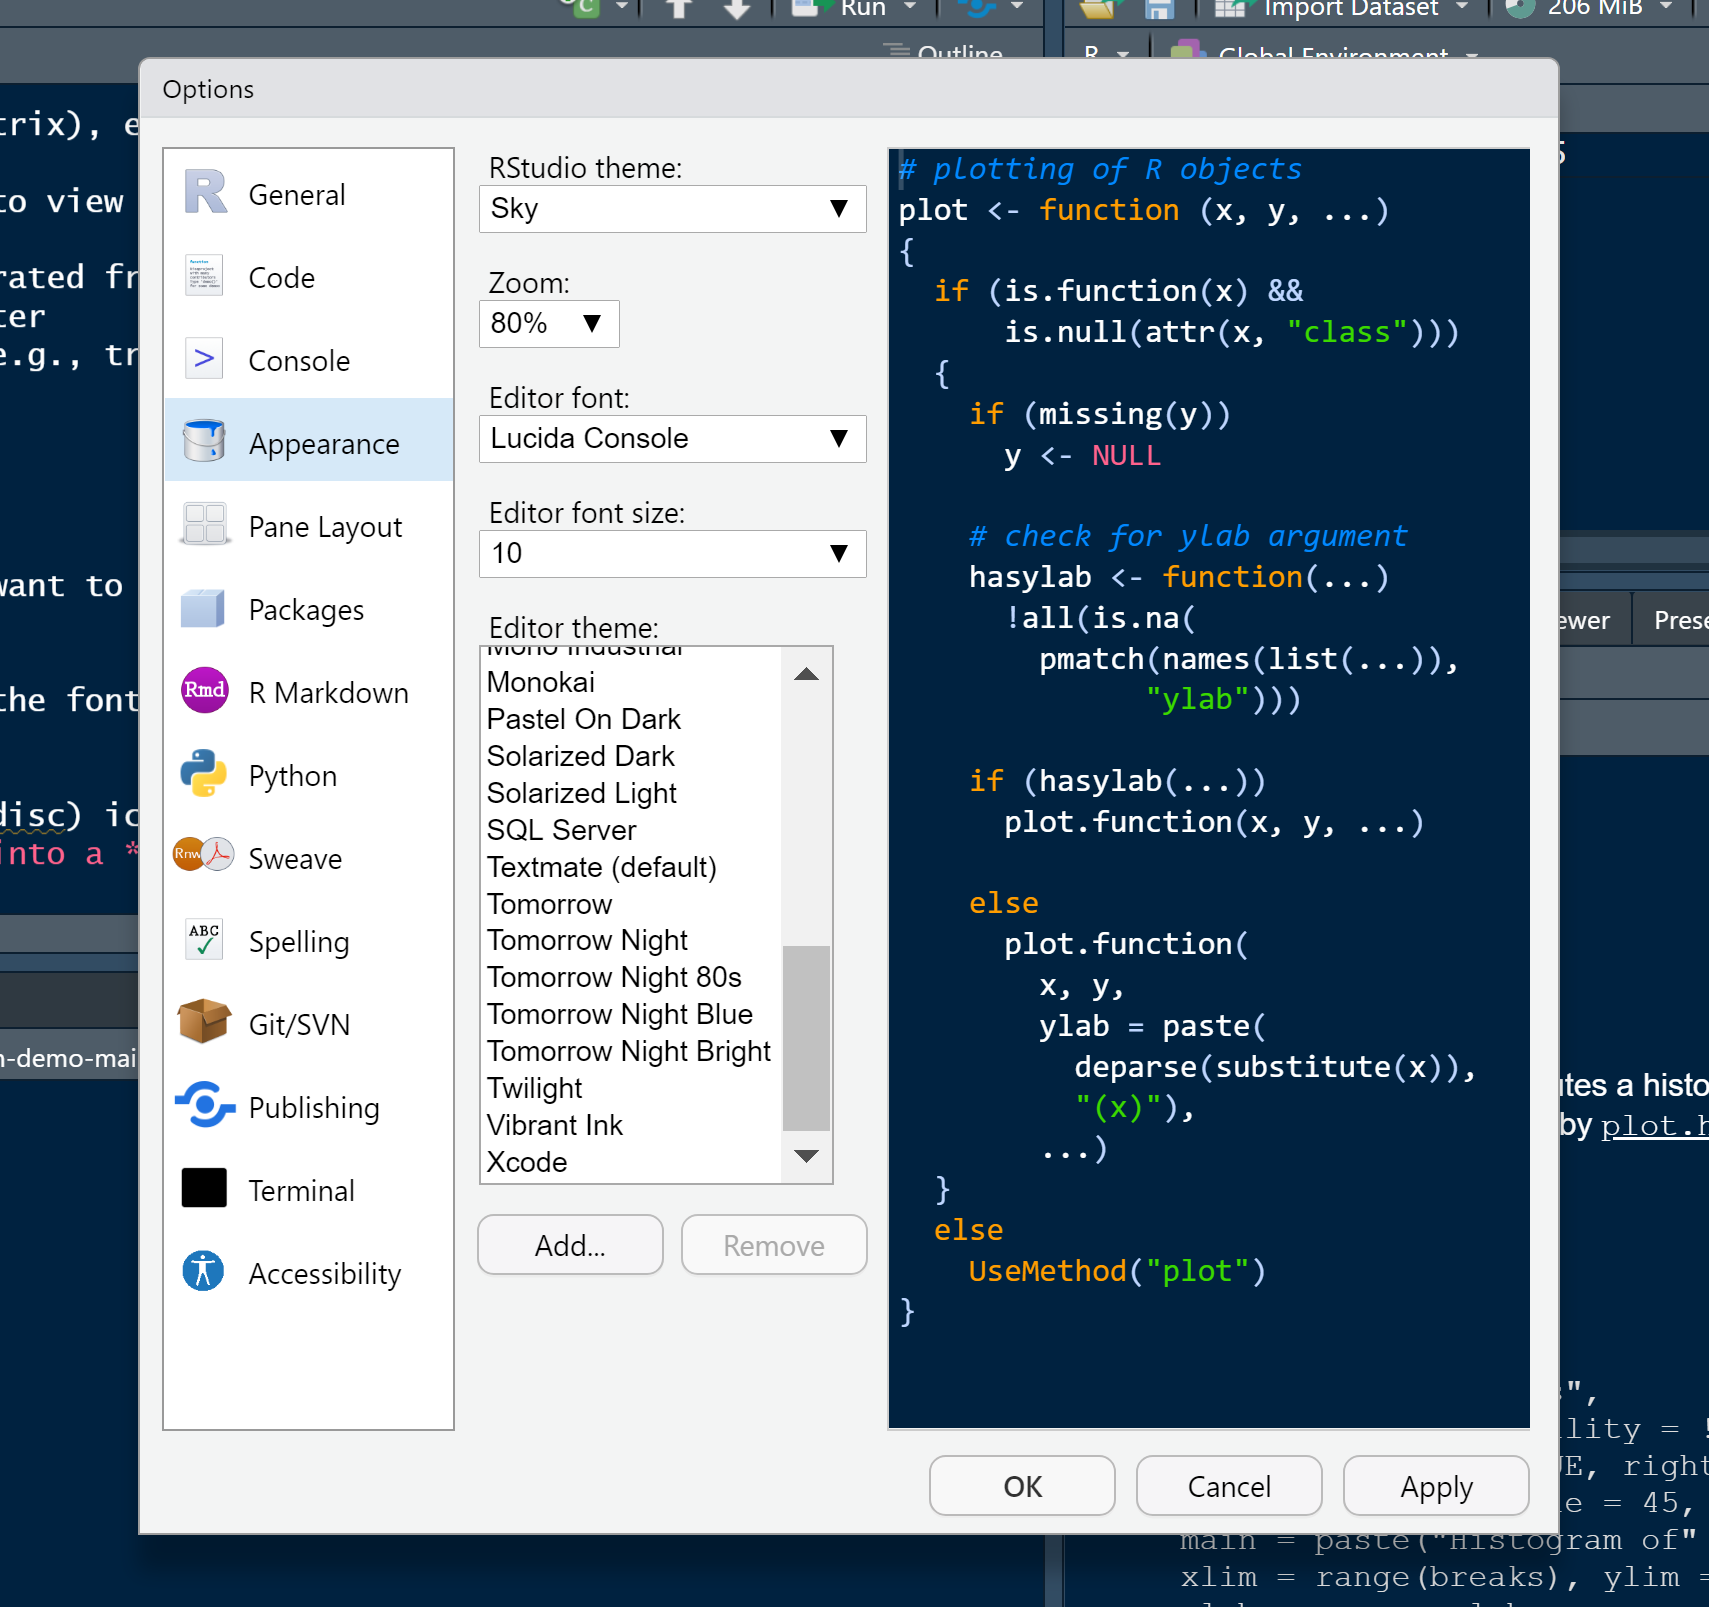
- You can also change the theme by going to Tools -> Global Options:
And like other software, saving/opening a script or an environment (called an image, which will be an .RData file containing everything in the environment) is quite straightforward, just press the save/open icon in the corresponding pane.