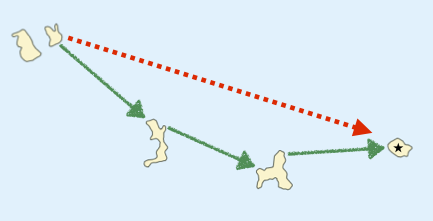
4.5 Navigation tricks
Here’s a few simple principles to make navigation a little easier. They’re handy whenever you’re on the water, but they become invaluable if you’re trying to find your way in fog or at night.
4.5.1 Short legs
Keep each hop between identifiable features short - avoid long sections during which you can’t check your navigation.
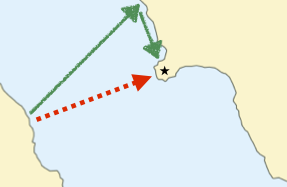
4.5.2 Aiming off
If you take a bearing towards an object (e.g. a place on distant shoreline), it’s very unlikely that you’ll end up exactly where you planned. When you arrive at the shore and don’t immediately find the thing you’re looking for, it’s not clear what to do next - do you turn left or right? To avoid this problem, deliberately aim to one side of the feature - that way you’ll know which way to turn.
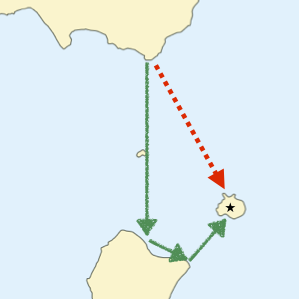
4.5.3 Attack points
Heading a significant distance towards a small feature isn’t likely to be successful. A better plan is to locate an easy to find feature nearby, then head from here towards your smaller feature. If you don’t succeed on the first go, you can return to your large, prominent feature and try again.
Map diagrams based on Holmes, Ian. (2017). Mean High Water Springs Polygon, [Dataset]. University of Edinburgh. https://doi.org/10.7488/ds/1969, public sector information licensed under the Open Government Licence v3.0