Chapter 7 Reading and data inspection
7.1 Reading data into R
7.1.1 The basics
There are several function in base R that exist to read data in, and the function in R you use will depend on the file format being read in. Below we have a table with the base R functions that can be used for importing some common text data types (plain text).
| Data type | Extension | Function |
|---|---|---|
| Comma separated values | csv | read.csv() |
| Tab separated values | tsv | read.delim |
| Other delimited formats | txt | read.table() |
For example, if we have text file where the columns are separated by commas (comma-delimited), you could use the function read.csv. However, if the data are separated by a different delimiter in a text file (e.g. “:”, “;”, ” “), you could use the generic read.table function and specify the delimiter (sep = " ") as an argument in the function.
7.1.2 Metadata
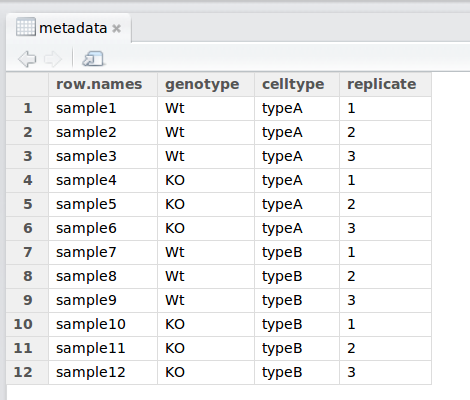
When working with large datasets, you will very likely be working with a “metadata” file which contains the information about each sample in your dataset.

7.1.3 The read.csv() function
Let’s bring in the metadata file in our data folder (mouse_exp_design.csv) using the read.csv function.
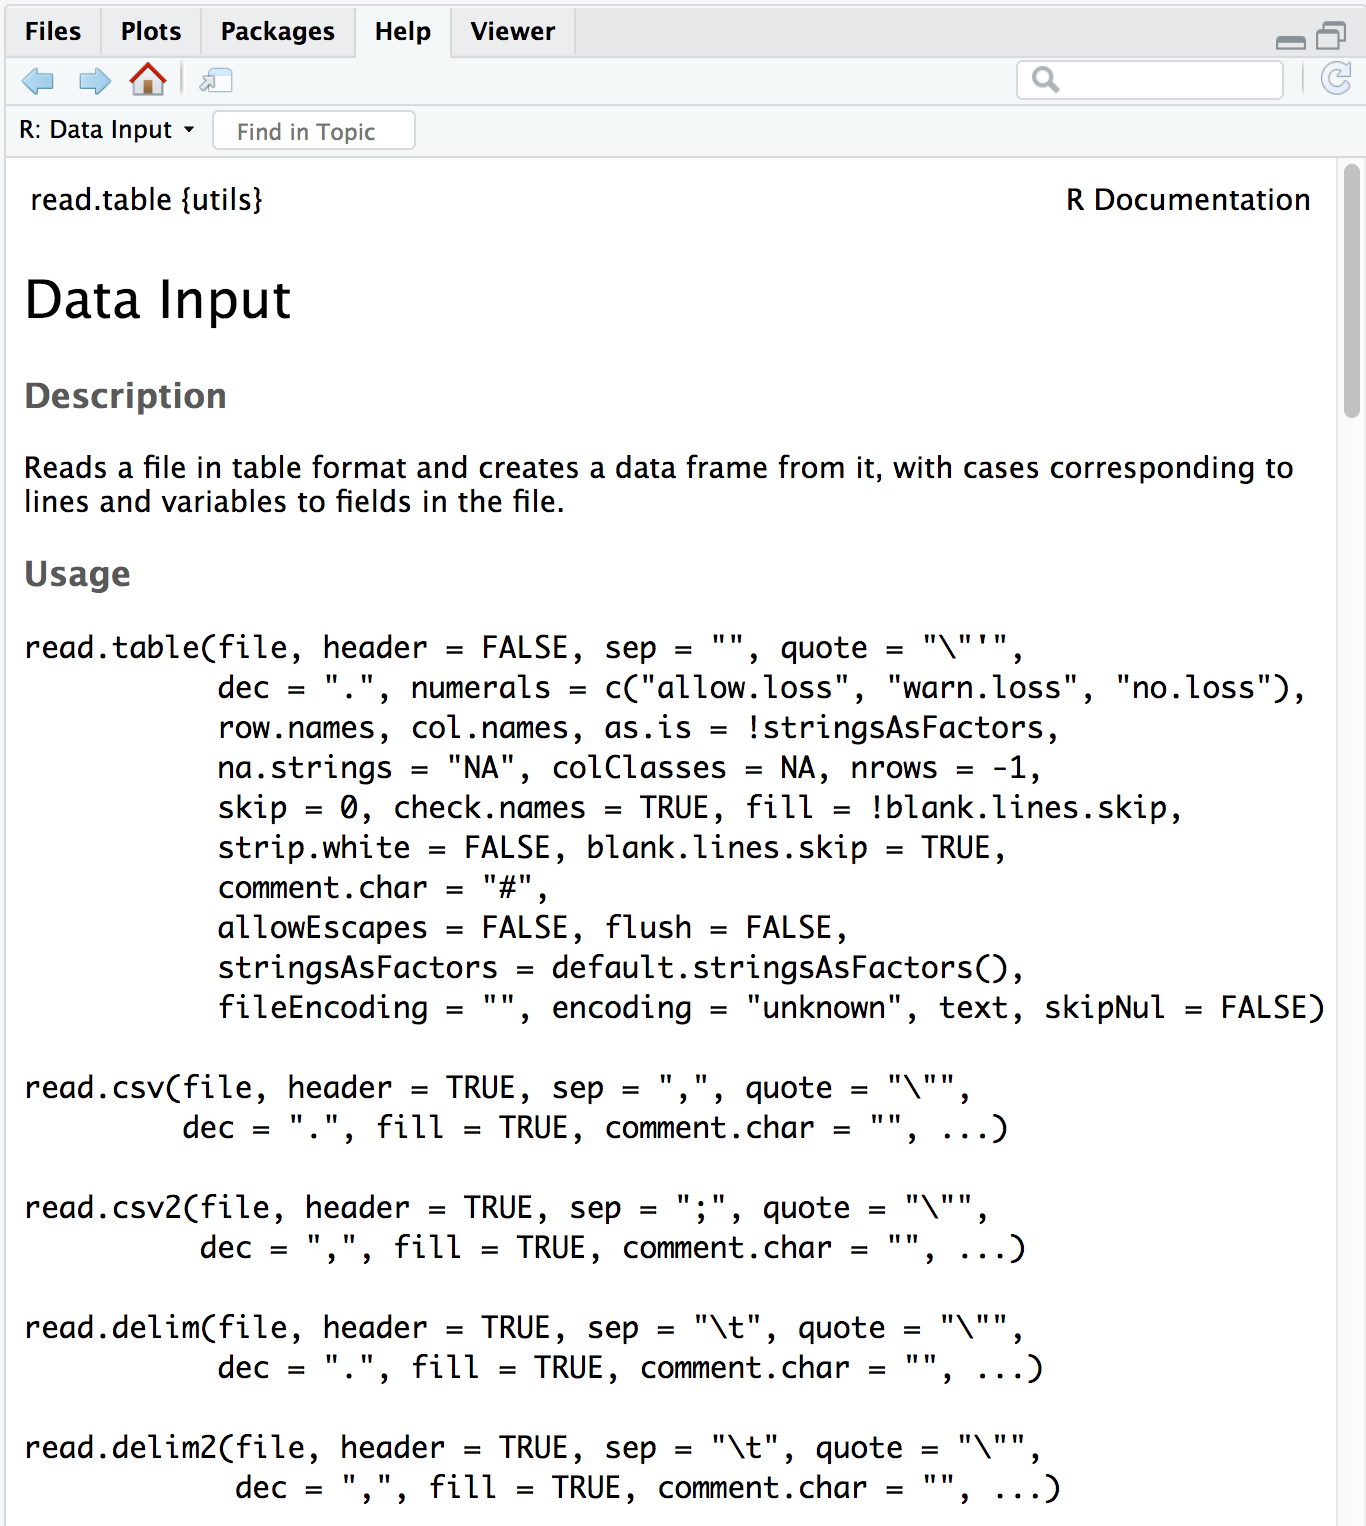
First, check the arguments for the function using the ? to ensure that you are entering all the information appropriately:

The first item on the documentation page is the function Description, which specifies that the output of this set of functions is going to be a data frame.
In usage, all of the arguments listed for read.table() are the default values for all of the family members unless otherwise specified for a given function. Let’s take a look at 3 examples:
- The separator
for
read.table()sep = ""(space or tab)for
read.csv()sep = ","(a comma).
- The
header- This argument refers to the column headers that may (TRUE) or may not (FALSE) exist in the plain text file you are reading in.
for
read.table()header = FALSE(by default, it assumes you do not have column names)for
read.csv()header = TRUE(by default, it assumes that all your columns have names listed).
- The
row.names- This argument refers to the rownames.
for
read.table()row.namesby default assumes that your rownames are not in the first column.for
read.csv()header = TRUE(by default, it assumes that your rownames are in the first column.
Note: this one is tricky because the default isn’t listed as such in the help file.
The take-home from the “Usage” section for read.csv() is that it has one mandatory argument, the path to the file and filename in quotations; in our case that is data/mouse_exp_design.csv
7.1.4 Create a data frame by reading in the file
Let’s read in the mouse_exp_design.csv file and create a new data frame called metadata.
We can see if it has successfully been read in by running:
Exercise 1
- Read “project-summary.txt” in to R using
read.table()with the approriate arguments and store it as the variableproj_summary. To figure out the appropriate arguments to use withread.table(), keep the following in mind:- all the columns in the input text file have column name/headers
- you want the first column of the text file to be used as row names (hint: look up the input for the
row.names =argument inread.table())
- Display the contents of
proj_summaryin your console
7.2 Inspecting data structures
There are a wide selection of base functions in R that are useful for inspecting your data and summarizing it. Below is a non-exhaustive list of these functions:
The list has been divided into functions that work on all types of objects, some that work only on vectors/factors (1 dimensional objects), and others that work on data frames and matrices (2 dimensional objects).
All data structures - content display:
str(): compact display of data contents (similar to what you see in the Global environment)class(): displays the data type for vectors (e.g. character, numeric, etc.) and data structure for dataframes, matricessummary(): detailed display of the contents of a given object, including descriptive statistics, frequencieshead(): prints the first 6 entries (elements for 1-D objects, rows for 2-D objects)tail(): prints the last 6 entries (elements for 1-D objects, rows for 2-D objects)
Vector and factor variables:
length(): returns the number of elements in a vector or factor
Dataframe and matrix variables:
dim(): returns dimensions of the dataset (number_of_rows, number_of_columns) [Note, row numbers will always be displayed before column numbers in R]nrow(): returns the number of rows in the datasetncol(): returns the number of columns in the datasetrownames(): returns the row names in the datasetcolnames(): returns the column names in the dataset
Let’s use the metadata file that we created to test out data inspection functions.
head(metadata)
str(metadata)
dim(metadata)
nrow(metadata)
ncol(metadata)
class(metadata)
colnames(metadata)
Exercise 2
What is the class of each column in metadata (use one command)?
What is the median of the replicates in metadata (use one command)?
Exercise 3
- Use the
class()function onglengthsandmetadata, how does the output differ between the two? - Use the
summary()function on theproj_summarydataframe, what is the median “rRNA_rate”? - How long is the
samplegroupfactor? - What are the dimensions of the
proj_summarydataframe? - When you use the
rownames()function onmetadata, what is the data structure of the output? - [Optional] How many elements in (how long is) the output of
colnames(proj_summary)? Don’t count, but use another function to determine this.