Chapter 7 Time Series
The following outline of steps should get any user a single time series of multiple-channel images. These steps can be used in combination with the steps in Multiple Image Acquisition to produce many time series acquisitions from in a single experiment.
7.1 Optimize Your Acquisition Scheme
Refer to the instructions in Single Image Acquisition to do this.
7.2 Check the Time Series Option
Check the following box in the experimental options:

For a single time-series, you would not want to have tiles or z-stack checked. However, you can combine these functions, if you so desire.
7.3 Set Your Focus Strategy
Using the same tab as used in Multiple Image Acquisition, set your focus strategy to “None,” as you should already be in focus:
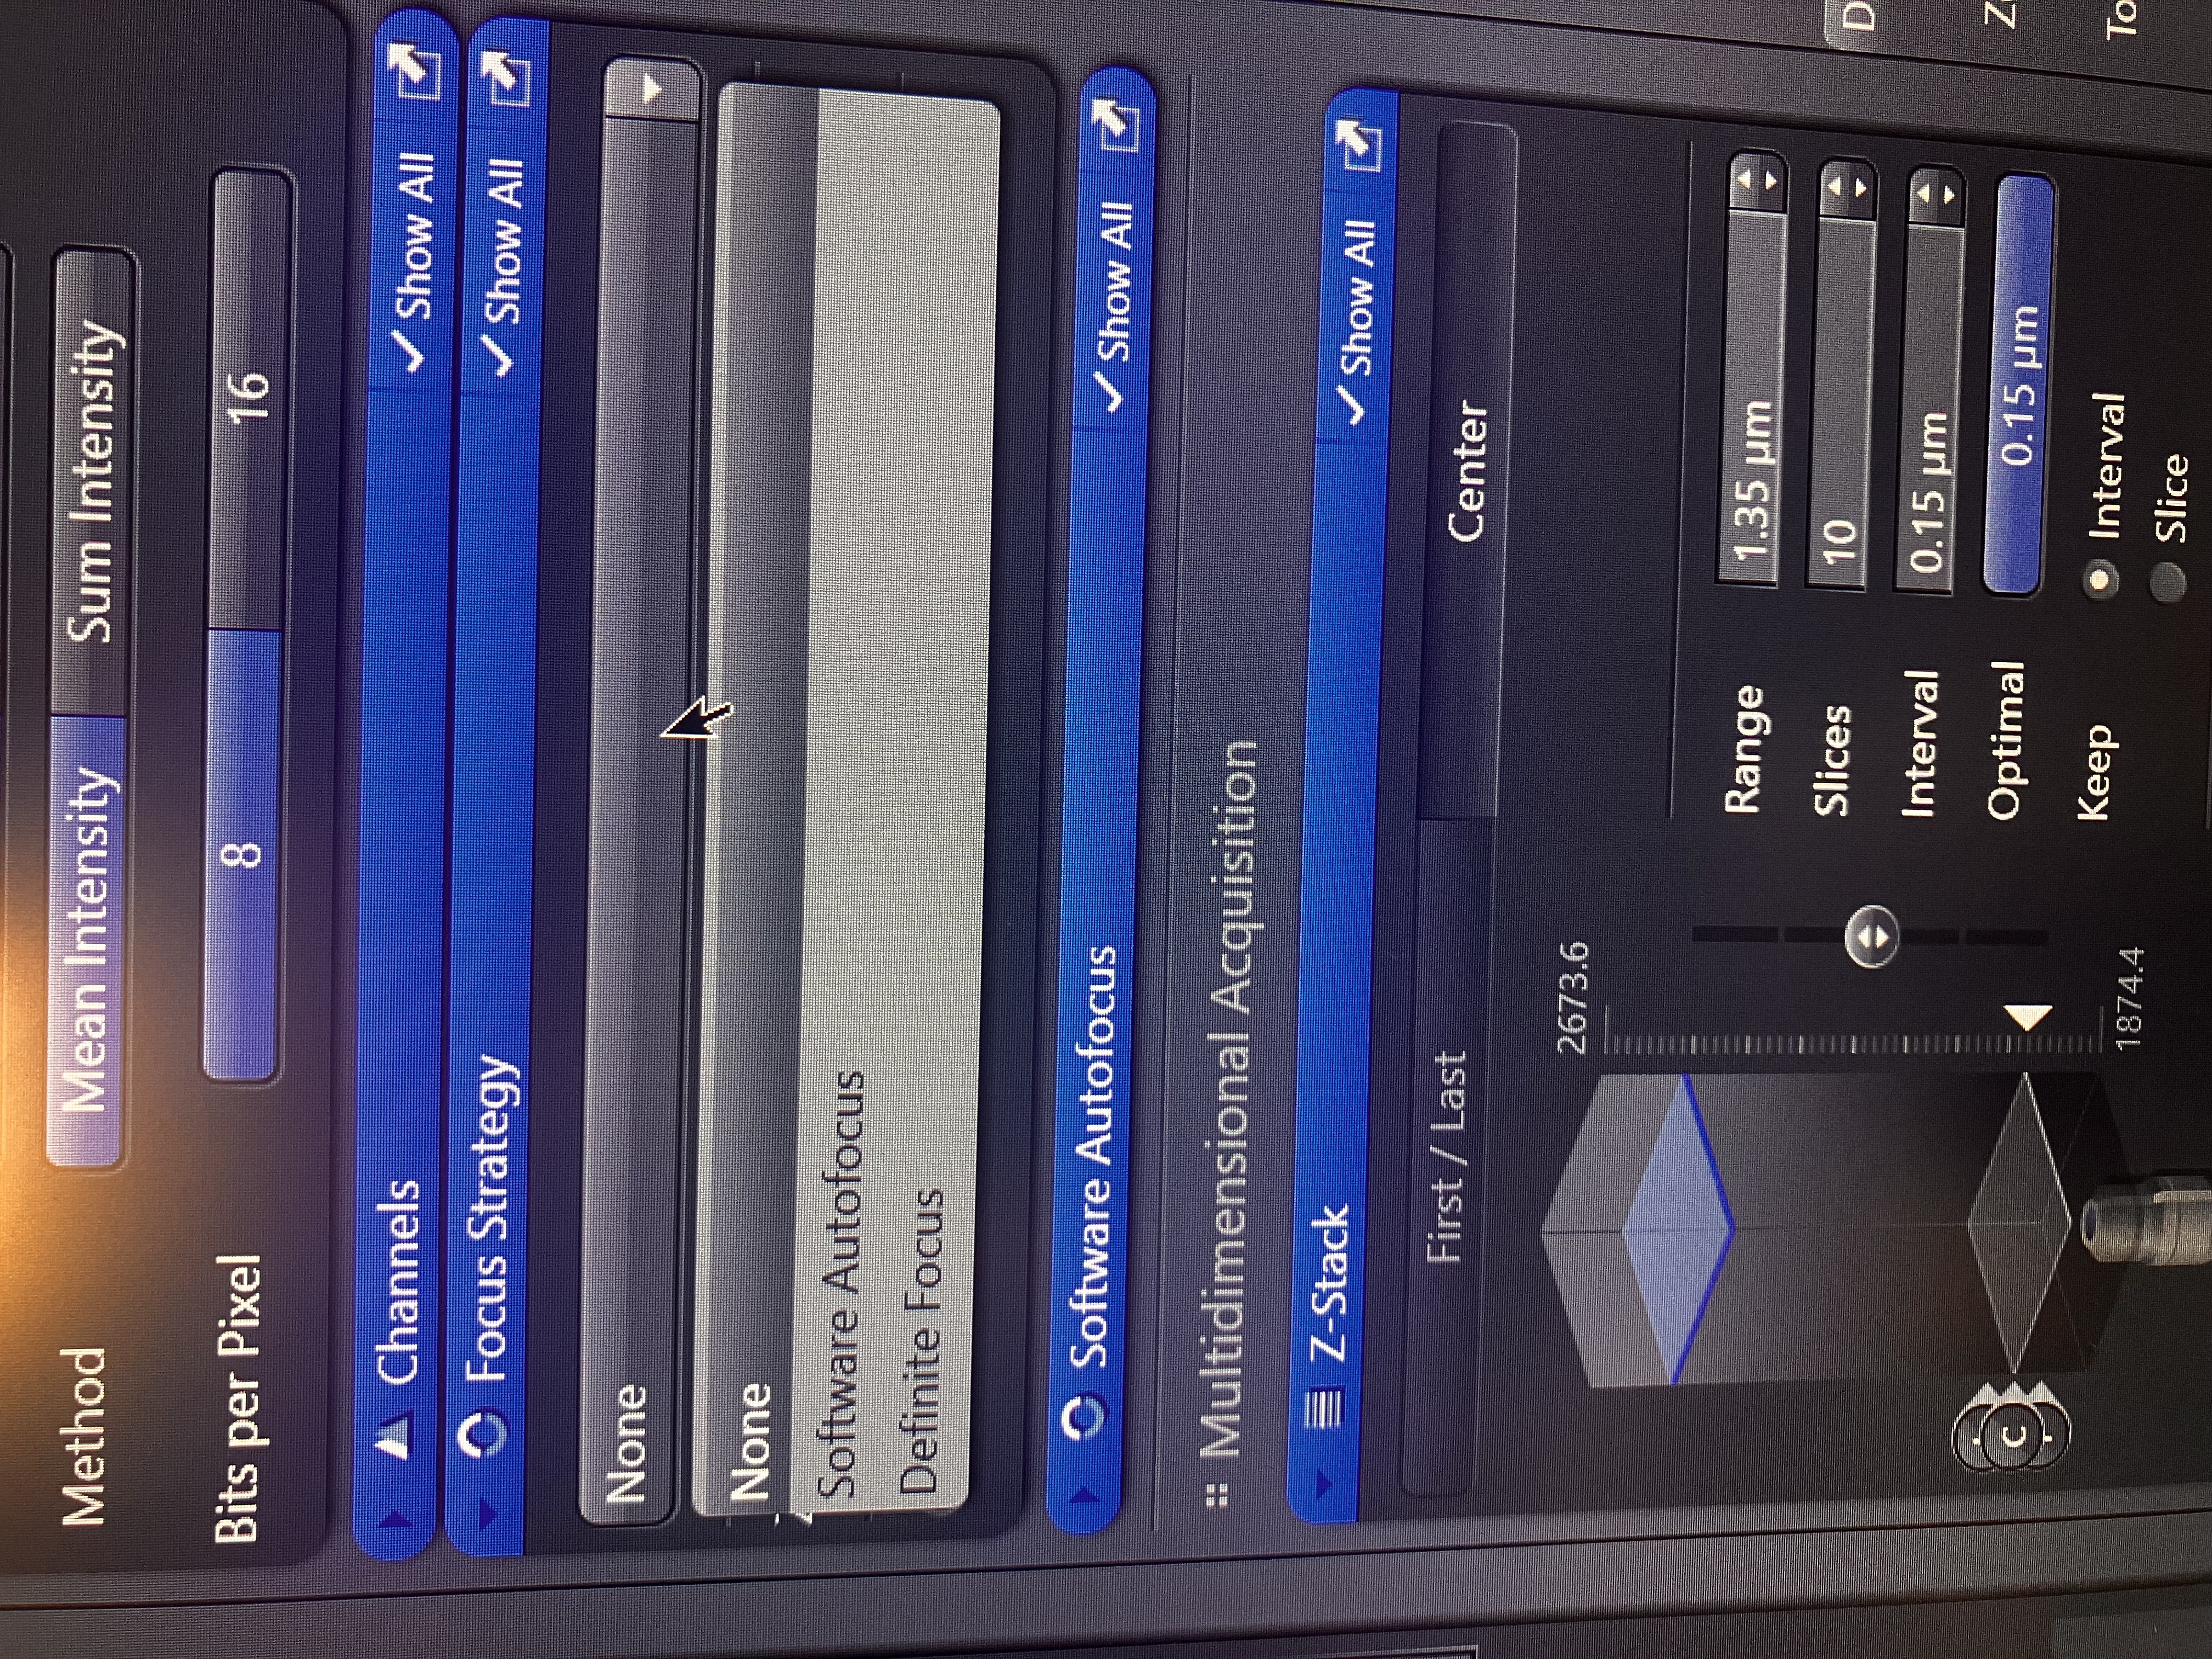
This is crucial. If you select a different option, the exact focal plane will change when you actually run your experiment, since the ZEN software will attempt to automate finding said plane. So, for one time series, select “None” to leave the focal plane as is. If you are finding z-stacks for many positions, you likely want to use “Definite Focus,” as described in Multiple Image Acquisition.
7.4 Set Time Series Settings
Find the time series tab and adjust your settings:
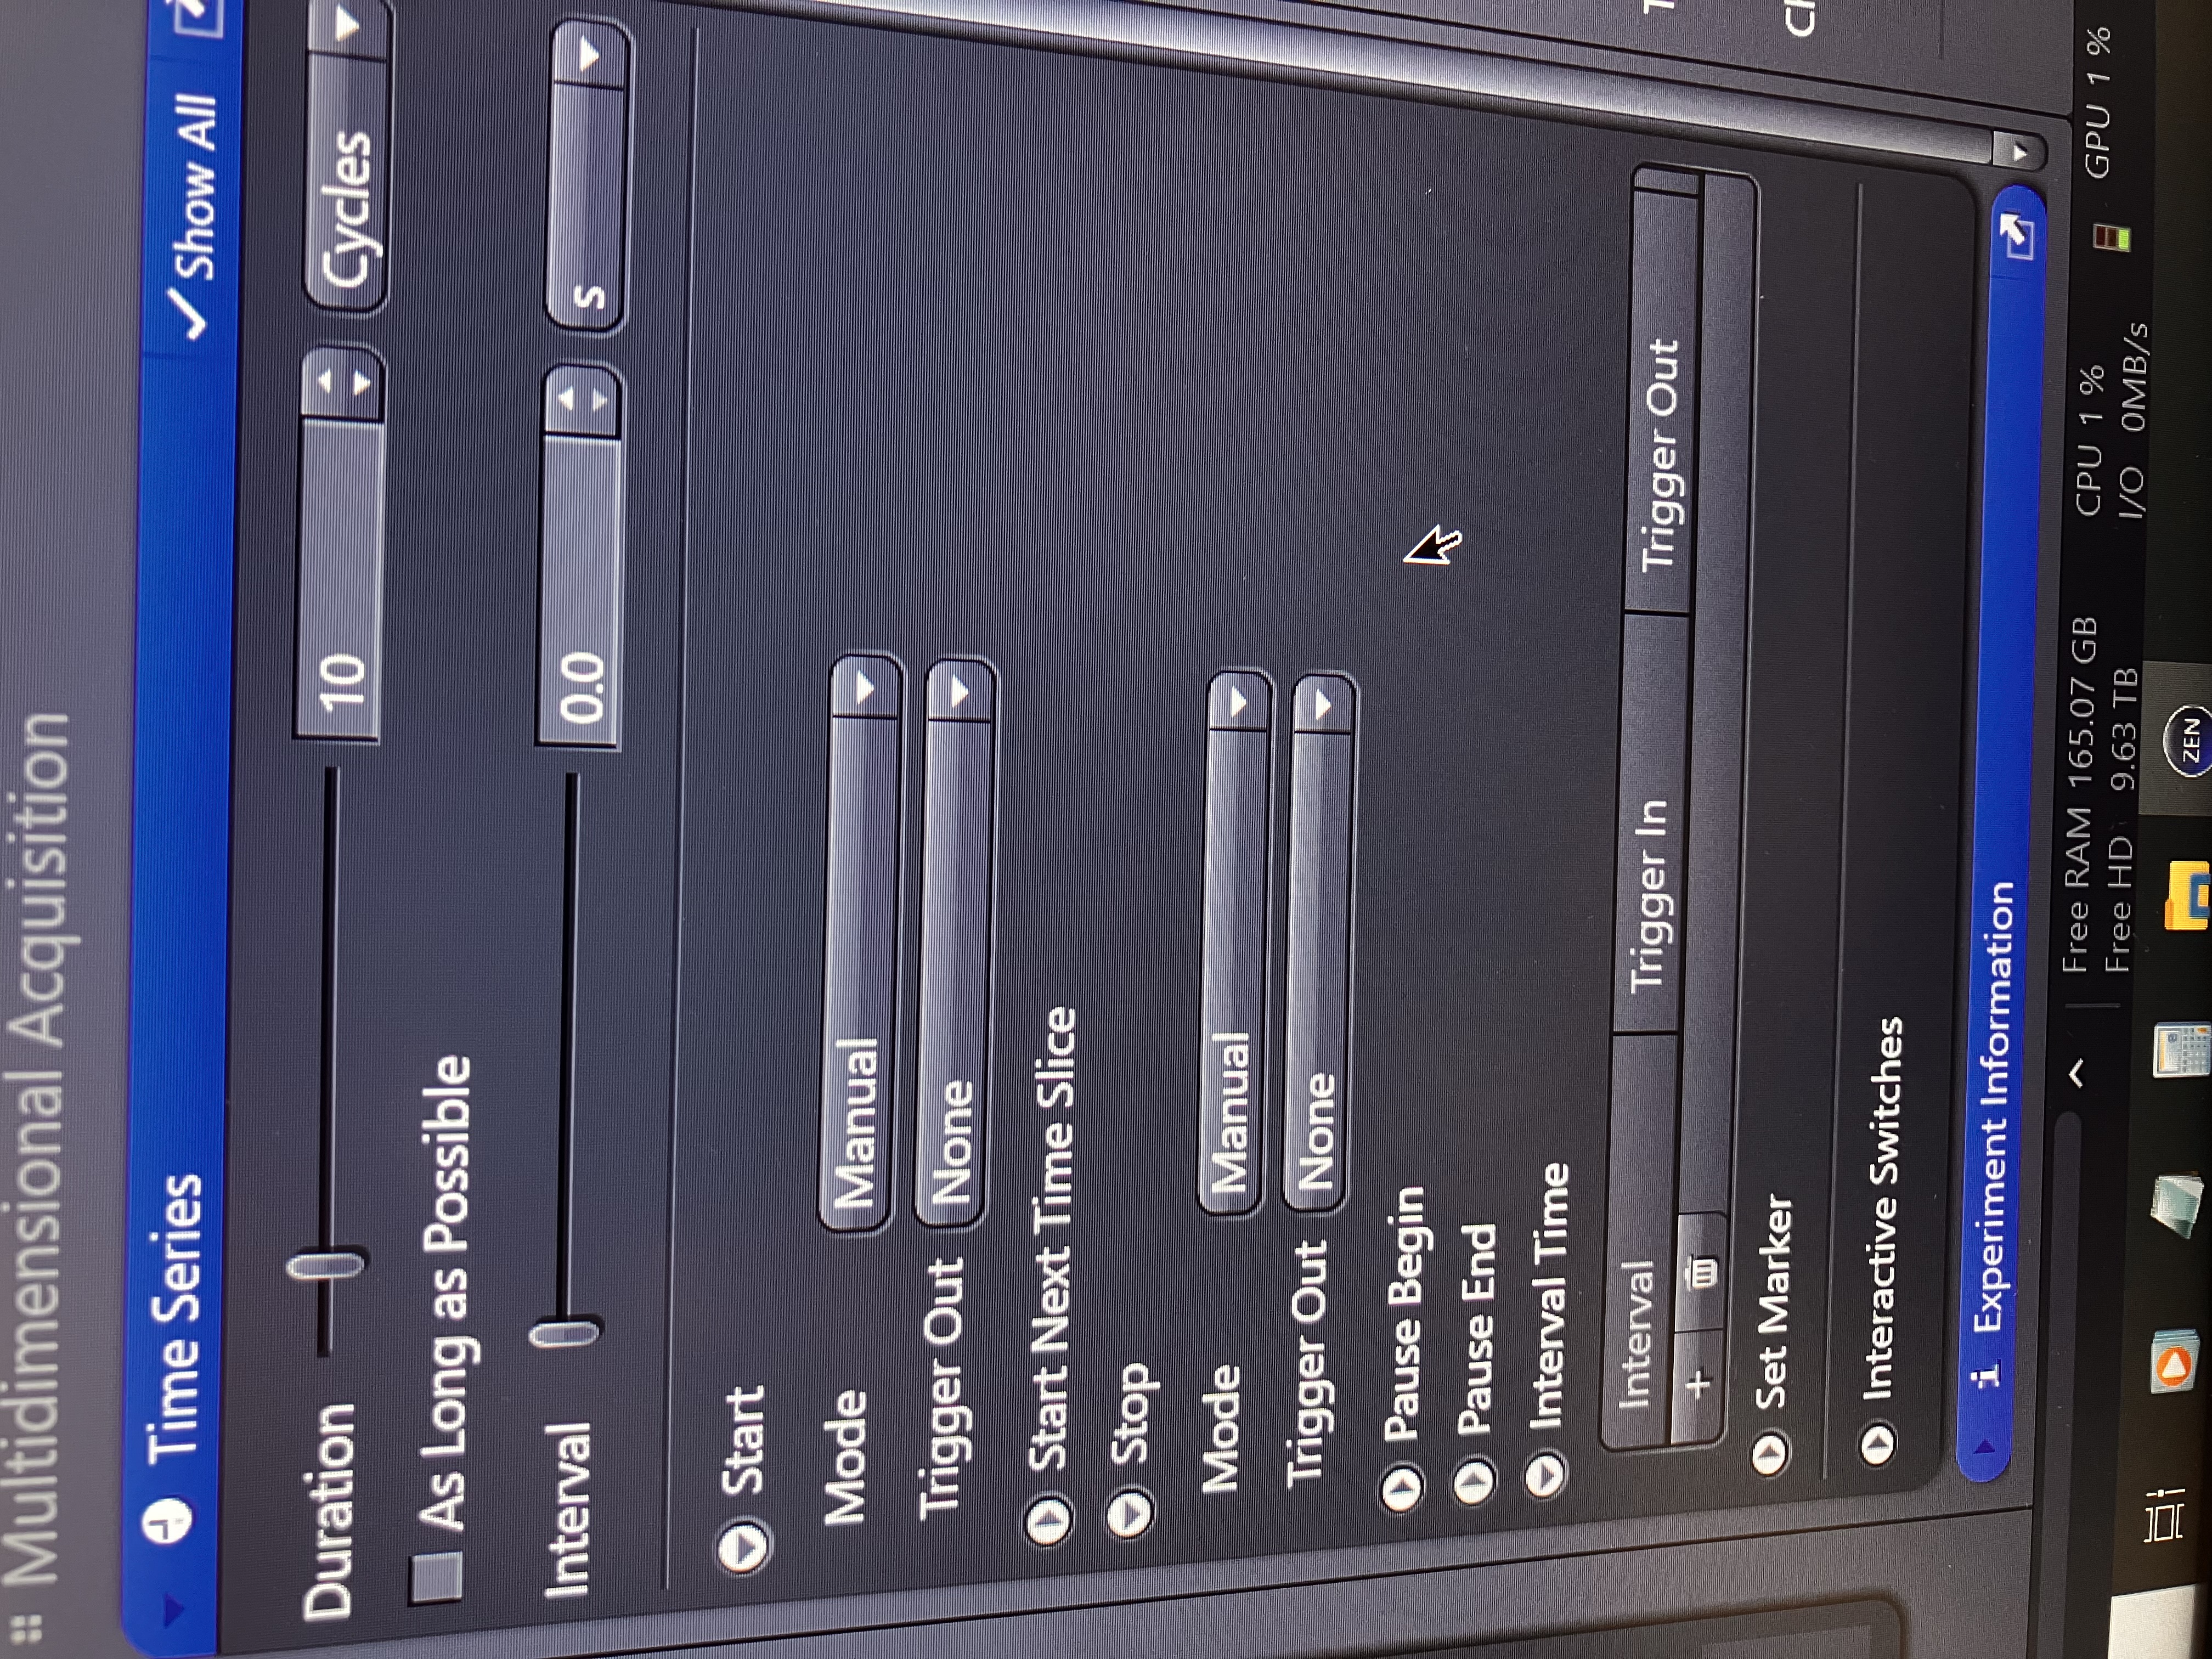
This tab is where you will define your time series parameters. You can adjust the number of images taken total, the interval between images, and the total time of the experiment. There are many options you can toggle between, so it may be worth it to simply experiment a bit with them for a couple cycles, before deciding on them for your experiment. If in doubt, ask the Core for help.
7.5 Run Your Experiment
Click “Start Experiment” as shown below and make sure that the file size makes some sense:
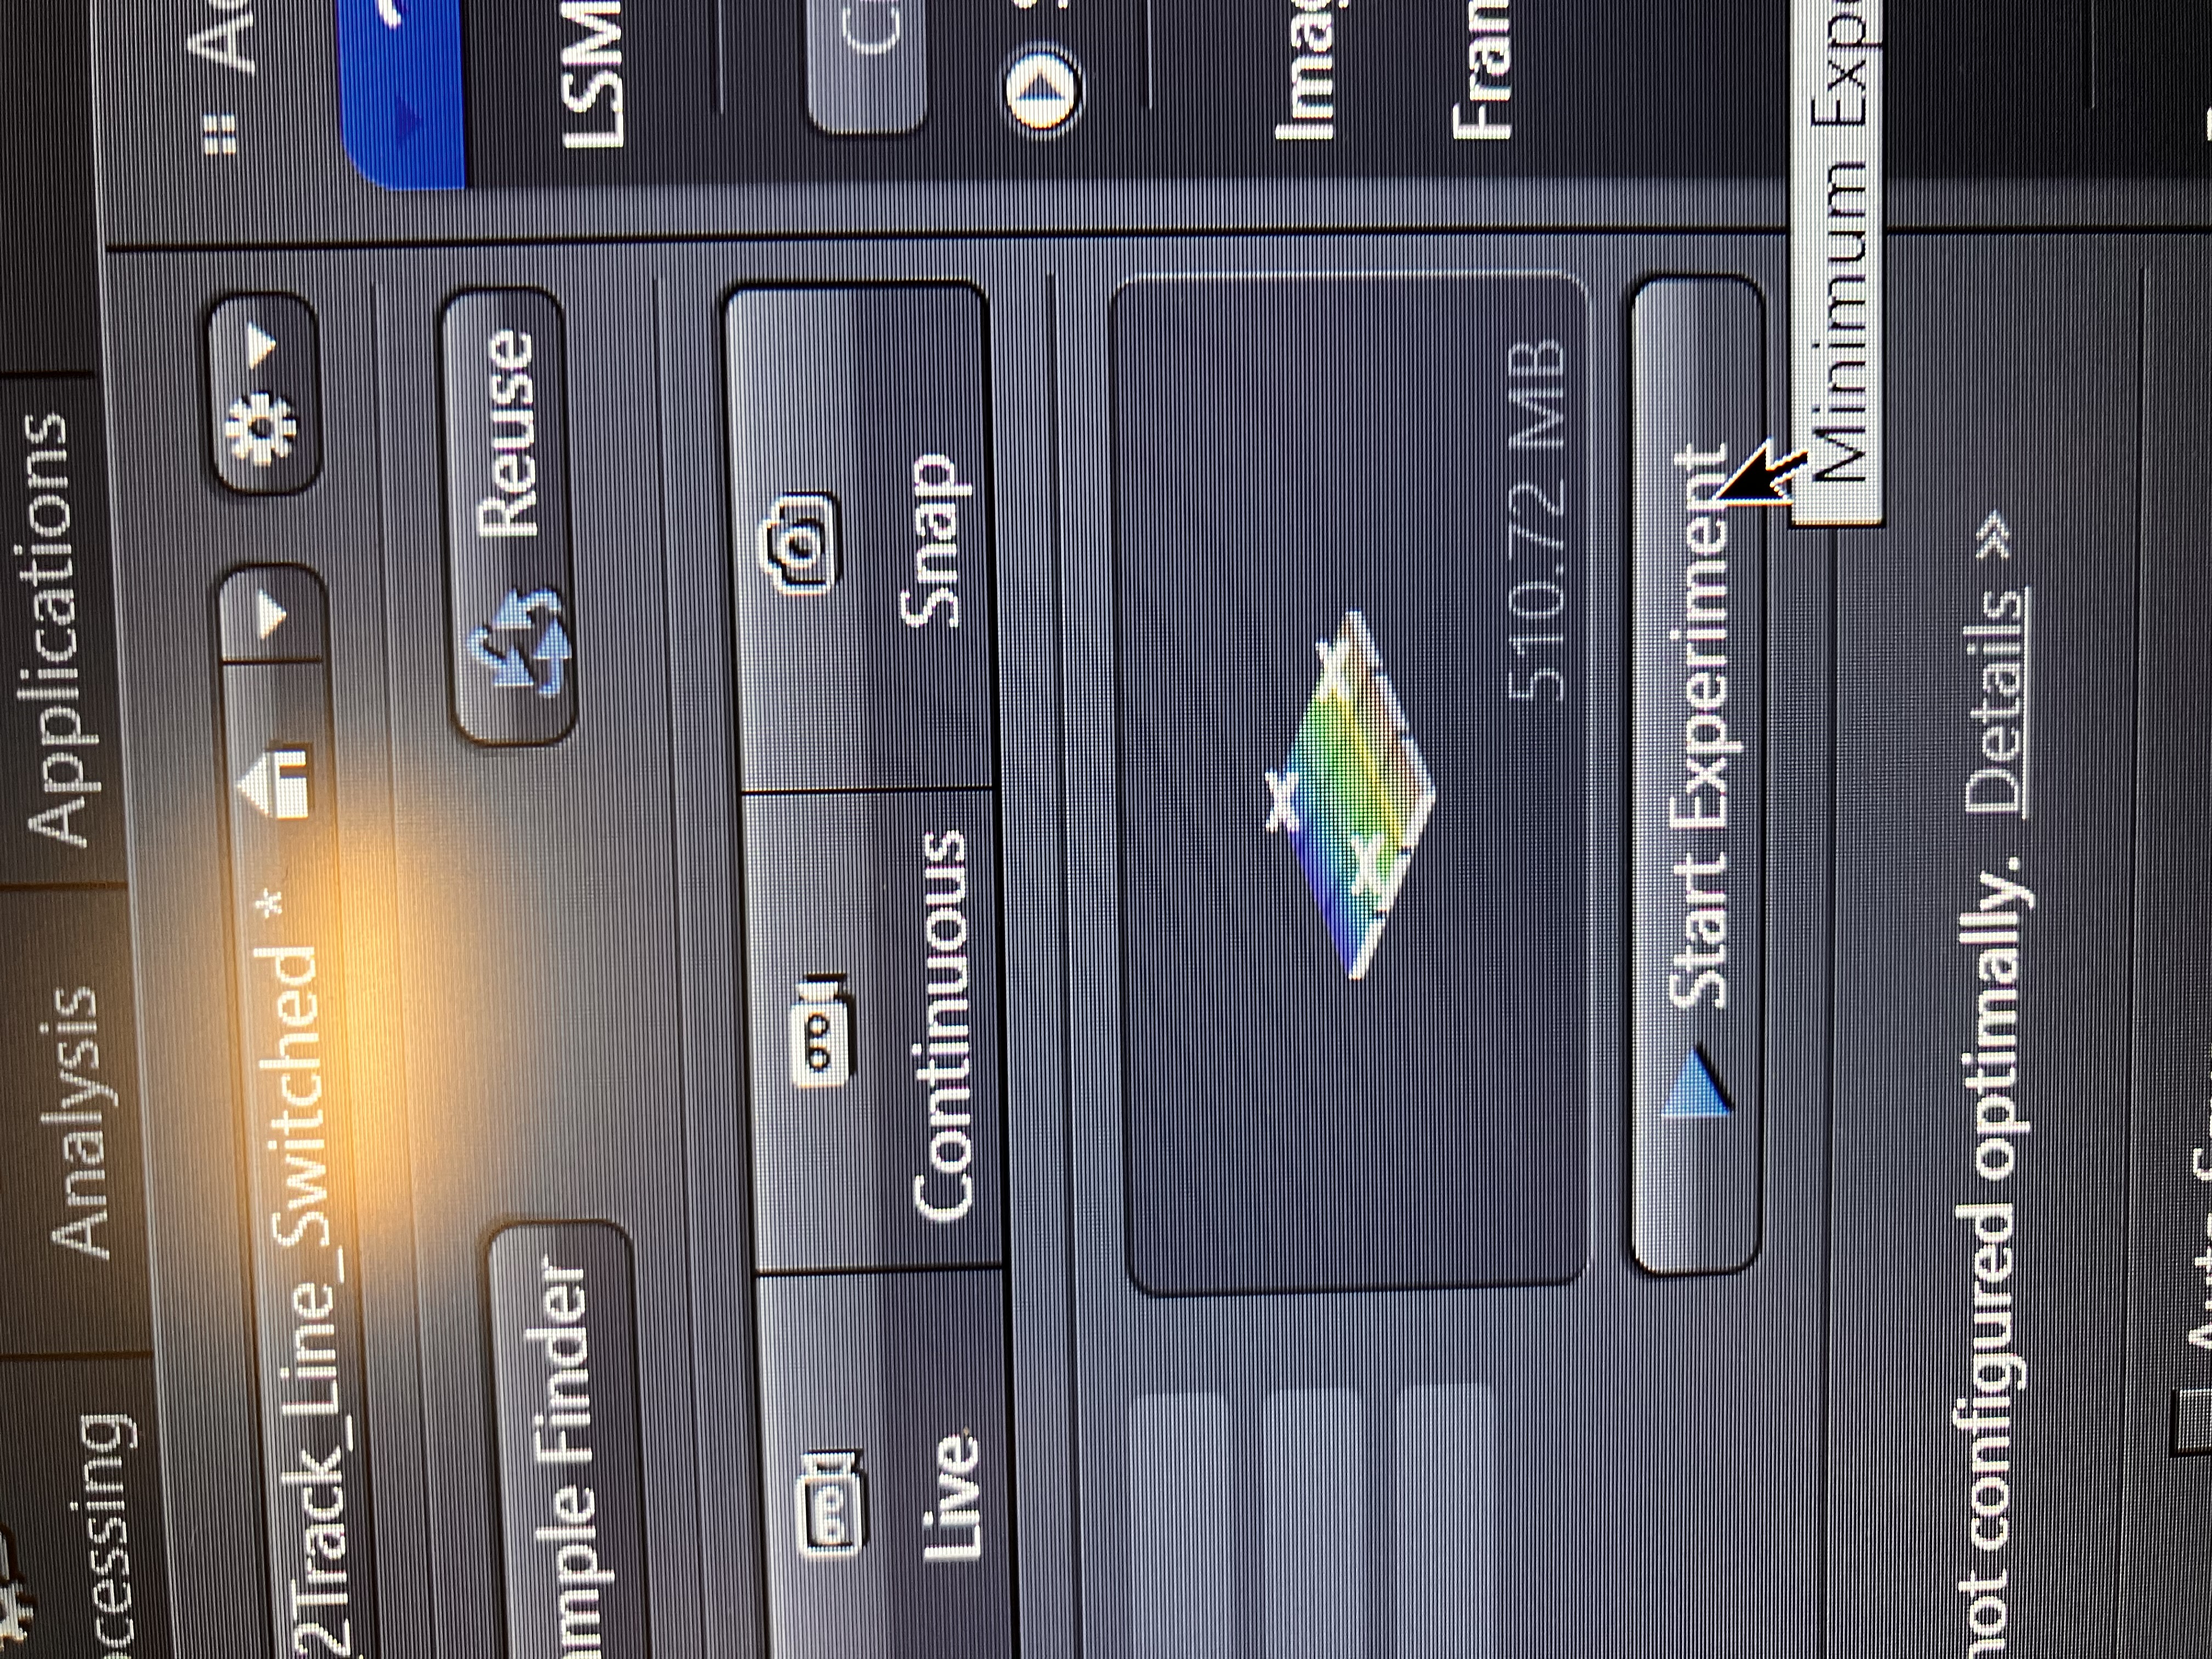
You should begin seeing your image slices being captured.
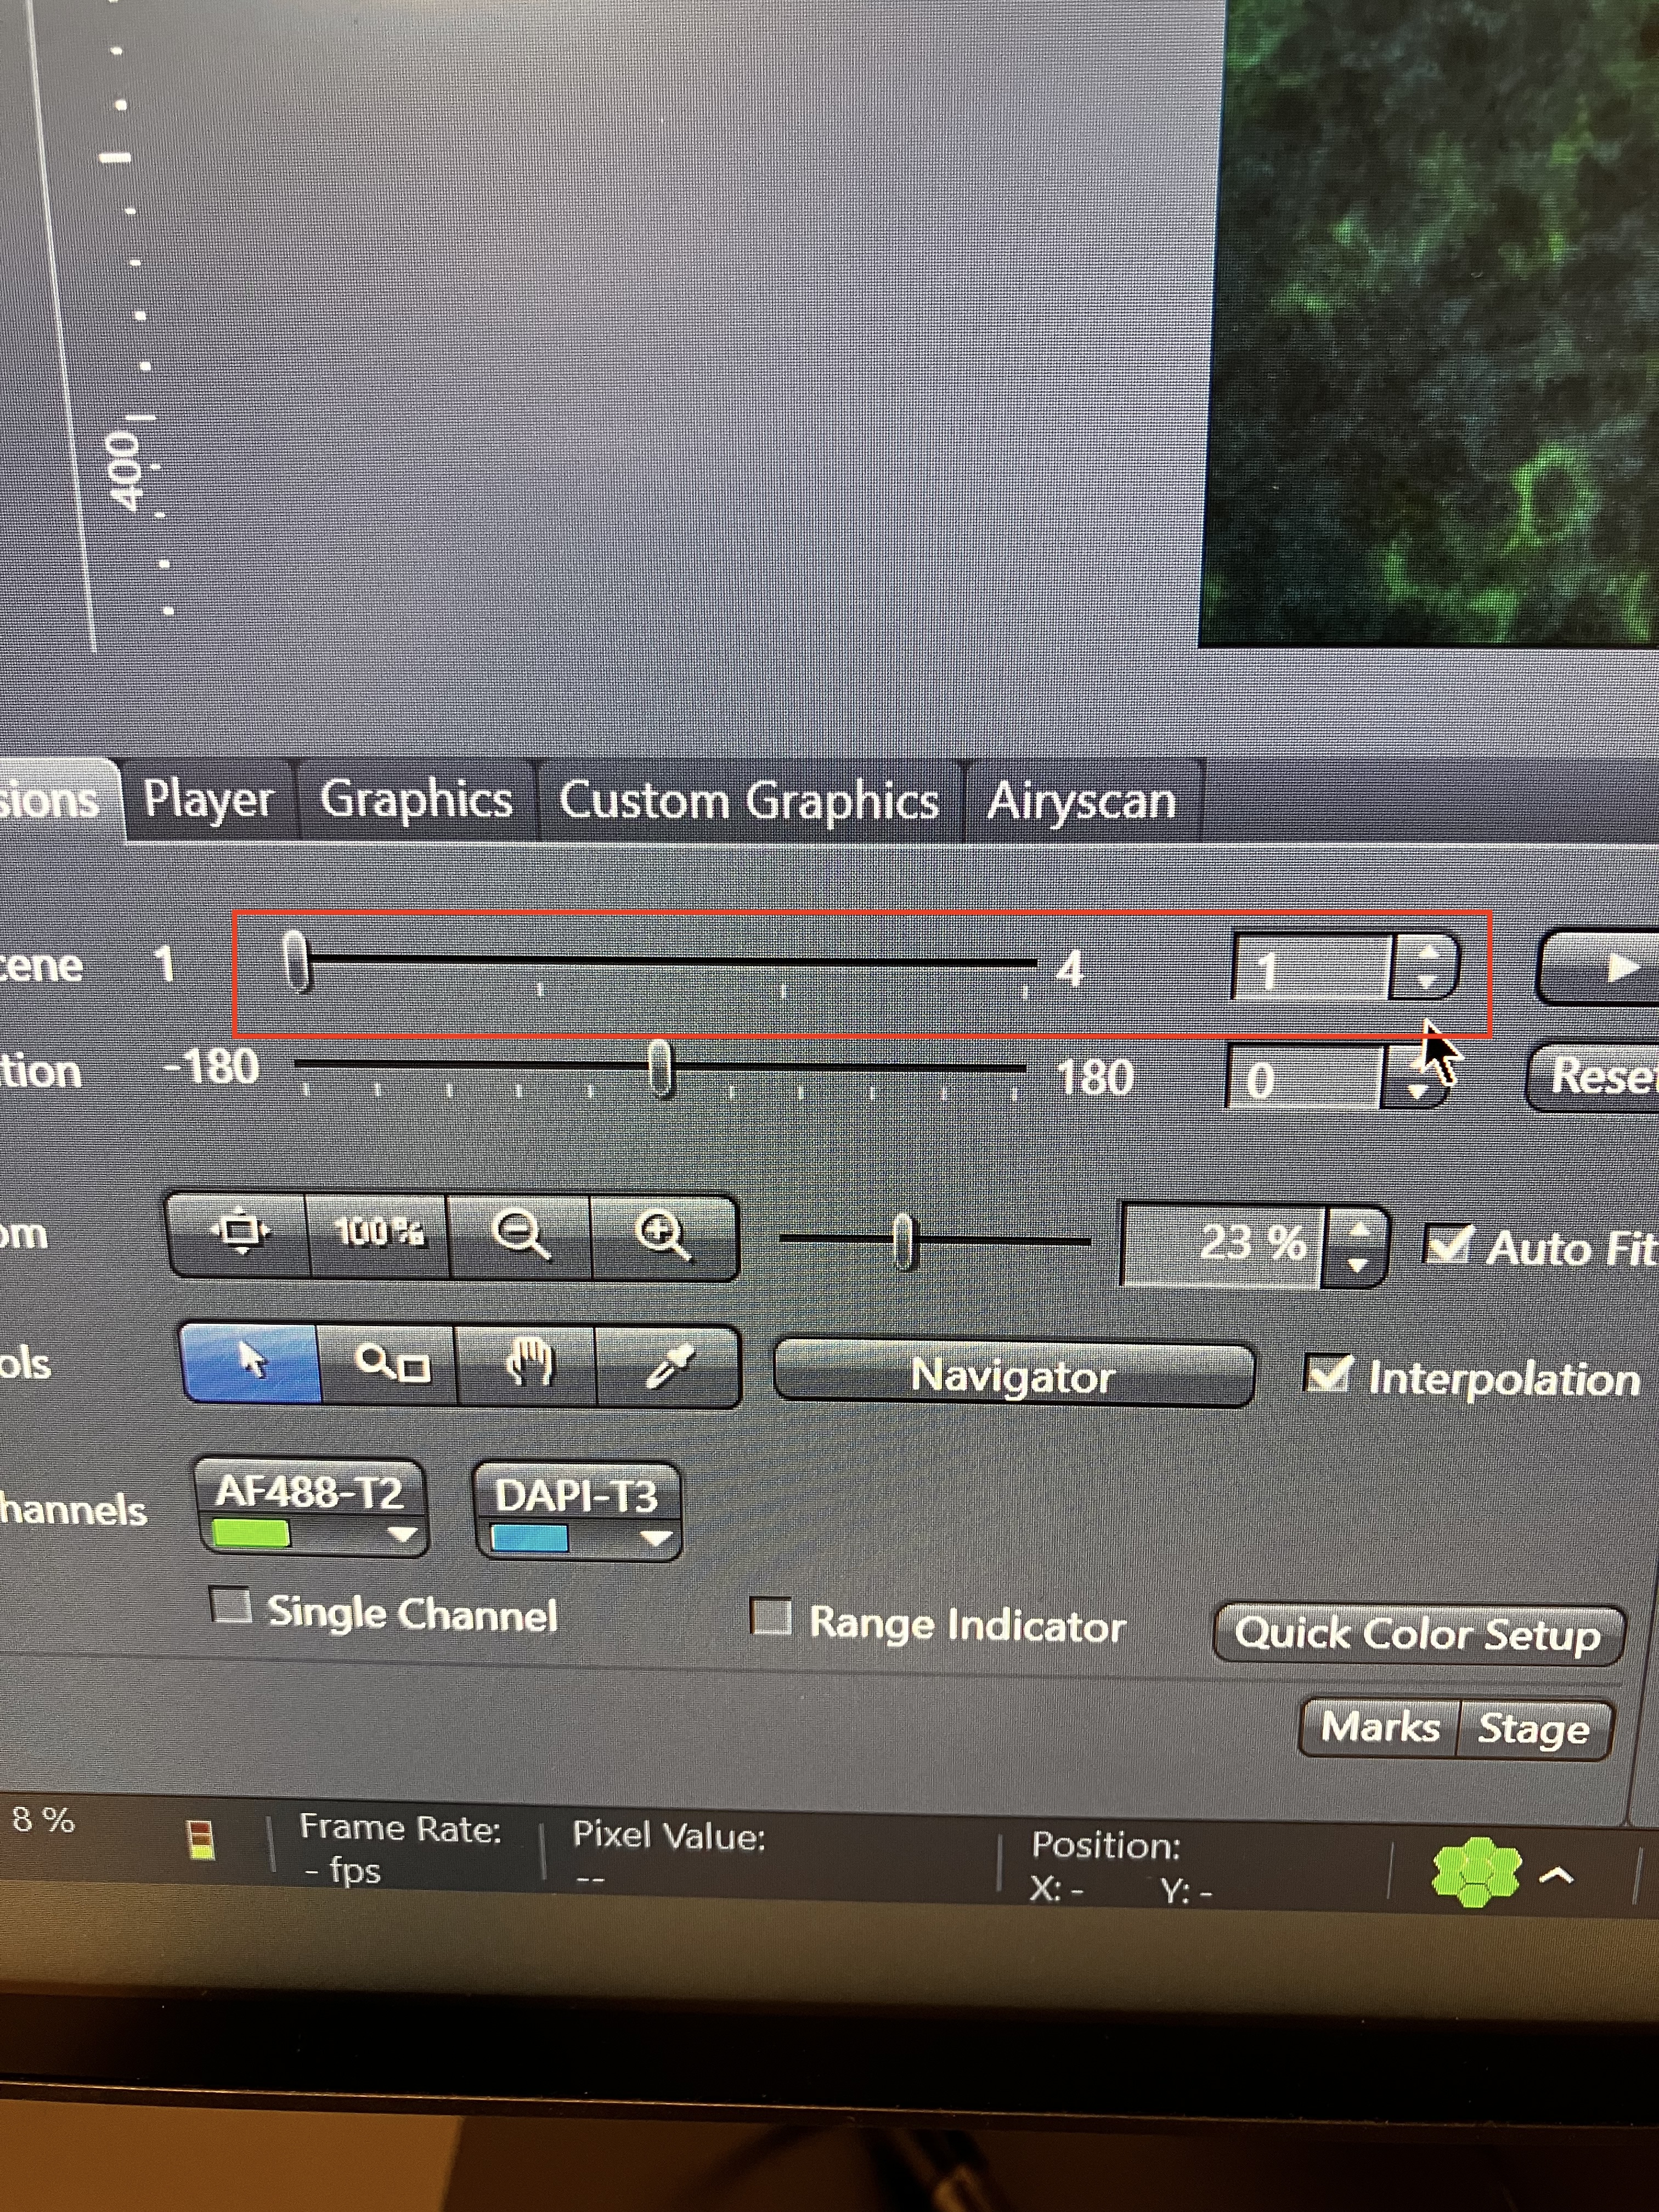
7.6 Process Your Time Series
You can pan through your time points in the same way that you can toggle through tiles or z-stack slices, as shown here:
You can perform Airyscan processing if you used SR or Multiplex mode and then you can create files for the processed data by selecting any of the following options:
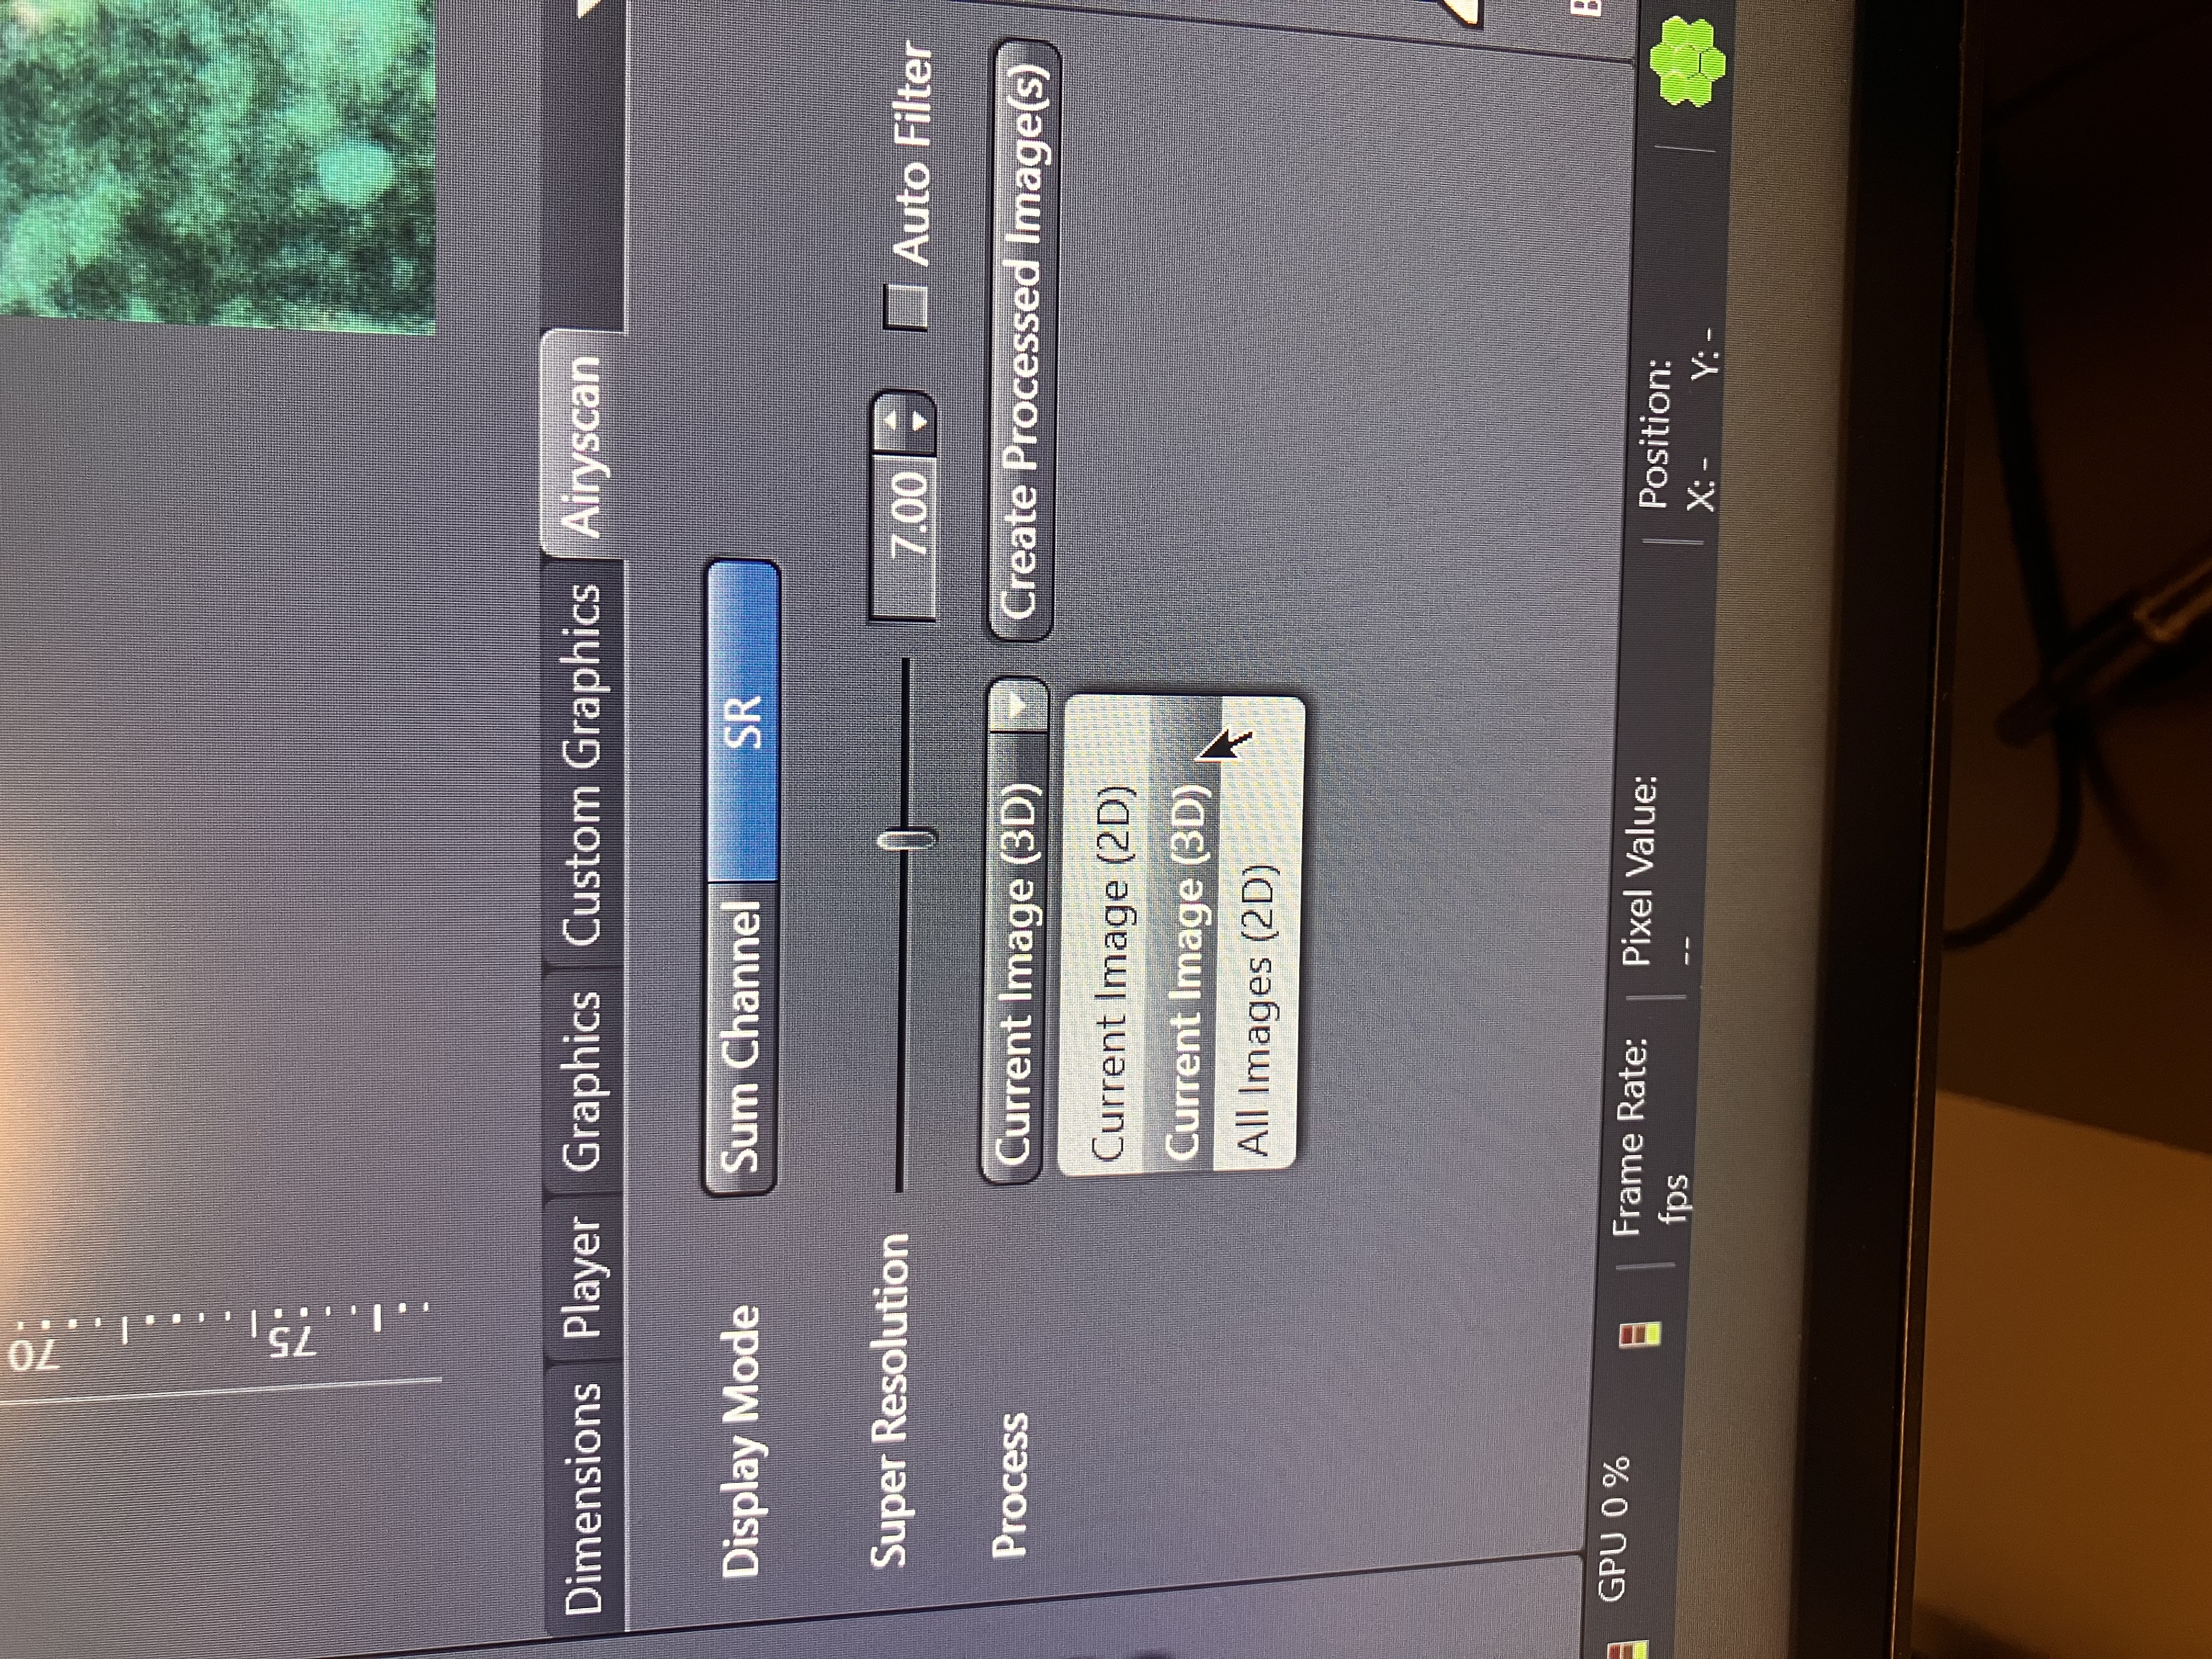
Current Image (2D) will simply save the single time point you are looking at as a flat file. Current Image (3D) will save the entire time series you are looking at as a multidimensional file (a stack of 2D images). All Images (2D) will save each time point as its own flat file. Note here that you will need the raw Airyscan data from your experiment to perform Joint Deconvolution downstream. This applies to SR only.