Chapter 4 Codes
4.1 Display of binary and / or numeric codes
Once you uploaded your data and decided to manually build the model (see Chapter 1), you should land on the main page of the ENA webtool. On the sidebar the Model icon should be selected, and on the tab bar the Codes icon (see Figure 4.1). A short explanation of codes is provided, if you hover over the question mark next to the codes icon [1].
All your binary coded columns will be displayed under the search bar. If you would like to add other numeric variables, select them in the search bar [2]. You can also add all numeric columns by changing code variables to display from binary [3] to all numeric [4] in the advanced options.
You can change the order of your code display by clicking on the three dot icon that will appear, when you hover over the code name and dragging them [5].
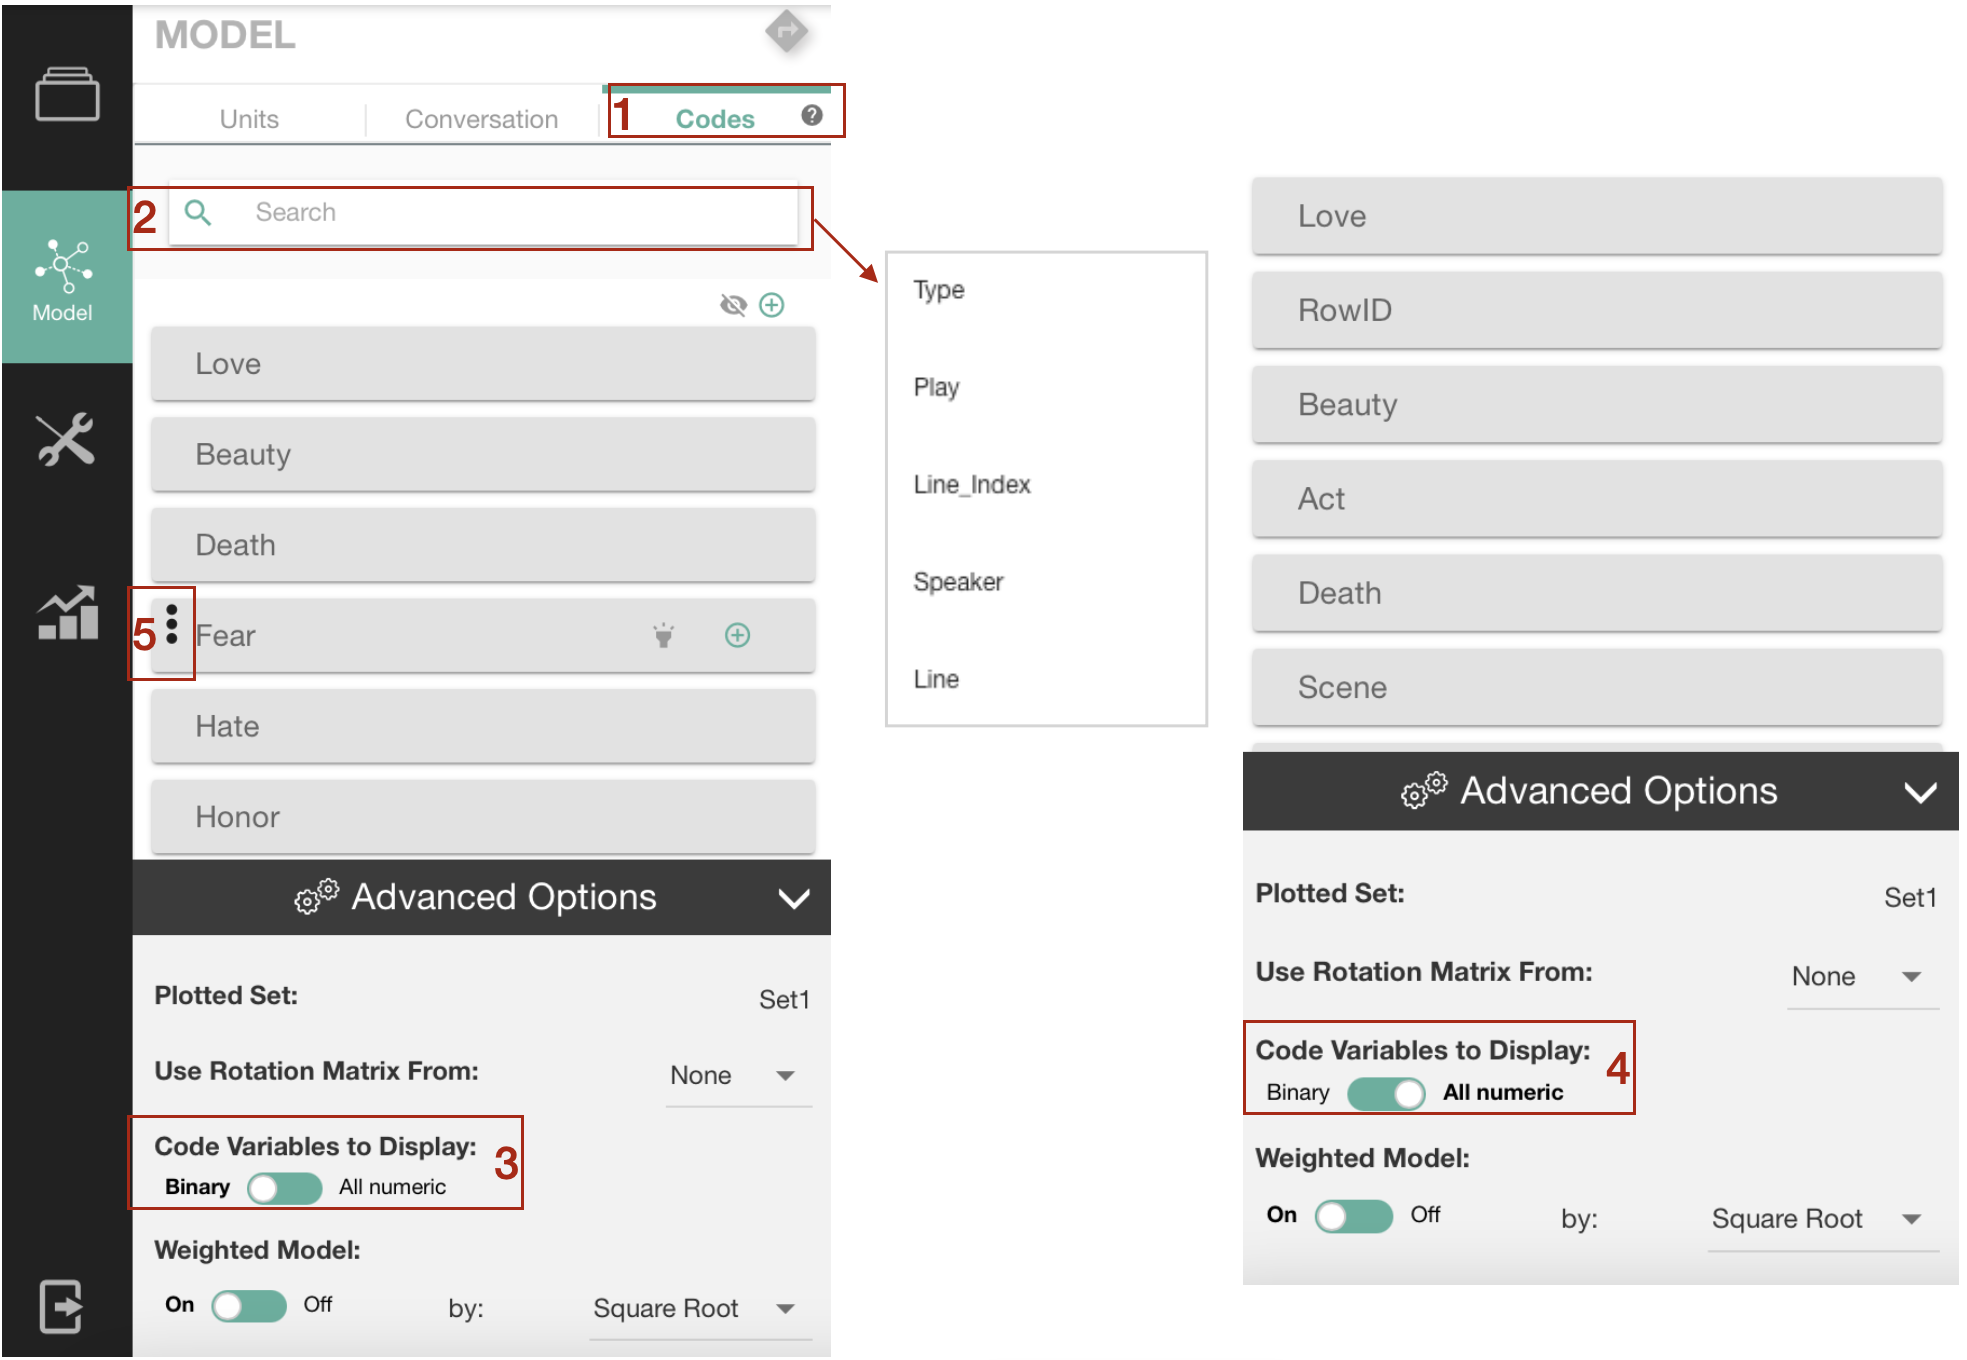
Figure 4.1: Display of binary and/or numeric codes
4.2 Exclude/include codes
To select all codes, click on the include all icon above the code list [1] (see Figure 4.2). If you only want to choose specific codes, hover over the name of a code, so that an include icon will appear and click on it [2]. Your included codes will change color from grey to white. To build an ENA model, you need to select minimum 3 codes.
To exclude all codes, click on the exclude all icon above the code list [3]. If you only want to exclude specific codes, click on the exclude icon that will appear, when you hover over the code name [4].
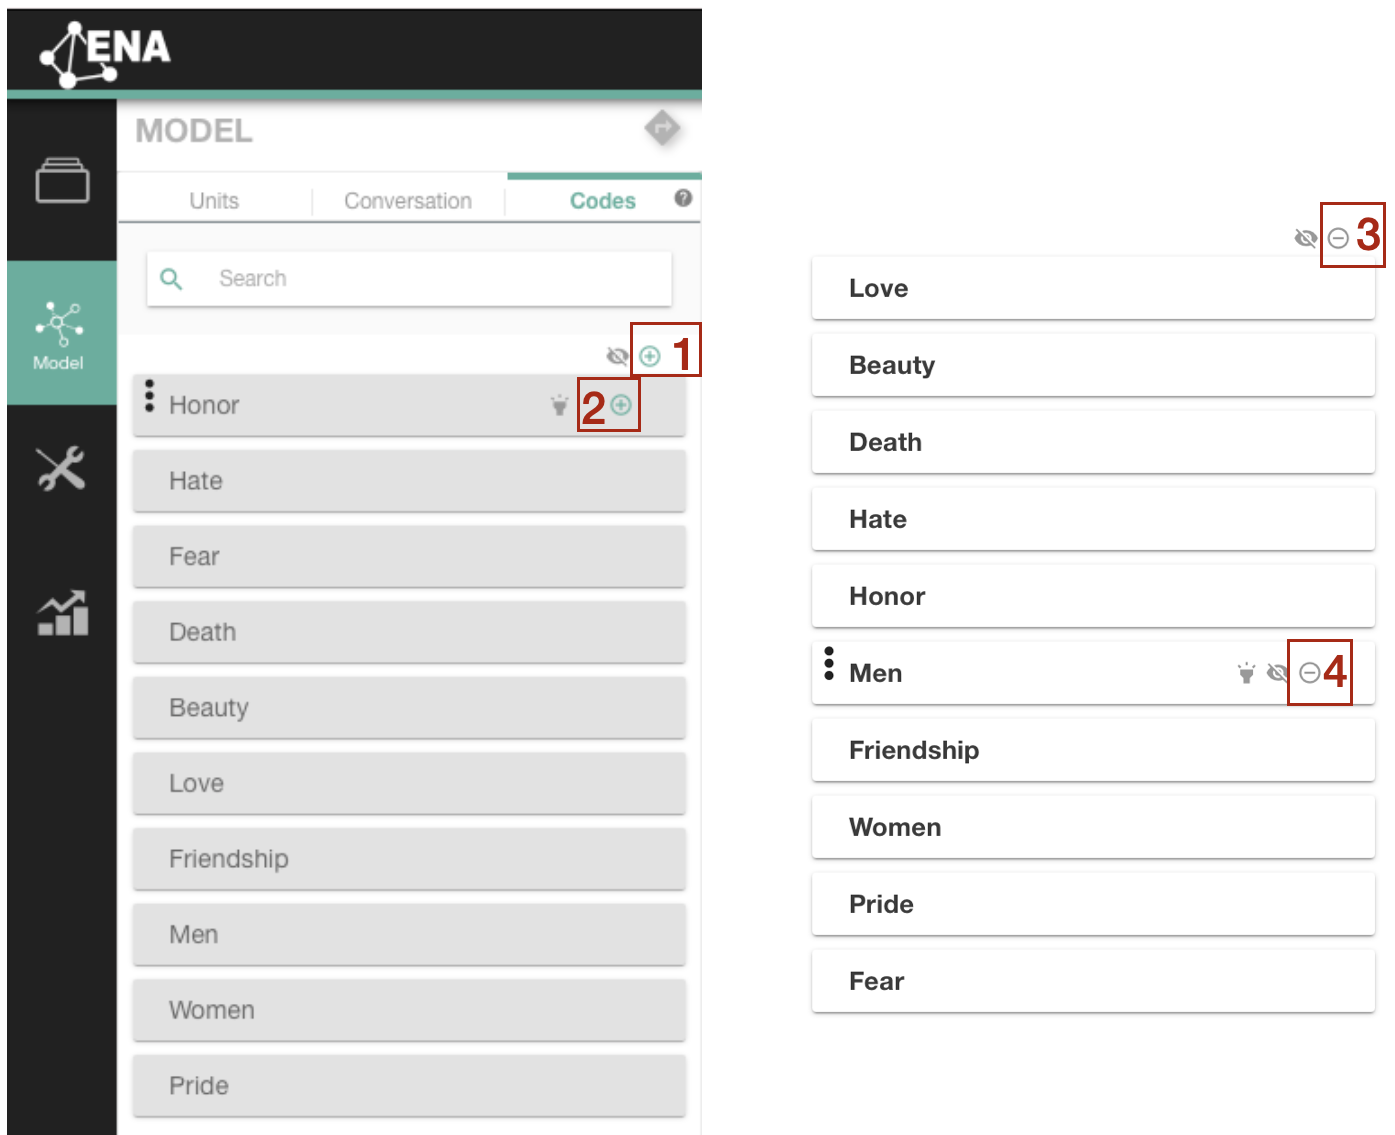
Figure 4.2: Include / exclude codes
4.3 Hide/unhide codes
To hide all codes, click on the hide all icon above the code list [1] (see Figure 4.3. If you only want to hide specific codes, hover over the name of a code, so that an hide icon will appear and click on it [2]. The hidden codes will change color to light grey [3]. Hidden codes are not visible in the ENA graph, but are still part of the ENA model. You might want to hide some codes in your visualization to “decluter” your model and showcase specific codes.
To unhide all codes, click on the unhide all icon above the code list [4]. If you only want to unhide specific codes, click on the unhide icon that will appear, when you hover over the code name [5].
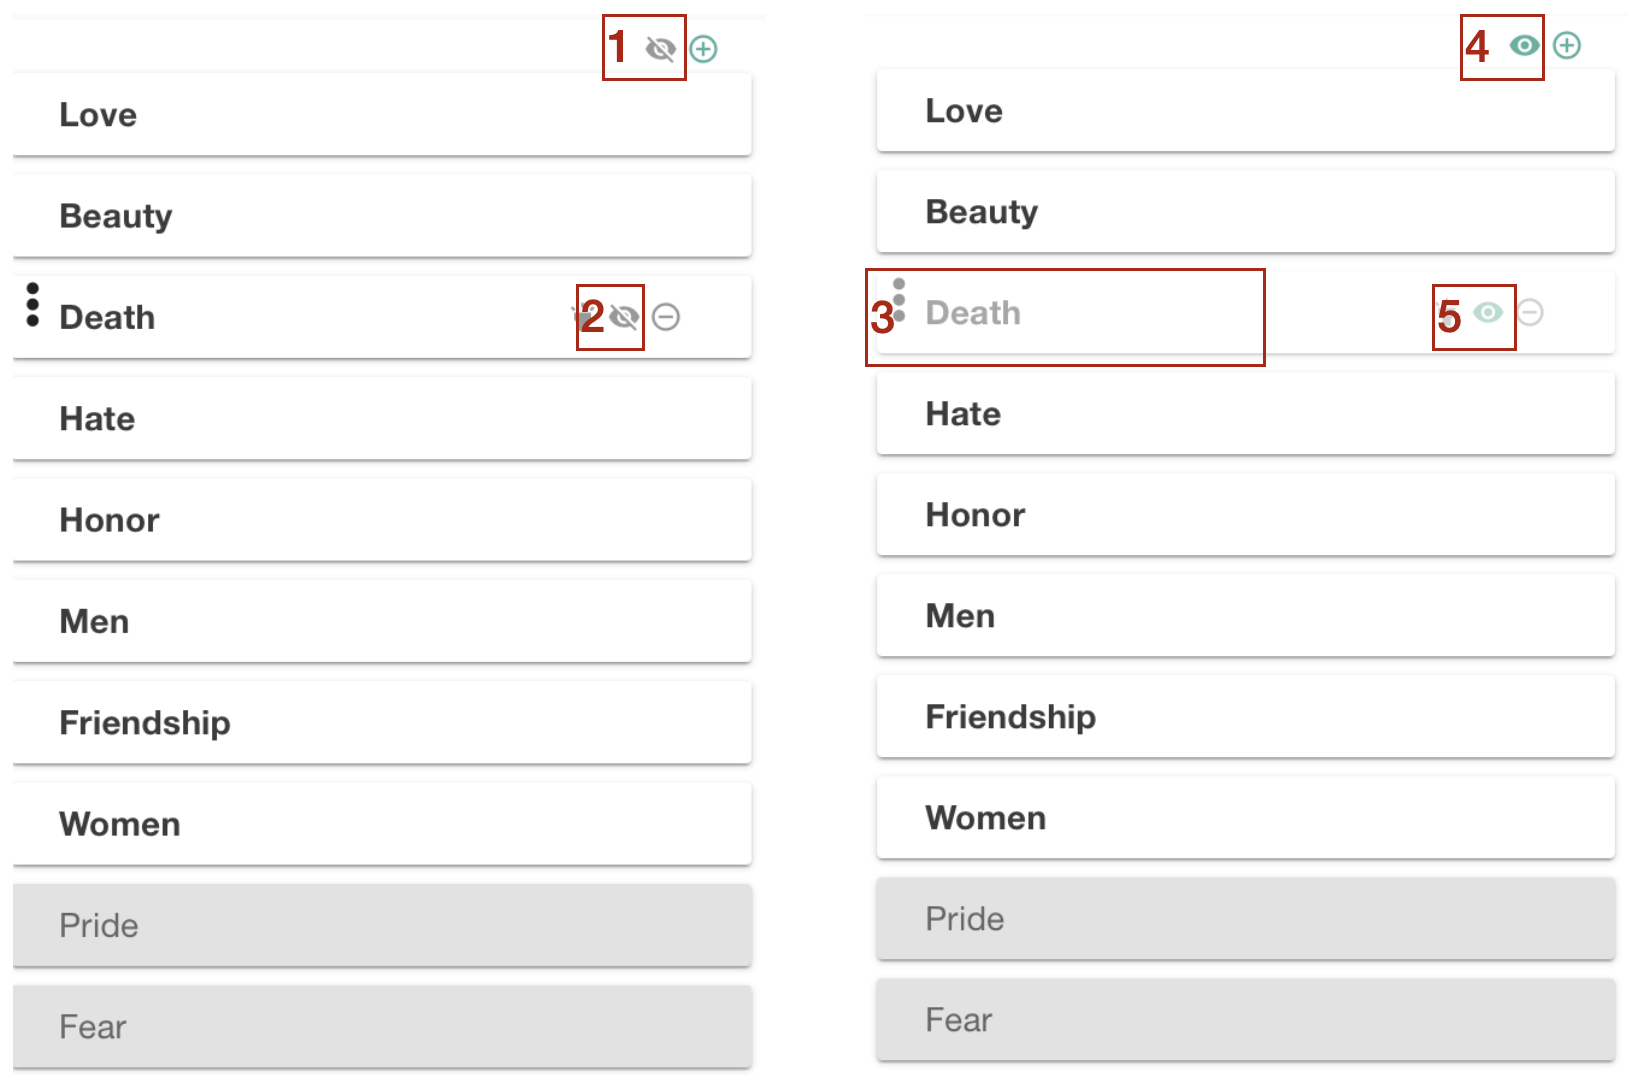
Figure 4.3: Hide / unhide codes
4.4 Highlighting and unhighlighting codes
Highlighting codes helps to explore data behind the codes’ connections.
To highlight a code, click on the highlight icon that appears, when you hover over the code’s name [1] (see Figure 4.4. You have to choose two codes to highlight a connection between them. Once selected, the codes will turn orange both in the codes list [2] and in the ENA graph [4], and it will trigger a data view showing the data that the connection was built upon [3]. Watch this tutorial video to learn more about the data view. Another way to highlight a connection is to directly click on the edge between two codes in the comparison plot view [5].
You can either unhighlight all codes by clicking on unhighlight all icon below the search bar [6], or you can unhighlight a particular code by clicking on the unhighlight icon that will appear while hovering over the code’s name [7].
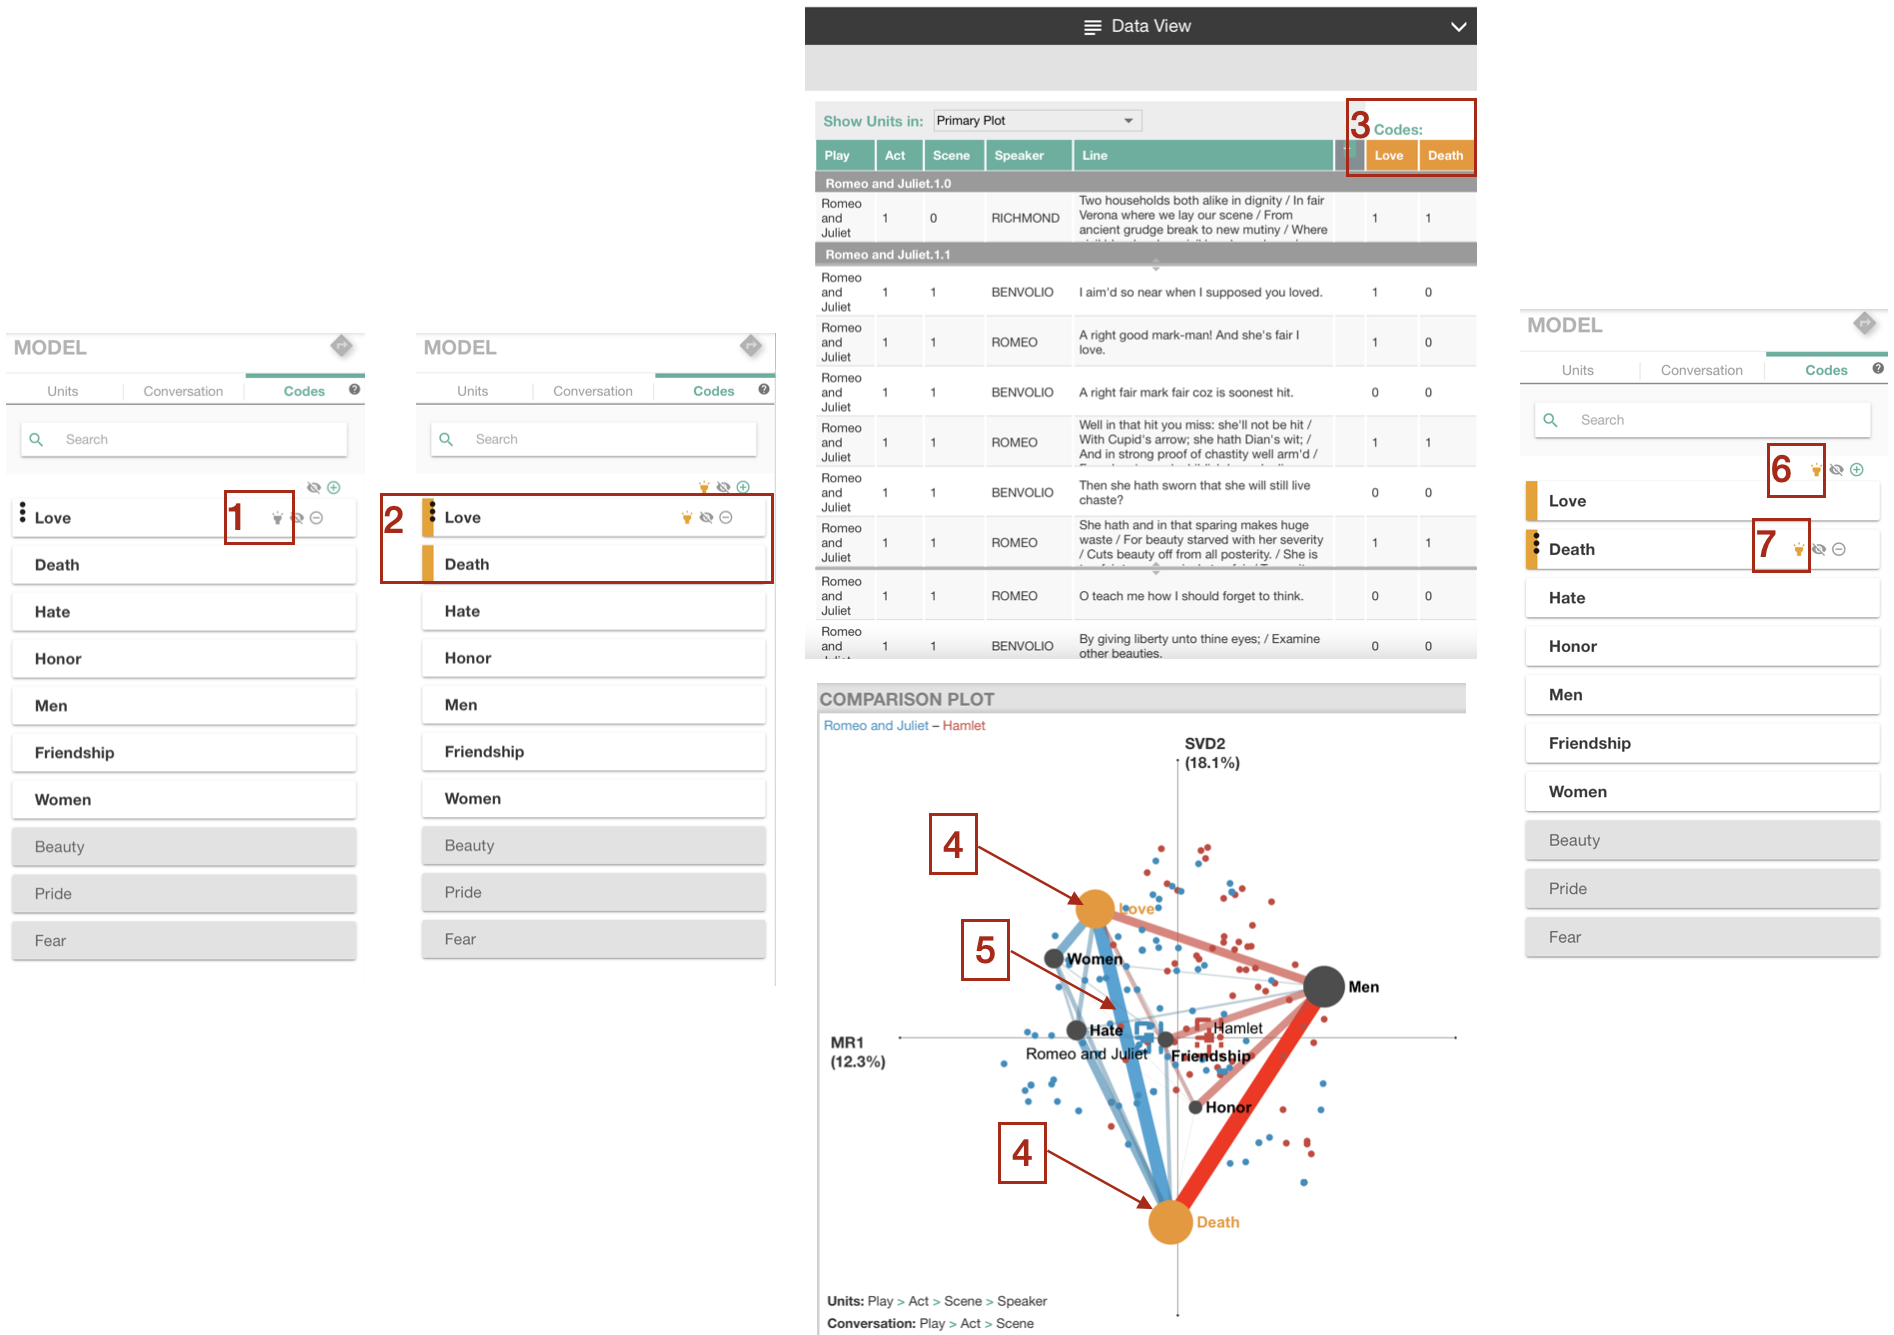
Figure 4.4: Highliting und unhilighting codes