5.4 Barbecuing
So the predominant advice on most barbecue recipes is “low and slow”. This makes sense, since the original Caribbean *barbacoa” was performed in a charcoal filled pit in the ground. More importantly, it gives time for the meat to take up the smoke flavor. Accordingly, most of the recipes here call for maintaining a temperature between 200 and 250o F. But of course that also means that cook times can be quite long - as much as 18 hours for a packer brisket or a full Boston butt roast. So plan ahead!
With that in mind, here are a few points to consider:
- You’ve put your internal temperature monitor into your brisket or butt, the grill temperature is stable, and the internal temperature is rising steadily. UNTIL it reaches 160 or so. Then it just sits there, possibly for hours. This is the infamous “stall” that occurs when liquid in the meat starts evaporating, causing evaporative cooling. At that point, you have two choices - either wait it out, or wrap the meat in foil or “peach paper”, essentially unwaxed butcher paper. I prefer the latter for a couple of reasons. First of all, at this point the meat has absorbed all of the smoke it’s going to. Second, the meat is less likely to dry out as it rises to the magic end point of 203o F. And, of course, it saves time
- Even if you are cooking for a large family, it is doubtful that a full packer brisket will be devoured on the first sitting. So how to reheat leftovers? Thermoworks recommends a sous vide approach, in which frozen leftover barbecue is placed in a ziploc bag and immersed in a water bath maintained at 175o F. until the internal temperature reaches 165o F. This something that can easily be done with a sous vide wand or an InstantPot®, but the link above describes how it can be accomplished with a pot of water on the stove top.
5.4.1 Brisket Style Tritip
This is a great place to start in your barbecue adventure. Unlike a brisket, it is a small piece of meat, more suitable for 1-2 people (although it will yield up multuple servings. Furthermore, the cook time is reasonable (6-7 hours), and leftovers will keep in the refrigerator for days.
Ingredients:
2-3 pound Tri-tip roast
Your favorite beef barbecue rub (I use Penzey’s Barbecue 3000
3-4 Oak or Hickory Wood Chunks
Peach paper (available at Lowes)
- Soak the wood chunks in water for at least 30 minutes.
- Load the barbecue with charcoal and add two Fire Starter Sticks. Ignite.
- As soon as the flame dies down, add the soaked wood chips and stir them into the coals as best you can.
- Place your ConvEGGtor, and aluminum drip pan, and grill in place.
- Immediately hook up your Billows device with a long probe in channel 1 and your grill monitoring probe (attached to the grill).
- Using the Thermoworks app, set the fan temperature to 250o F. Close the upper vent on the Egg nearly completely
- Apply a binder to the tri-tip. Mustard is the standard here, however I use olive oil.
- Apply rub liberally to all sides
- Insert a long probe into the heart of the roast and place on grill. Close the lid and let the cooking commence.
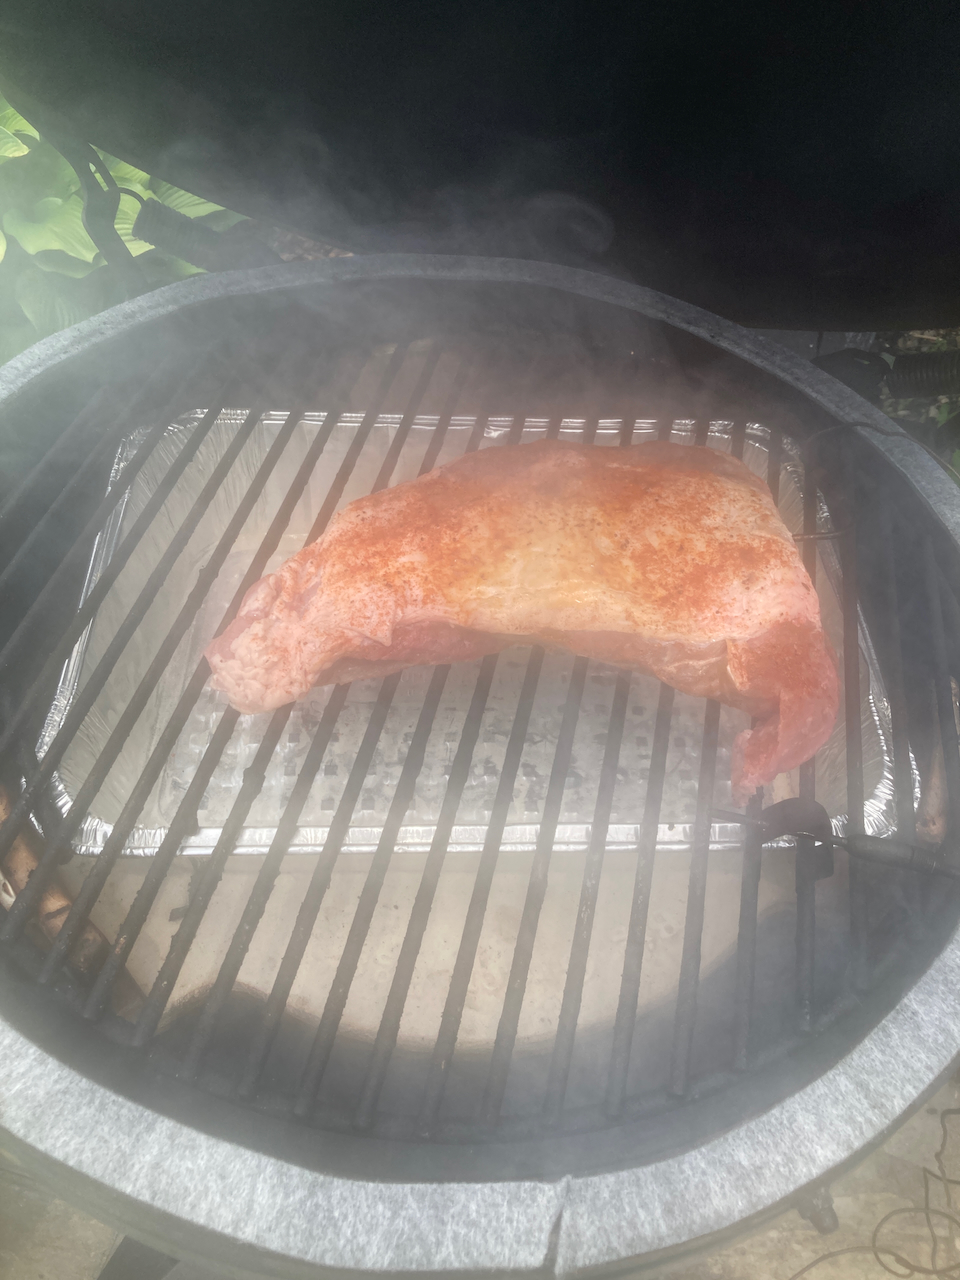
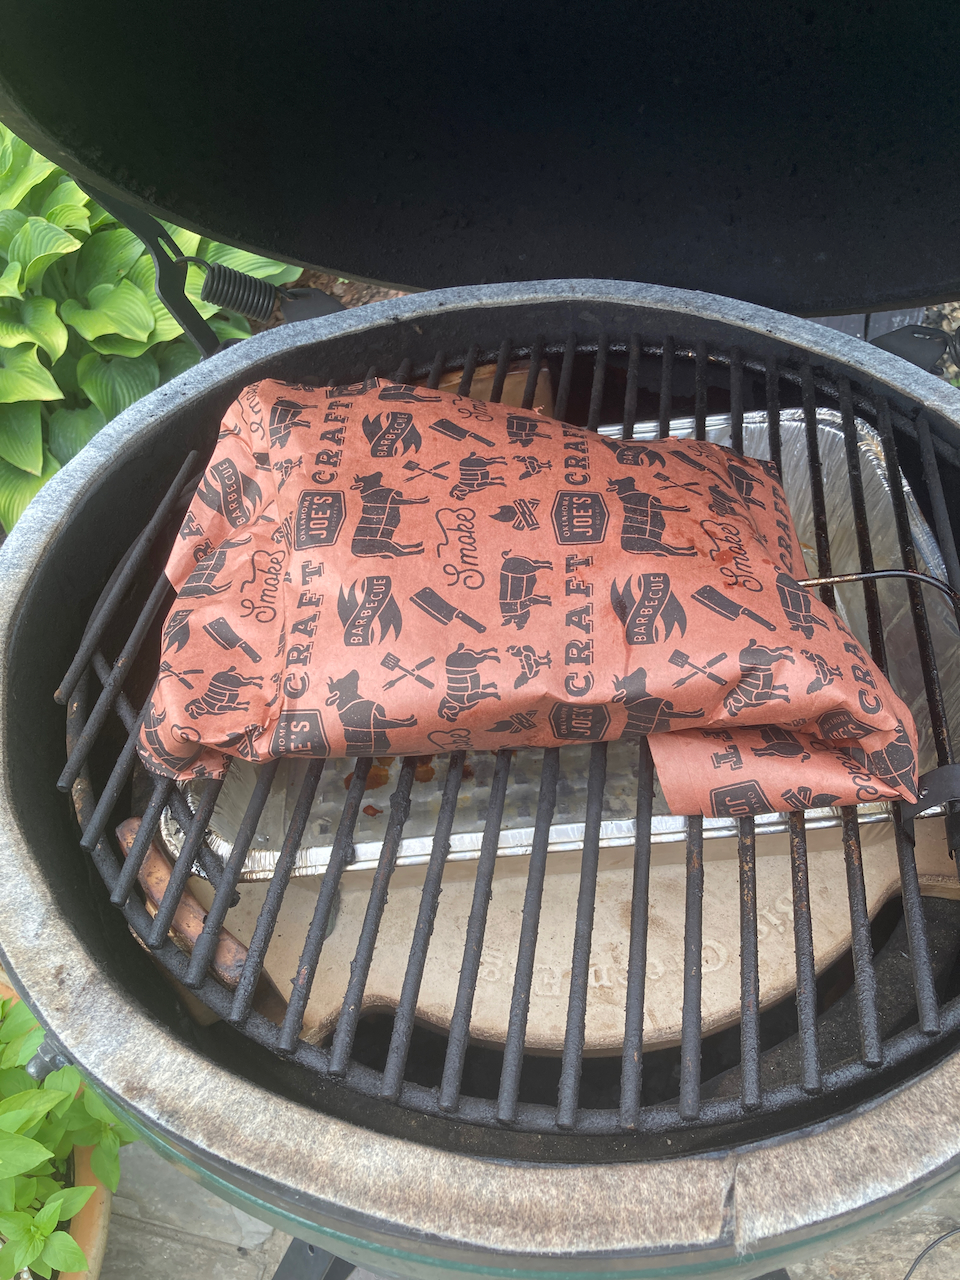
Left: Beginning the barbecue Right: Tritip wrapped in butcher paper for final cook.
At this point, sit back, have a beer or a glass of wine, and keep an eye on time and temperature. When the internal temperature reaches 150o F. or when 2 hours have past (whichever comes first), proceed as follows:
- Remove the roast from the Egg, keeping lid-open time to a minimum.
- Wrap the roast in two layers of orange butcher paper.
- Return the roast to the Egg, and with the app, increase the grill temperature to 275o F.
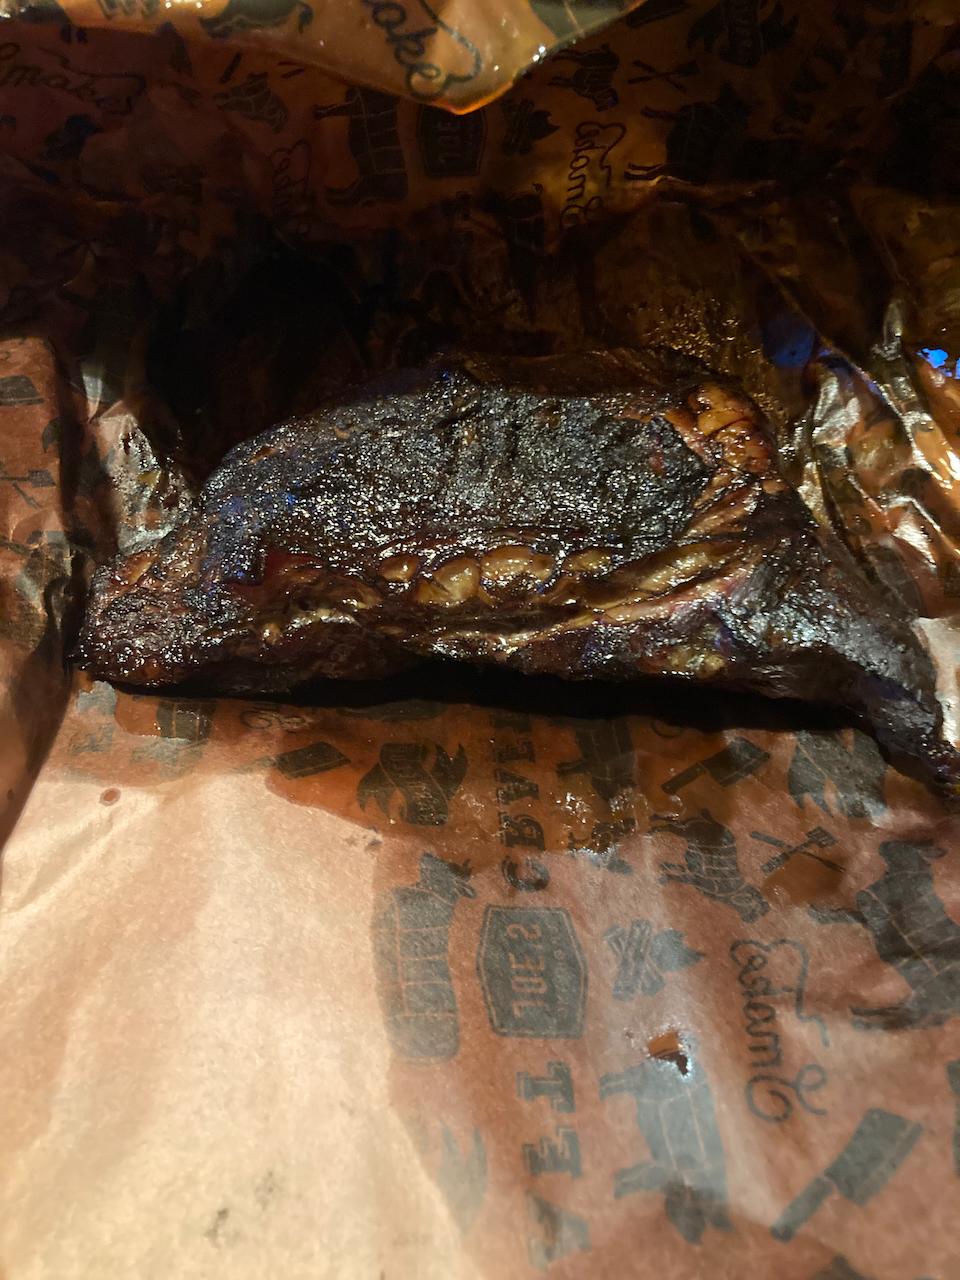
- When the roast has reached 200o F. (about 3-4 hours), remove it and let it stand wrapped for 20 minutes or so.
- Slice and enjoy!
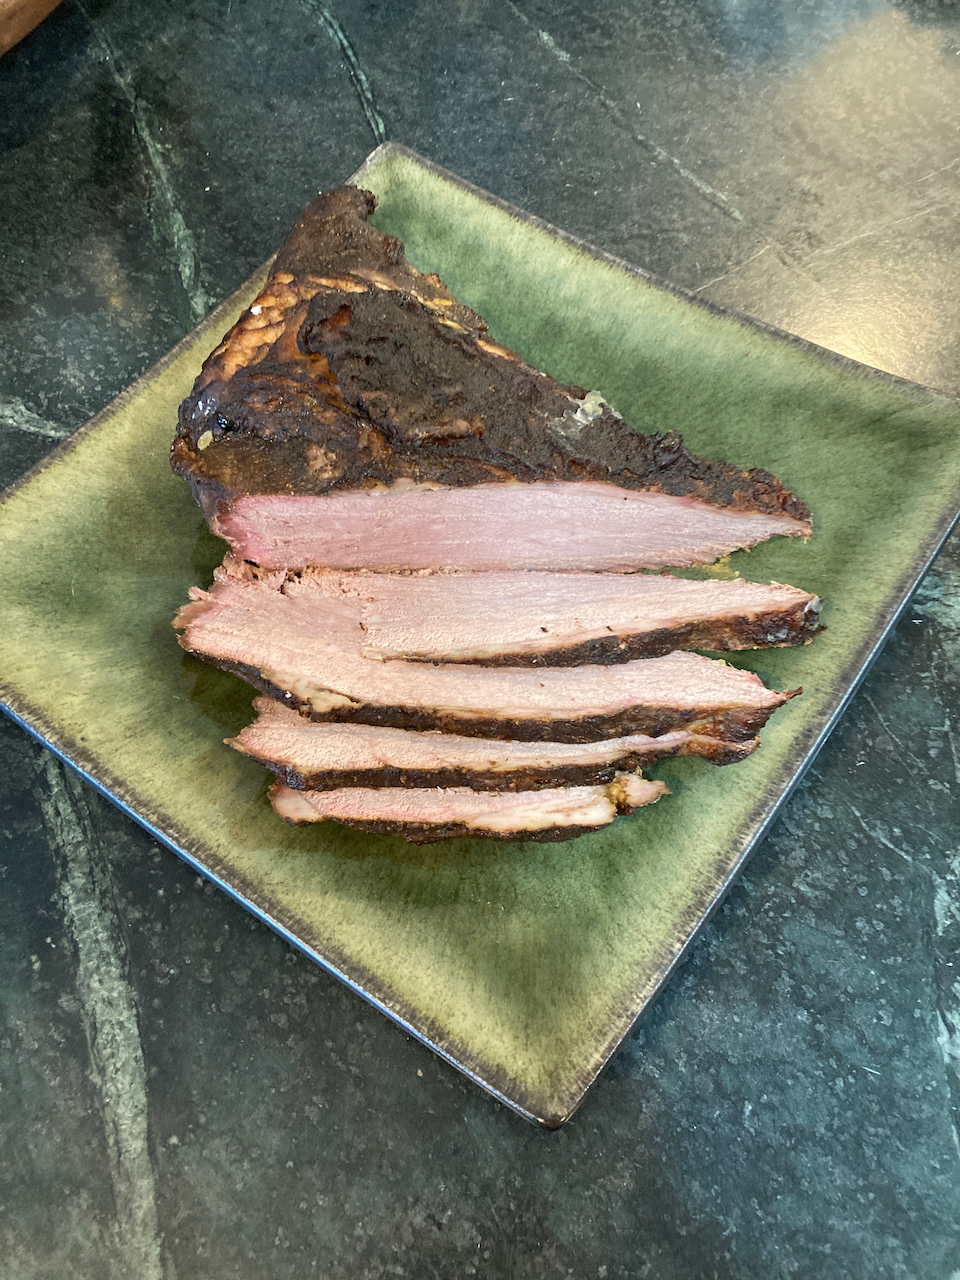
Cooked and sliced.
5.4.2 Roast beef for sandwiches
This is one that showed up in my inbox from Thermoworks. I haven’t tried it yet, but I’m betting it will work well barbecued on the grill. Note that the original recipe calls for a preliminary sear; I’m betting that smoking without the convEGGtor will get the job done.
Ingredients
1 eye round roast, 2-3 lb
kosher salt
black pepper
- The night before you cook, salt the roast generously and place in the refrigerator covered.
- Prepare your grill for low temperature smoking at 200o. You may or may not want to add wood chunks (oak or hickory).
- Rinse off excess salt, dry, and apply pepper.
- Barbecue at 200o F until internal temperature reaches 120-130o F. (lower for more rare meat, higher for more tender).
- Use your instant read thermometer to check for doneness.
- For ease of slicing, put roast in the refrigerator overnight.
5.4.3 Pork ribs
There are, of course, a variety of cuts of ribs out there - we will concentrate on “St. Louis” ribs, cooked “wet” (that is, finished with barbecue sauce). Because ribs are high in connective tissue, they need to be cook to a high enough internal temperature for the tough collagen to be converted to gelatin. We also have to overcome the “stall”, when at about 160o F. water is release from the meat and slow the temperature increase as a result of evaporative cooling.
The following so-called 3-2-1 cooking is from Hey Grill Hey, and works rather well. A rack of ribs can be ready to eat in about 6-7 hours.
Ingredients
1 rack of ribs
2 tbsp pork rub
1 cup apple cider or juice
1/4 cup dark brown sugar
2-3 tbsp butter
1/2 cup your favorite barbecue sauce*
* While I normally like hot sauces, in this case a milder tomato-based sauce works better.
- Prepare your barbecue for smoking (using the convEGGtor) with hickory wood chunks at ~200 o F.
- Pat the ribs dry and attempt to remove the membrane from the back by grasping with a paper towel and pulling. Don’t worry if you don’t get all of it - the ribs will still be fine.
- Liberally dust both sides of the rib with your favorite rub.
- Place the ribs on the grill, with an internal temperature probe in place, and grill for about 3 hours. The internal temperature should reach ~160o F.
- Place a sheet of heavy duty aluminum foil on your work surface and transfer the ribs to it, bone side up.
- Sprinkle the ribs with brown sugar, and distribute the butter as multiple pats on the surface. Raise the sides of the aluminum foil to form a boat and add the apple cider or juice.
- Wrap the foil tightly around the ribs, reinsert the internal temperature probe, and return to the barbecue. Maintain at 225 o F. for two hours.
- Unwrap the ribs and baste them on both sides with barbecue sauce. Continue cooking for one hour, flipping and basting occasionally. The final internal temperature should be 200-205o F.
5.4.4 Pig Wings
Despite the fact that we live near Cincinnati, home of the Flying Pig Marathon, these are not made from avian porcines. Rather, they are partially deboned and trimmed pork shanks, prepared with a sauce similar to traditional buffalo wing sauce. The meat may be available from a local butcher shop; online it can be had at Porter Road in Nashville (a great source of meat, but expensive, with high shipping costs). Alternatively, you may be able to get properly trimmed pork shanks from your local butcher shop.
Like brisket or pork butt, shanks are full of connective tissue that must be broken down in order to yield a properly tender result. This will occur if the meat is cooked to an internal temperature of 200o F. That processed is hastened by covering the pan containing “wings” and sauce for the second half of the cooking.
Ingredients
Pig wings (however many you want)
BBQ rub
1 onion, sliced or diced.
8 oz. butter
8 oz. hot sauce (your favorite)
Juice of half a lemon
1 tbsp. mustard powder
1/2 cup apple cider vinegar
12 oz. beer
- Prepare your smoker as you did for tri-tip. For this recipe, you want to reach a cooking temperature of 250o F. Hickory or apple wood work well for this recipe.
- Remove any excess fat and the silver skin (if any) from the wings.
- Season with BBQ rub (or with salt, pepper and garlic powder).
- Place in the smoker and cook for 1 hour, turning every 20 minutes.
- While the wings are smoking, make the sauce as follows:
- Melt the butter, add the onion, and sauté until soft.
- Add all of the remaining ingredients EXCEPT the beer and let it boil for a couple of minutes.
- Add the beer and boil for an additional 5 minutes.
- Melt the butter, add the onion, and sauté until soft.
- After the hour of cooking above, mop the wings with the sauce. Continue to cook for an additional hour or until the internal temperature reaches 180o, mopping every 20 minutes or so.
- Transfer the wings to an aluminum pan with ~1/2 inch of sauce in it. Top the wings with some of the onions from the sauce.
- Cover the pan with foil, insert an internal temperature probe into one of the wings through the foil.
- Cook until the internal temperature reaches 200o. Verify with your instant read thermometer.
- Allow wings to rest 10-15 minutes and then serve.
5.4.5 Candied Ribs/Pork Wings
This recipe comes from Thermoworks And calls for “wide ribs” - basically St. Louis ribs cut into two rib sections. It occurs to me, however, that it would also work well with pig wings. The recipe below uses “wings”; the original post describes how to process ribs.
Ingredients
pig wings
3-4 tbsp barbecue rub
barbcue sauce (as both a binder and a baste)
Rib candy* or alternative syrupy sauce (honey, maple syrup, etc.)
- The day befor cooking, brush wings with barbecue sauce and apply rub. Refrigerate overnight.
- Set up your smoker to a temperature of 225o F.
- Place the wings in the smoker with a needle probe in one and a grill temperature monitor in place.
- When the internal temperature reaches 200o F., glaze the wings with a 2:1 mixture of barbecue sauce and syrup.**
- Continue cooking for an additional hour, turning and basting occasionally. Remove and serve.
* This is a commercial product available from multiple online sources, including this one.
**having now cooked this once, I would modify it along the lines of 3-2-1 ribs,as follows
- Hook over indirect heat until the internal temperature reaches about 150o F.
- Wrap with foil or butcher paper and continue cooking, increasing the grill temperture to 275o F., until internal temperature reaches 195-200o F.
- Unwrap, baste thoroughly with sauce mixture, and continue cooking for an additional hour, turning and basting occasionally.
Total cooking time is about 6 hours, and the results are spectacular.
5.4.6 Chicken Wings
What’s not to love about chicken wings? Aside from the fact that they are messy to eat, they are very tasty, either by themselves or (as is more common) dipped in one of many different wing sauces. Of course, wings are often broiled or fried, but I have found that slow cooking on the barbecue works very well. My preference is for wings that have been sectioned prior to cooking, but that is not necessary if you prefer keeping them whole.
Ingredients
2 lb. chicken wings
barbecue seasoning of choice (salt and pepper would also work)
4 oz. hot sauce,*
3 tbsp. butter
- Prepare your grill for smoking at 220oF. I do not use wood chunks for this - the charcoal imparts plenty of flavor.
- Pat the wings dry with paper towels, and if sectioning, use game shears to separate the tips, flats, and drumettes. Discard the tips (or save them for making stock).
- Liberally apply rub.
- Place the wings on the grill, with a short needle probe inserted into the largest piece. If you have a grilling rack (see photo below), use it.
- When the internal temperature reaches 125o F., turn the wings over.
- While they are continuing to cook, melt the butter and stir in the hot sauce.
- When the internal temperature reaches 165o, remove the wings, stir in with the hot sauce mix, and serve.
* Given my western New York heritage, I am partial to Buffalo style wings. Of course there are hundreds of commercial sauces available; I actually use one I get from an Amish market in Adams County Ohio. A more widely available alternative is Tabasco Bufalo Style Hot Sauce. However, it is ridiculously easy to make Buffalo sauce from scratch. This one, from Serious Eats is excellent:
2/3 cups hot sauce (Franks works well in my hands)
1/2 cup butter
1/4 tsp Worcestershire sauce
1/4 tsp cayenne pepper (or to taste)
1/4 tsp garlic powder
1.5 tbsp white vinegar
Combine all ingredients in a saucepan and heat over low heat until the butter melts. Coat wings with sauce and enjoy. The recipe makes about enough sauce for 10-12 whole wings.
Of course there are lots of other styles of wing sauce. One that I like is Korean barbecue ribs published recently in Southern Living:
1/2 cup gochujang (available in the Asian section of most food stores or at specialty markets)
2 tbsp sesame oil
2 tbsp honey
1 tbsp peeled and grated ginger
3 cloves garlic, peeled and chopped chopped scallions
toasted sesame seeds
The recipe given calls for the wings to be marinated in the first five ingredients for an hour, after which they are cooked as described above. I’m sure this mix would also work if the wings were to be dipped in it after cooking rather than before. Either way, the scallions and sesame seeds are sprinkled on the cooked wings before serving.
Still looking for ideas? Check out this compendium of wing recipes from Epicurious.
5.4.7 Margarita Brined Chicken
This recipe was originally published in Southern Living and called for high temperature grilling. However, I found that low temperature direct grilling works extremely well. As always, I use thighs, but if you are using breast meat, simply change the pull temperature from 170o to 155o F. And it’s a great recipe to prepare for company - while on the grill it requires very little attention, so you can mingle with your friends instead of being chained to the grill.
Ingredients
1 cup water
¼ cup kosher salt
2 tablespoons light brown sugar
1 cup cold water
½ cup tequila
3 tablespoons orange zest
½ cup fresh orange juice
3 tablespoons lime zest
1 tablespoon whole black peppercorns
6 bone-in chicken pieces (thighs, drumsticks or breast halves)
2 tablespoons olive oil
teaspoon kosher salt
½ teaspoon freshly ground black pepper
6 limes, halved
Fresh cilantro for garnish
- Add water, salt and brown sugar to a saucepan and bring to a boil, stirring regularly until the sugar and salt are dissolved.
- Pour the mixture into a large bowl, let stand 10 minutes, and then add cold water, tequila, orange zest, orange juice, lime zest and black peppercorns to it.
- Submerge the chicken in the brine mixture, cover the bowl, and let it marinate refrigerated at least 6 hours or overnight.
- Set up your grill for low temperature cooking at 230o F.
- Remove the chicken and pat it dry. Discard the brine mixture.
- Brush with olive oil and sprinkle with salt and pepper. Let the chicken stand at room temperature for 20 minutes.
- Place the chicken on the grill, with a temperature monitoring probe placed in the largest of the pieces.
- Grill, turning occasionally until the internal temperatures reach 155o F. for white meat or 170 o F. for dark meat.
- For the last 5 or so minutes, grill the lime halves, cut side down.
- Place the chicken on a platter, cut the lime halves in two and place on the platter. Garnish with fresh cilantro.
5.4.8 Smoked Spatchcocked Turkey
What can be more traditional than turkey with the trimmings for Thanksgiving? As a child and as a younger adult, I had it on almost a yearly basis. Now, I only do it on the rare occasions that we have company - otherwise, I get to eat all of it myself, and leftovers do get old!
Smoke certainly adds a nice touch to the turkey, and slow cooking helps to keep the meat moist (as does dry brining the bird). The challenge is in reaching two different pull temperatures - 150o F. for white meat and 170o for dark. This is where spatchcocking - removing the backbone and pressing the bird as flat as possible - comes into play. Doing so allows heat to penetrate the bird more evenly, so that it is easier to reach a uniform pull temperature. Of course, by doing so you lose the ability to make a grand entrance into the dining room with a golden brown bird, but what is more important, image or substance?
The recipe below can be found on seriouseats.com. It is optimized for a standard kettle cooker, so if that’s what you have, you should follow their grilling instructions. For Big Green Egg cooking, we’ll make a couple of changes:
- Of course we’ll use lump charcoal, not briquets, as was recommended.
- In place of indirect cooking, we’ll use our convEGGtor.
- The original recipe calls for adding additional wood to the coals as the turkey cooks. This is, of course, very difficult to do with a convEGGtor in place, and quite frankly can result in a turkey that tastes more like wood smoke than anything else. Four chunks, well mixed into the coals, will provide smoke for about 2 hours, more than enough to flavor the bird sufficiently.
I also strongly recommend fresh turkey if available (I’ve gotten mine straight off the farm). The meat will be juicier, and if you can find it from a local farm, you will be supporting their business. I usually shoot for a 14 pound bird - smaller ones tend to dry out and larger ones are suitable only for very large families or get-togethers.
Ingredients
1 12- to 16-pound turkey
2 tablespoons (35g) kosher salt
1 tablespoon olive oil
1 tablespoon paprika
1 teaspoon smoked paprika
1/2 teaspoon freshly ground black pepper
1/2 teaspoon ground yellow mustard seeds
1/2 teaspoon ground coriander seeds
1/2 teaspoon ground cumin seeds
1/4 teaspoon ground cayenne pepper
1 teaspoon granulated garlic powder
1 teaspoon granulated onion powder
1 teaspoon ground sage
2 tablespoons (40g) light brown sugar
1 tablespoon baking powder
Preparing and dry-brining
- 1-3 days before cooking, remove the turkey’s backbone by cutting on either side of it with either poultry shears, a cleaver, or a heavy carving knife.
- Remove the wishbone with a paring knife and discard. Place the bird on a flat surface and press hard on the breast to crack the bone and flatten the bird.
- Rub the surface of the bird with olive oil.
- Mix all of the remaining ingredients (the spices) together and rub over the entire surface of the turkey. Refrigerate, covered, at least overnight and up to three days.
Barbecuing
- Prepare your grill for cooking with the convEGGtor in place, adding soaked hickory chunks and setting a smoking temperature of ~250o F.
- Place internal temperature probes into the breast and the thickest part of a thigh of the turkey.
- Place on the grill, legs pointing down, and cook until the breast temperature reaches 150o and the thigh one 165o F. This will take around three hours.
- Remove from the grill, let it rest 15 minutes, and carve.
5.4.9 Smoked Duck
If you aren’t feeding an army, a great alternative to turkey is duck. They are much smaller, realistically feeding two diners each, and they are all dark meat (a plus or minus, depending on your taste). The downside is that they are high in fat that needs to be rendered. This is where slow cooking on a barbecue is great - most of the fat is rendered during cooking and can be discarded afterwards (or used for cooking other dishes - duck fat is considered a delicacy by many. Also, like turkey, duck is considerably improved by dry brining over night prior to cooking.
This recipe, from Hey Grill Hey is relatively straightforward to prepare, and if cooked on a charcoal grill, is excellent. Note that I did try it once in the oven (weather was too bad for outdoor cooking, even for me) and the results were, to put it mildly, disappointing
Ingredients
For Brining
1 ~5 lb. duck
1/3 cup kosher salt
For Barbecuing
2 small oranges, halved
1/2 cup orange juice
1/2 cup maple syrup
- The night before cooking, discard the neck and giblets of the duck, pierce the skin all over (the tip of an instant read thermometer works well for this), and sprinkle the kosher salt all over it. Refrigerate for up to 15 hours.
- Prepare your grill for smoking (with convEGGtor) at 275o F., using apple chunks for smoke.
- Stuff the orange halves into the cavity of the duck. If they don’t all fit, juice any left over to add to the basting liquid.
- Smoke the duck to an internal temperature of 160o F., a time of about 2.5 hours, basting periodically with the combined orange juice and maple syrup. The probe should be inserted into the breast.
- (Optional) When the duck is cooked, if the skin is not sufficiently crisp for your taste, place it under a broiler for 2-3 minutes.
- Let the duck stand for 15 minutes. Carve and serve.
5.4.10 Smoked Salmon
Salmon is probably the most widely consumed fish in America today. In truth, however, it is not exactly my favorite. EXCEPT when it is fresh caught pacific salmon (as in at a dockside restaurant in Seattle) or it is smoked Pacific salmon (I’ve never tried smoking Atlantic varieties). These include sockeye (the most commonly found), coho, and (for a luxury treat) king salmon. A few years ago I ventured forth on smoking my own, and actually came up with a recipe that drew rave reviews at a party, including from my old friend Lee, who is an avid fisherman and pretty much a go to expert on cooking fish.
A couple of points before we begin. First, this is one place in which the wood used for smoking really matters. And alder is definitely the way to go. It may be a bit hard to find, but it is worth the hunt. And in addition, since the cooking time is relatively short (1-2 hours), I recommend chips rather than chunks. The will generate a lot of smoke right away and will be burned out by the time cooking is complete.
Second, the overnight dry brining is critical. The spices in the brine add some flavor, but what is most important is that the salt acts to dehydrate the fish and remove some of the more unpleasant fishy flavor.
Finally, temperature control here is tricky. The grill temperature used, 160o F., is the lowest of any we use in this book. A few tips may help:
Keep the amount of charcoal and wood to a minimum.
Just as soon as the flame from the starter dies down, add the smoking wood and set up your Billows device set to 160o F. If you do not have one, turn both vents down to the smallest possible openings.
Even if the grill temperature does drift upwards, as long as you monitor the internal temperature and pull the fish when it hits 135o F., you will have an excellent piece of fish to share with friends.
Note that I have only used this for Pacific Salmon, which tends to be more expensive than Atlantic salmon and is sometimes hard to find. Some day I’ll smoke a piece of Atlantic fish just to see how it turns out.
This recipe comes from Delishably and is optimized for Big Green Egg cooking. My only bone to pick with the recipe is the pull temperature - they recommend 160o F.; to me, that makes the fish overly dry and, if anything, too flaky.
Ingredients
1 pacific salmon filet, 1-1.5 lb.
1 cup brown sugar
1/2 cup Kosher salt
2 cloves garlic, chopped
1 tsp grated ginger
1/2 tsp ground black pepper
2 bay leaves, crumbled
- Pat the fish dry and place it in a glass baking dish.
- Combine the remaining ingredients and apply them to both sides of the fish.
- Cover the dish with aluminum foil and refrigerate overnight.
- The next morning, remove the fish from the pan and rinse very thoroughly.
- Pat it dry and return it to the refrigerator for about an hour.
- About 45 minutes after you return the fish to the refrigerator, prepare your grill for smoking, with the convEGGector in place. You will want to place an aluminum drip pan on its surface.
- When the coals are going and the wood added, insert a needle probe into the fish and place it on the grill. Close the grill and leave it closed! There is no need to do anything to the fish while it is smoking.
- When the internal temperature reaches 135o F., remove the fish to a platter and let it cool.
This is, of course, best served as an appetizer with some sort of lightly salted and flavored crackers. It will keep in the refrigerator for at least a week.