6 Instant Pot
OK, so we succombed, partly because I was intrigued, and partly because Alice wants to explore cooking beans in one. So we bought and Instant Pot® Pro, and have been exploring it for the last few months.
6.1 Basics
Most of the recipes below employ the basic pressure cooking function of the device. A couple of general thoughts:
- They are incredibly safe - not like the stovetop pressure cookers of bygone days.
- Pressure cookers require steam, and steam requires water. Thus, be sure what you’re cooking has at least 3/4 cups of clear liquid prior to starting. Otherwise, you run the risk of getting the dreaded “burn” notice.
- Pay attention to the instructions in recipes for the steam release. During a natural release, the food will go on cooking. Sometimes this is fine, but otherwise it can be disastrous (for example slow release of a pasta dish will result in mush.
- There is a large and active Instant Pot® facebook group, and the books and recipes of Jeffrey Eisner are a common subject. I’ve looked at some of his stuff, and while the basics (preparation, cook times, etc.) are well covered, in general I find the recipes themselves to be rather plain. And as you should recognize by now, plain food is not my specialty.
So read on for some suggestions.
6.2 Meat
6.2.1 Pork Carnitas
The recipe linked to above is great, but it could probably use a little more flavor. Hence, I went web surfing to see what I could find and came up with this one, from an excellent source, Amy and Jacky. I’ve left in the fruit juices from the original recipe and have omitted the chicken stock from the Amy and Jacky version.
Ingredients
boneless pork butt or shoulder, 2.5-3 lb., cut into 2 inch cubes
4 garlic cloves, crushed
1 onion, chopped
1 tsp ground cumin
1 tsp cinammon
1/2 tsp. ground pepper
2 bay leaves
1 cup freshly squeezed orange juice, from 3 oranges
1/4 cup lime juice, from two limes
1 tbsp soy sauce
1 jalapeno pepper, seeded and chopped
- Combine all of the ingredients in the instant pot and let the meat marinade for at least 20 minutes.
- Pressure cook on high for 30 minutes.
- Do a natural release for 15 minutes, after which you can do a quick release of the remaining steam.
- Remove the pork from the IP spread on a sheet pan lined with foil.
- (optional) Brown the meat either by baking at 425 for 10 minutes or so, flipping the meat half way through (It might also work in your Micropro). Baste the meat with a little of the cooking fluid both at the beginninng and when you flip the meat.
- Shred the meat with two forks.
- Use as a taco filling or as filling for a pulled pork sandwich. Adding good salsa or pico de gallo (and anything else you think of) adds a lot.
6.2.2 Birria Tacos
I found this first on Thermoworks and then subsequently for the IP on Amy and Jacky. The seasonings are quite similar, so here is the second version
Ingredients
~3 lb chuck roast or other similar cut of beef
2 tbsp. oil
3 dried ancho chiles
3 dried guajillo chiles
1 New Mexico dried chile
1 dried chile de árbol or morita chile
1 sliced onion
6 garlic cloves, chopped
2 bay leaves
1/2 cinammon stick or 1/2 tsp. ground cinammon
2 tsp oregano
1.5 tsp. ground cumin
1 tsp. ground coriander
2 tsp. tomato paste
2 cups chicken or beef stock
2 tbsp apple cider vinegar
1 tbsp. soy sauce (optional)
1 tbsp. fish sauce (optional)
For assembly
corn tortillas
Mexican cheese blend
diced onion
cilantro, chopped
lime slices
- Remove stems and seeds from all chiles and then chop into pieces.
- Place peppers in IP an press sauté. Toast for 4-5 minutes until you can smell the chiles. Remove and set aside.
- Place 1 tbsp. oil into IP. Season meat with salt and pepper and sauté until browned. Remove and set aside.
- Add more oil to the IP and add the onions. Sauté for 3-5 minutes and then add garlic, bay leaves, cinammon, oregano, cumin, coriander, and tomato paste. Sauté for an additional 1-2 minutes.
- Remove mixture from IP. Add 1 cup of chicken stock and deglaze.
- Ad vinegar, soy sauce, fish sauce, and another cup of chicken stock to the IP. Submerge all toasted chiles, add the onion mixture, and layer the beef on top.
- Close the lid, set on sealing position.
- For chuck roast, pressure cook on high for 50 minutes, followed by natural release for 15 minutes,
- Remove the meat to a bowl; discard the cinammon stick and bay leaves.
- Blend the sauce with an immersion blender and shred the meat with two forks. Add it back to the pot.
For serving, there are a few possibilities:
- Serve it in a bowl with some melted cheese, cilantro and onion sprinkled on top.
- Serve over rice.
- Serve in tortillas. For this:
- Dip a tortilla in the birria sauce, cover with mexican cheese, and fry until the cheese melts.
- Add birria meat, fold, and serve.
I bet this could be done in the Micropro just fine!
6.2.3 Pulled Pork
Made this a couple of times in Geneva; not like smoked but a lot easier.
6.2.4 Arroz con Pollo
A Jeffrey Eisner recipe that I have reduced by half
Ingredients
1 tbsp of olive oil
2 tbsp (1/4 stick) of butter
Pinch of saffron 1/2 medium yellow onion, diced
1/2 red bell pepper, diced
1/2 tbsp of crushed garlic
1. lbs of chicken thighs (boneless & skinless preferred), cut into bite-sized pieces
2 links of Chorizo, sliced into 1/4″ discs
1/2 cup of a dry white wine 1 cups of chicken broth
2 Roma tomatoes, chopped
7 oz of Goya Arroz Amarillo/Yellow Rice (plain rice is fine as well)
Juice of 1 lime
1 tsp of dried parsley
1 tsp of smoked or regular paprika
1/2 tsp cumin
1 tsp chili powder
- Set your IP for saute and melt the butter and oil.
- Add the saffron and sauté for 30 seconds.
- Add the onions and peppers and sauté for 3 minutes,
- Add the garlic and sauté for an additional minute.
- Add the chicken and chorizo, followed by the paprika, parsley and chili powder. Cook stirring, for three minutes until the chicken is evenly seared.
- Add the white wine and simmer for a minute. Then add the broth, lime juice and tomatoes.
- Once it is bubbling, add the rice and submerge without stirring.
- Cancel the sauté cycle, close the lid and pressure cook for 10 minutes, followed by a quick release.
- Stir the rice and let sit for 10 minutes before serving.
6.2.4.1 Notes
- This was good using the yellow rice called for, however I think I’ll try plain basmati rice next time - the yellow rice was too salty for my taste.
- It came out a bit soupy using the liquid called for above. Some may prefer it that way, but I like mine drier. Accordingly I reduced the chicken broth to 1 cup from the original 1.25 cups.
6.2.5 St Louis Ribs
Again, probably can’t compare to smoked ribs, but ease of prep might win out. And we might want to look at some of our other recipes and see if they could be adapted.
6.2.6 Deli-style Roast Beef
6.2.7 Korean Short Ribs
Thermoworks has a grill recipe.
6.2.7.1 Notes
- The Thermoworks version is excellent.
- These cook very quickly - 5-10 minutes on a 425o F. grill is sufficient. In fact, it might be easiest to grill them over hot coals with the lid open.
- When I get a fire basket with a divider, I’ll try cooking them over the direct side and then transferring them to the indirect side when they reach ~160o F.
6.2.8 Lamb Rogan Josh
This is a dish that I’ve always enjoyed but have had limited success with cooking it. Penzey’s sells a spice mix that makes for fairly easy preparation, but my results have been so-so. However, Indian Instant Pot® Cookbook by Urvashi Pitre came to the rescue. This book contains recipes for most standard Indian favorites, but uses ingredients that are by and large easy to find and work with. I recommend it highly.
The following is simple and excellent.
Ingredients
1 medium sized onion, diced
4 cloves garlic, minced
1 inch ginger root, peeled and minced
1/4 cup plain yogurt (whole milk if you can find it)*
2 tbsp tomato paste
1 tsp half sharp paprika
1 tsp garam masala*
1 tsp salt
1/2 tsp turmeric
1/2 tsp cinnamon
1/4 tsp ground nutmeg
1/2 tsp cayenne or pepper flakes
3/4 cup water, divided
1 lb. lamb stew meat
- Combine all of the ingredients except the lamb and 1/2 cup of the water in a small bowl.
- Add the lamb and stir to get it evenly coated. Marinate for 2 hours to overnight.
- Place the mixture in the inner pot of your Instant Pot®. Add the additional 1/2 cup of water and pressure cook on high for 20 minutes.
- Allow natural release to occur for 10 minutes, and then vent the remaining steam and remove the lid. If the sauce seems too thin, set IP to sauté and cook for a few minutes until the desired consistency is reached.
* So far I’ve achieved excellent results using all storebought ingredients. However, the book contains recipes for both garam masala and IP yogurt. Both recipes seem straightforward.
6.2.9 Beef Bourguignon
I’ve made this for years on the stove top, based on the recipe in The Joy of Cooking. Amy and Jacky’s version (see link) is somewhat similar. What follows is a hybridization of the two.
Ingredients
1 slice bacon*
1 onion, sliced
1-2 lbs. stew beef
1 medium onion, chopped
1/2 tsp salt
1 bay leaf
1/2 tsp thyme
3/4 cup red wine
1 tsp tomato paste
1/4 + 1/4 cup water
1 tbsp flour
- Set your IP on sauté and press start
- While it is coming to temperature, fry the bacon until most of the fat is rendered. Remove the bacon, let it cool, and then crumble it.
- Season the beef with salt and pepper, and sauté in the bacon fat until browned.
- Remove the meat, and sauté the onions for ~5 minutes.
- Add the wine and 1/4 cup of water to the pot and deglaze carefully,
- Add the salt, thyme, bay leaf, bacon, and tomato paste to the pot and mix thoroughly.
- Add the beef and seal the pot.
- Pressure cook on high for 30 minutes, followed by 10 minutes of natural release.
- Mix the flour and remaining 1/4 cup of water thoroughly.
- Set the pot on sauté and bring mixture to a simmer.
- Stir in the flour and water and continue to simmer until the sauce has thickened.
- Serve over rice or fettucine
*If you don’t wish to use bacon, use a couple of table spoons of olive oil for the sautéing.
NOTE: This is a pretty stripped down version of the recipe; many others include carrots and mushrooms. If you wish to do so, you should follow Amy and Jacky’s method and pressure cook the meat and vegetables separately, combining at the end.
6.2.10 Pepper Steak
There are two good recipes for this one (a stir fry) from [The New York Times(https://cooking.nytimes.com/recipes/1024320-pepper-steak){target=“_blank”} and one for the IP from Jeffrey Eisner. I’m going to try the Times version first, perhaps adding the sesame oil and/or Hoisin sauce called for in the Eisner version.
6.3 Rice
6.3.1 Mexican Rice
Again, I’ve made this in Geneva, sautéing some chorizo first to make it a meal.
6.3.2 Basmati Pilau
This is another recipe from Pitre - a fairly simple Indian spiced rice. I’ve adopted a suggestion she had in another recipe (for Lamb Biryani) by calling for broiling the onions rather than frying them.
Ingredients
3-4 green cardamom pods
6-8 black peppercorns
4 whole cloves
2 inch piece cinammon stick
1 tbsp ghee or other cooking oil
1/2 tsp cumin seeds
1 thinly sliced red onion
1 tsp salt
1 cup basmati rice
1.5 cups water
- Rinse the rice in a strainer until the water runs clear. Set aside.
- Spread the onions on a foil lined baking sheet. sprinkle with salt and drizzle with a little oil. Broil for about 15 minutes, until brown and crisp.
- Combine the cardamom, cinnamon, peppercorns and cloves in a spice bag or infuser.
- With the IP set on sauté, heat the oil or ghee. Add the cumin seeds and cook for about 30 seconds, until they sizzle and become aromatic.
- Add the onions, followed by the water, rice and spice bag.
- Pressure cook on high for 5 minutes, followed by a 10 minute natural release.
6.3.3 Jambalaya
The above is an IP version; Paul Prudhomme has an excellent stove top version. Prudhomme’s recipe calls for tasso ham (and Thermoworks has a recipe for making it), however I prefer to use good quality andouille sausage.
So below is a hybridization of the two, which turned out extremely well for me.
Ingredients
Spice mix (for 1 cup rice)
1 bay leaf
1-2 tsp cayenne pepper
1 tsp salt
1.5 tsp white pepper
1 tsp dried thyme
1/2 tsp black pepper
1/4 tsp sage
Other Ingredients
2 tbsp butter
1/2 lb andouille sausage
3/4 lb boneless chicken thighs
1 chopped onion
1 cup celery (I omit)
1 cup chopped green pepper
3 cloves garlic, mixed
1 cup tomato sauce
2 roma tomatopes, chopped
1 cup chicken broth
1 cup long grain rice (Basmati)
- Combine all of the spices in a small bowl.
- Set the IP to sauté and add the oil, chicken, and sausage . Cook 3-5 minutes until the chicken is lightly browned.
- Remove the sausage and chicken chicken and drain on paper towels.
- Add the onions, peppers and celery and sauté until soft.
- Add the spice mix and garlic and cook for an additional 1-2 minutes.
- Press cancel, and then add the remaining ingredients except the rice. Stir gently.
- Add the rice, making sure it is submerged, but do not stir.
- Pressure cook on high for 10 minutes, followed by 5-10 minutes of natural release.
- Remove lid, stir, and serve.
6.3.3.1 Notes
I found this to be absolutely delicious. When I first opened the pot, it was a bit soupy, but I left it on “keep warm” with the vent on the lid open for about 20 minutes, and it was fine. That was with five minutes of natural release; I may try a little more in the future.
I used 1.5 teaspoons of cayenne, resulting in a very hot jambalaya. I like it that way, but if you prefer milder flavoring, reduce the amount of cayenne accordingly.
Shrimp always tastes good with jambalaya, but pressure cooking would destroy it. This recipe recommends sautéing some prior to cooking everything else and then adding it back after the release is complete, allowing it to sit on “keep warm” for five minutes to warm it up. Alternatively, you could quickly grill some shrimp after the jambalaya has reached the “keep warm” stage, perhaps using this recipe
Ingredients
shrimp (as many as you need - I’m going to try about six 16/20, with tails on)
1/2 cup butter 2-4 cloves garlic, minced
1 tbsp. cajun seasoning
1 tbsp. lemon juice (juice of 1/2 lemon) salt to taste
- Soak wooden skewers for 30 minutes, enough for 3-4 shrimp per skewer.
- Ignite your grill and let it heat to 450o F.
- Combine everything except the shrimp in a saucepan. Bring to a simmer and then remove from heat.
- Brush one side of the shrimp with marinade and refrigerate for 2 minutes.
- Turn the shrimp over and repeat.
- Grill the shrimp until they are opaque - about 2 minutes per side.
- Brush on any remaining marinade and add hot shrimp to the jambalaya.
- Serve immediately.
6.4 Pasta
6.4.1 Cooking Pasta
6.4.4 Penne alla Vodka
6.4.5 Cacio e pepe
I’ve done this one on the stovetop, using this recipe from Wine Spectator, twice. The first time came out great, the second time not so much. Here’s how I’m going to try it next:
Ingredients
1/2 lb. pasta (spaghetti is traditional, but I like shaped pasta like mini-shells or somesuch)
2 cups chicken broth
4 tbsp butter, halved
1/4 cup grated Pecorino Romano cheese
1/4 cup grated Parmesan cheese
1/2-1 tbsp coarsely (and preferably freshly) ground black pepper
- Pour the chicken broth into the IP and layer pasta over it. If using spaghetti or (recommended) bucatini, break the pasta in half prior to layering.
- Place two tablespoons of butter on the top.
- Select pressure cook at high temperature and cook for 5 minutes (an initial guess based on rules for IP pasta cooking.
- Quick release.
- Add the remaining butter and stir until melted.
- Stir in the cheese until melted.
- Add the black pepper, stir, and serve
6.4.5.1 Notes
I made this (using water instead of broth), and it tasted fine but was a little too soupy for my taste. Next time I will try reducing the amount of broth and perhaps adding a bit more cheese. However, the pasta cooked beautifully. It was bucatini, with a recommended stove top cook time of 10-12 minutes. I gave it five minutes on high pressure, followed by immediate release of pressure. Stay tuned as I fool with this one.
6.5 Other Stuff
6.5.1 Yogurt
Let me be clear at the outset - while I cook with it I don’t eat it. Hence, I will leave it to others to comment on flavor. Below is my first attempt, based on both a recipe from Pitre’s Instant Pot® Indian cookbook and other suggestions from a variety of online sources (such as this one).
There are two protocols for fermenting yogurt, dubbed “cold start” and “hot start”. In the cold start method, one starts with ultrapasteurized milk, the kind that will keep for months without spoiling. Since it has already been completely sterilized, there is no need to heat it to a high temperature prior to initiating fermentation. On the other hand, the hot start method is for regular old homogenized milk, which does need an initial sterilization step. So which to use? Both have tradeoffs, to wit:
Cold Start is simpler - just dump and go. However, the cost of the milk per quart is about double that of regular milk.
Hot Start uses cheaper milk, but does require initial heating to 180o F, followed by cooling prior to inoculation. Thus, it takes longer to complete.
Ingredients
1 quart whole milk
1 packet of yogurt starter*
Hot Start
- Add milk to inner pot. Select the yogurt cycle set to high and press start.
- When the pot reads “boil” check the temperature of the milk. It should be ~180o F. The pot should turn off after a few minutes; when it does, remove the lid and let the milk cool to < 110o F.
- Remove the film from the surface of the milk by dragging a fork through it.
- Add 1 tbsp yogurt starter culture or 2 tbsp of a previous batch and mix briefly.
- Set yogurt cycle to Low and press start. Time should auto set to 8 hours, and milk will be held at 110o F. I typically set mine to 9 hours, but that’s personal preference.
- Put glass lid or pressure lid on venting on and let incubate. Yogurt is done when it moves as a solid mass.
- Place in refrigerator over night. For Greek style, place it in a strainer lined with cheesecloth or a coffee filter over a bowl.
- In the morning, whisk it until smooth and place in a storage container. For Greek style, place it in a strainer lined with cheesecloth or a coffee filter over a bowl and let it strain 1-2 hours. Reported refrigerator shelf life is two weeks.
* It is possible to start with commercial yogurt, assuming is says “live culture” or somesuch on the package, but I initiallydecided to buy a dehydrated starter from Amazon. Subsequently I’ve been able to keep this going like sourdough starter, making a new batch every week or so.
Cold start
- Place 1 quart of ultrapastured milk into the pot.
- Add either dried yogurt started or 2 tbsp. active culture yogurt. Stir briefly.
- Press the Yogurt button and select “Low” and the desired incubation time (again, I find 9 hours to be optimal).
- Follow steps 7 and 8 of the hot start method.
6.5.1.1 Notes
So which method is better? I’ve tried both, and in truth I got the best results with a cold start. Yes, the milk is more expensive per volume, but I found that, when buying milk by the half gallon, I usually ended up throwing away the second quart. So, all in all the cost evens out, thus making the convenience of cold start the determining factor.
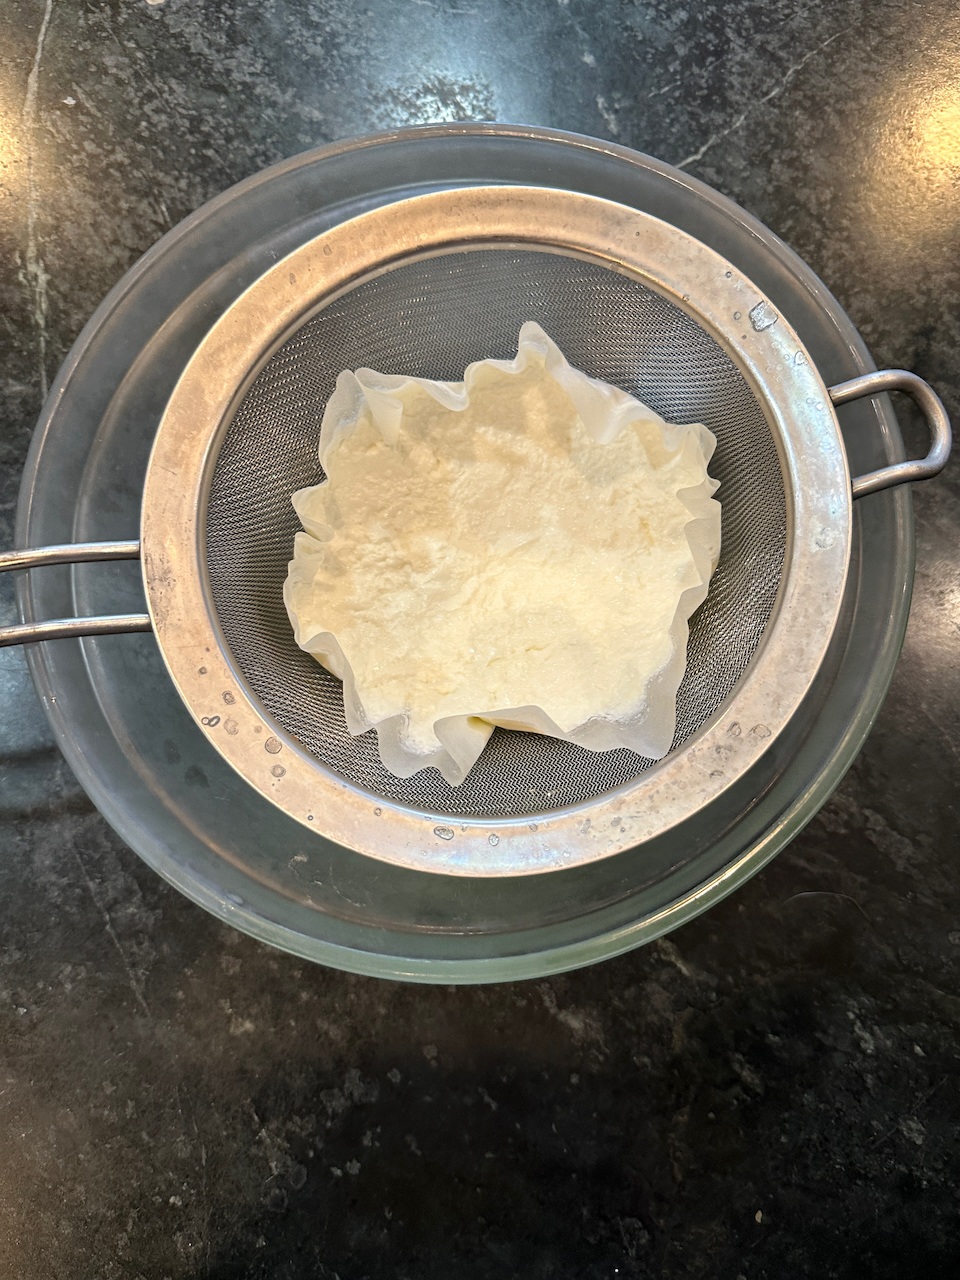
The results after being drained through a coffee filter overnight
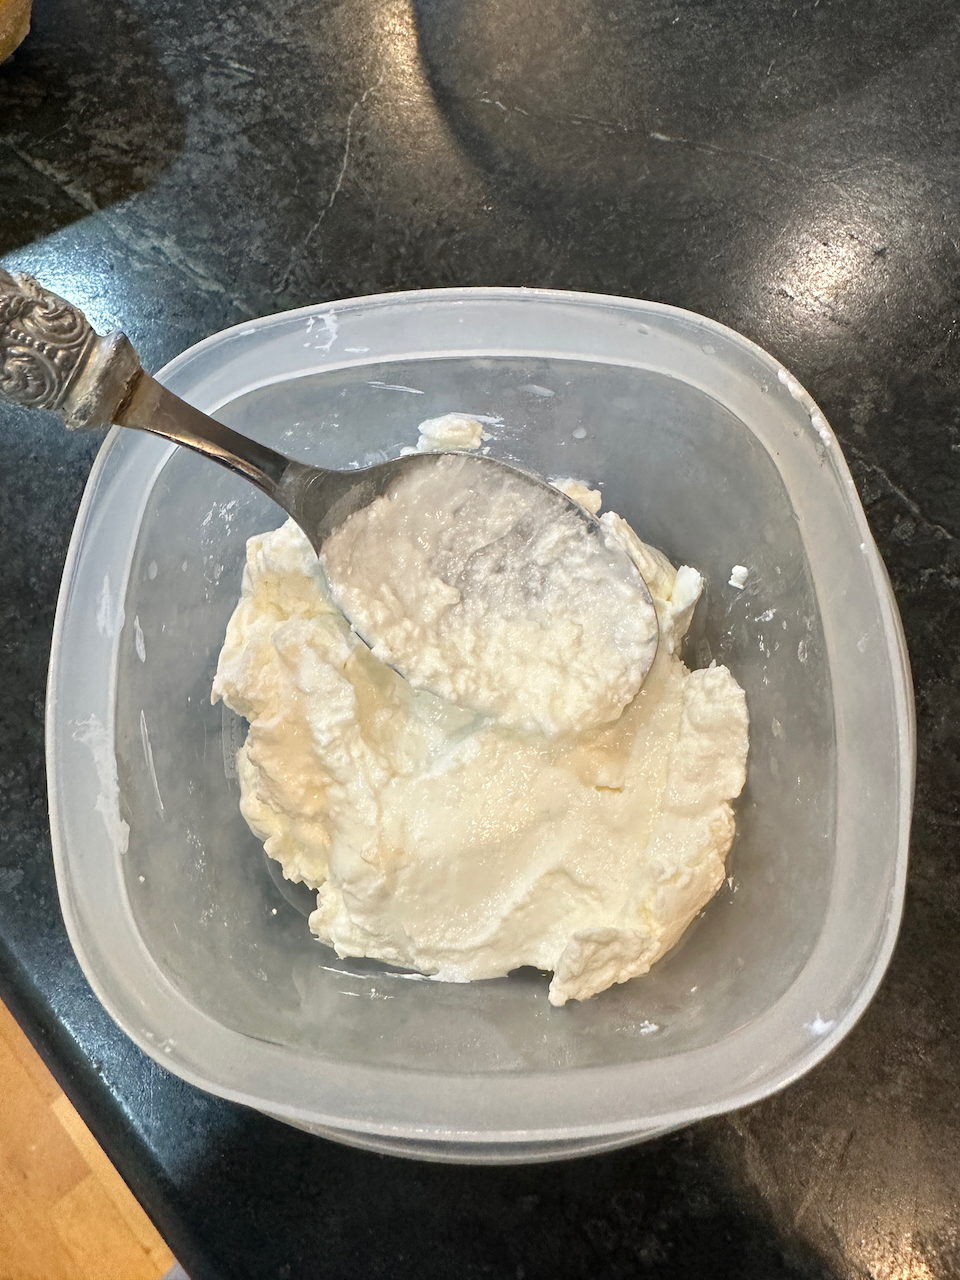
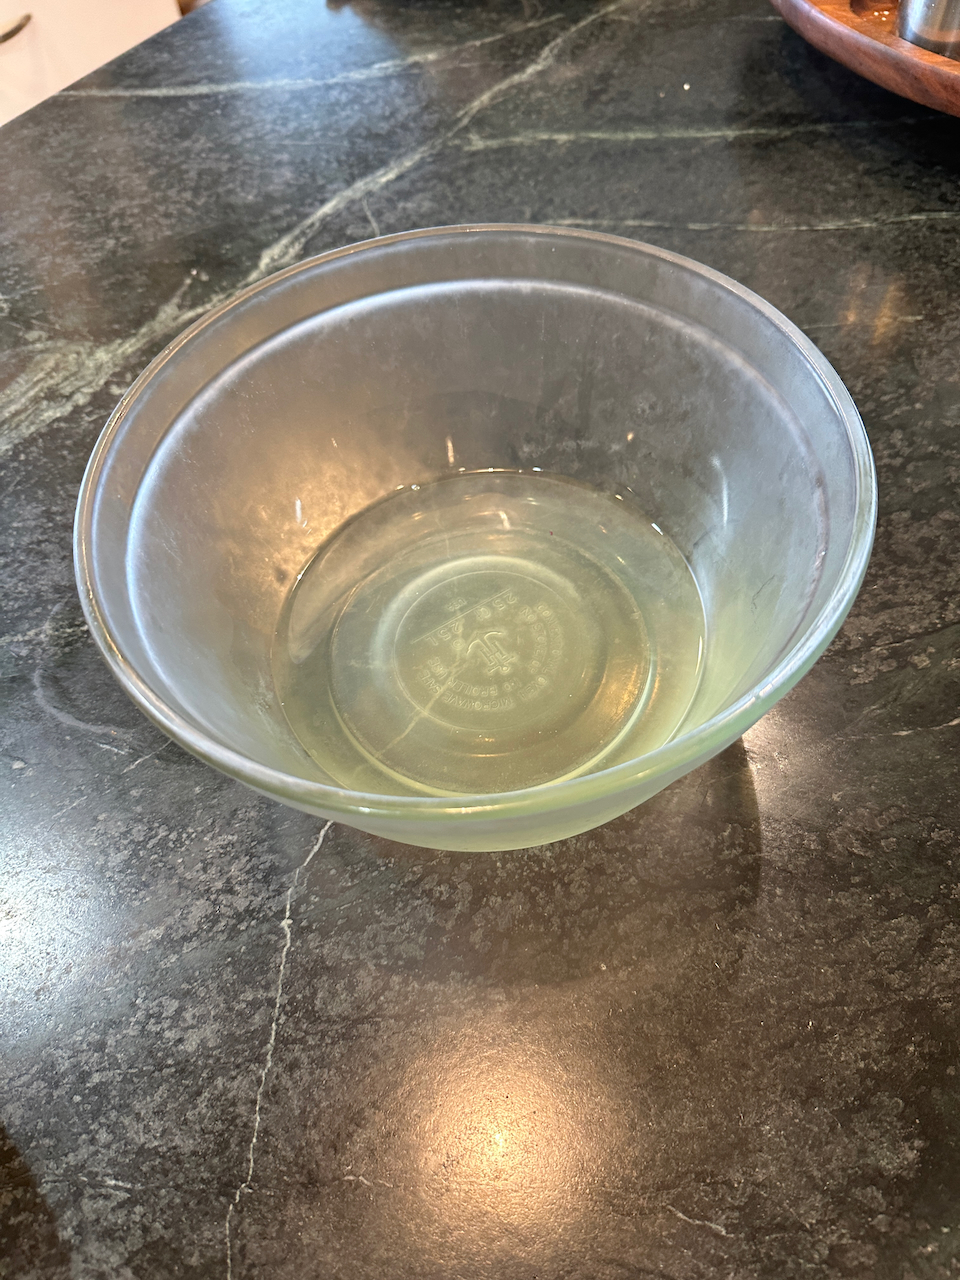
The separated results - greek yogurt on the left and whey on the right. If a thinner yogurt is desired, some of the whey can be whipped into it prior to use.
6.5.2 Chocolate Cheese Cake
OK, I certainly don’t need to eat cheesecake, and in the past it was easy to avoid making, largely because it usually fails. However, I couldn’t resist trying in the Instant Pot®, based on glowing internet comments. Well, I finally succumbed to tempation and tried this recipe.
Ingredients
10-20 double stuffed oreos*
2 packages Philadelphia Cream Cheese
1/2 cup sour cream
3 tbsp sugar
2 tbsp unsweetened cocoa powder
2 eggs
4 oz. melted semi-sweet or dark chocolate
1 tsp vanilla
For optional topping
1/2 cup chocolate chips
1/2 cup heavy cream
- Be sure that all ingredients are at room temperature
- Pulverize the oreo cookies (complete with creme) in a food procesoe and pack them into the base of a lightly oiled 7 inch springform pan. Place in the freezer until ready to fill.
- Whip the cream cheese in a stand mixer until fluffy.
- Add sugar and mix until it is just combined.
- Add sour cream and mix briefly.
- Add the melted chocolate, vanilla, and cocoa powder and mix by hand until combined.
- Ad the eggs and mix in, doing so as little as possible.
- Pour the filling into the crust.
- Cover the crust with aluminum foil.
- Place the trivet into your IP, along with 1 cup of water. You may also want to make a “sling” out of folded aluminum foil, that can be used to remove the cooked cheesecake.
- Place the pan into the IP, seal, and pressure cook on high for 35 minutes, followed by a natural release.
- When the pot can be opened, carefully remove the cheesecake from the IP.
- Keeping the foil cover in place, allow it to cool to room temperature.
- Refrigerate overnight, and then remove from the springform pan and enjoy.
*The original recipe calls for 20 cookies, but I found that to be a bit obsessive.
NOTES
When I went to make this the first time, I discovered I was low on sugar, so I reduced it from the 6 recommended tablespoons to three. I was still delicious.
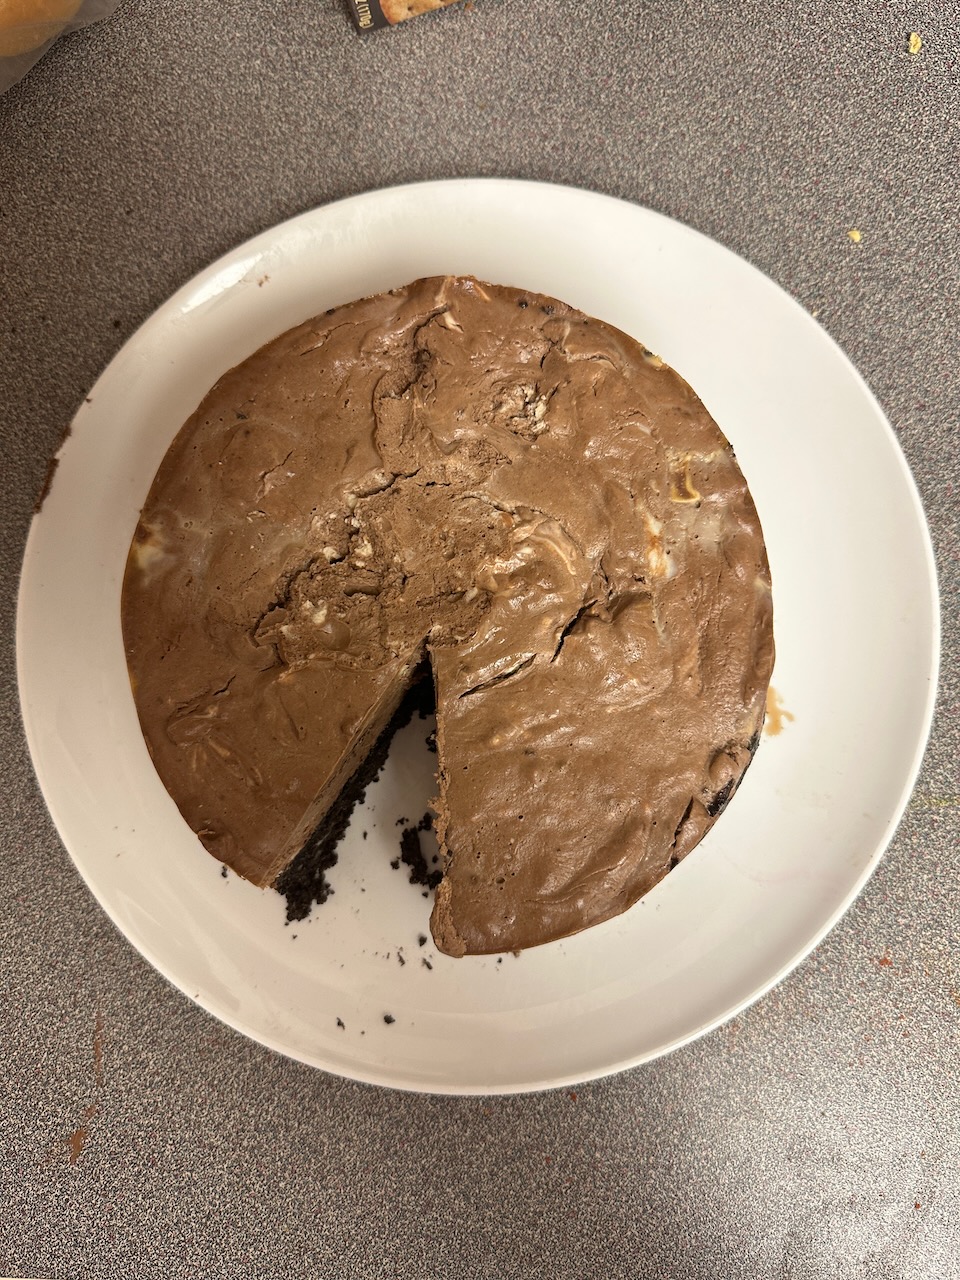
After cooking overnight, this cheesecake was irresistible.