Publishing Jupyter Notebooks
You must install the rsconnect-jupyter notebook extension and configure your Posit Connect account before attempting to publish from Jupyter Notebook. See the Connecting - Jupyter Notebook section for details.
Publishing
Open the notebook you wish to publish.
Click the blue publishing icon in the notebook toolbar. If the icon is not present, ensure that the plugin is installed and enabled by following the instructions in the rsconnect-jupyter User Guide.

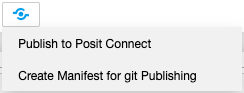
Select Publish to Posit Connect to open the Publishing window.
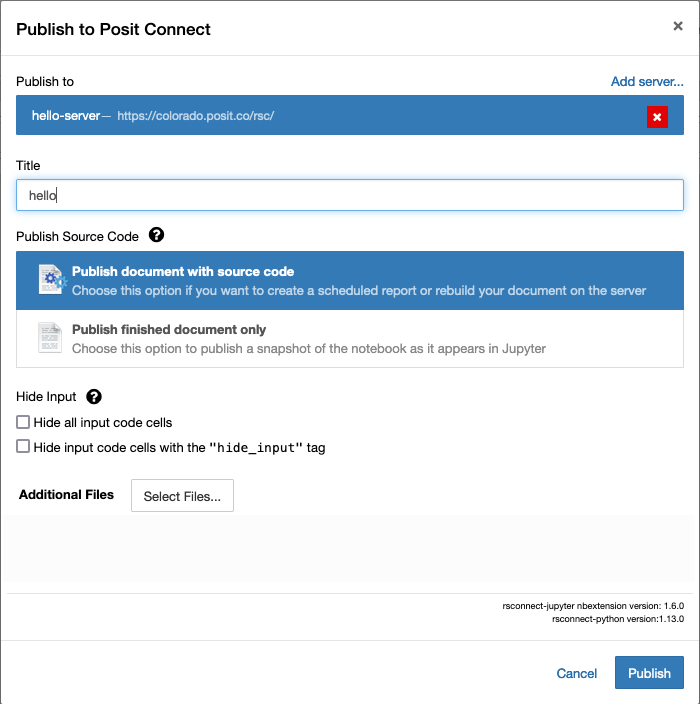
There are two different publication modes:
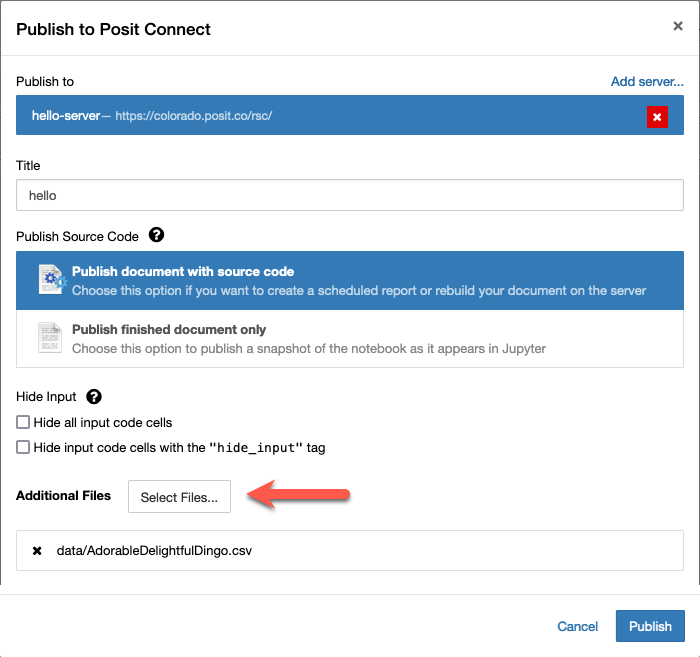
If you select Publish document with source code, the notebook file and a list of the Python packages installed in your environment will be sent to Posit Connect. This enables Posit Connect to recreate the environment and re-run the notebook at a later time.
Selecting Publish finished document only will publish an HTML snapshot of the notebook to Posit Connect. HTML snapshots are static and cannot be scheduled or re-run on the Posit Connect server.
This plugin is only for notebooks using Python kernels. Therefore, R notebooks cannot be published using this plugin.
Environment detection with pip
The list of packages sent along with the notebook comes from the python environment where the notebook kernel is running. For environment inspection to work, the rsconnect-jupyter package must be installed in the kernel environment; that is, the environment where the ipykernel package is installed. In most cases that will be the same as the notebook server environment where jupyter is installed.
The command pip freeze will be used to inspect the environment. The output of pip freeze lists all packages currently installed, as well as their versions, which enables Posit Connect to recreate the same environment.
Handling conflicts
If content that matches your notebook’s title is found on Posit Connect, you may choose to overwrite the existing content or create new content.
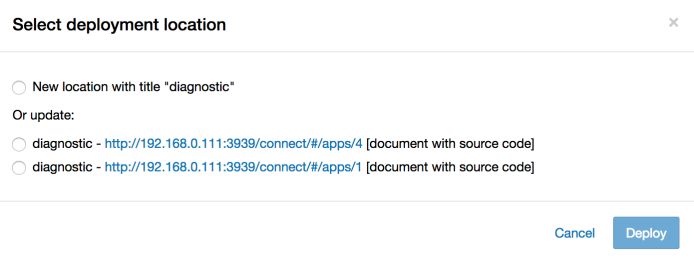
- Choosing New location creates a new document in Posit Connect.
- You can choose either publication mode:
- an HTML snapshot or
- a document with source code
Updating an existing document will not change its publication mode.
Upon successful publishing of the document, a notification will be shown in the toolbar.
Clicking the notification will open the published document in the Posit Connect server you selected in the previous dialog.
Publishing Options
Hide Input
There are two options for hiding input code cells in Jupyter Notebooks published to Posit Connect:
- Hide all input code cells
- Hide only selected input code cells
To hide all input code cells, make that selection in the Publish dialog under the Hide Input section.
To hide only the tagged cells, first enable Tags in the View > Cell Toolbar menu:
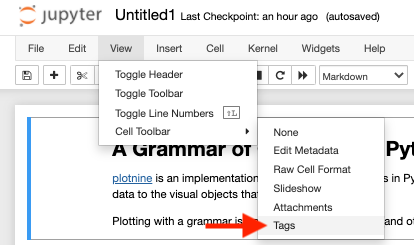
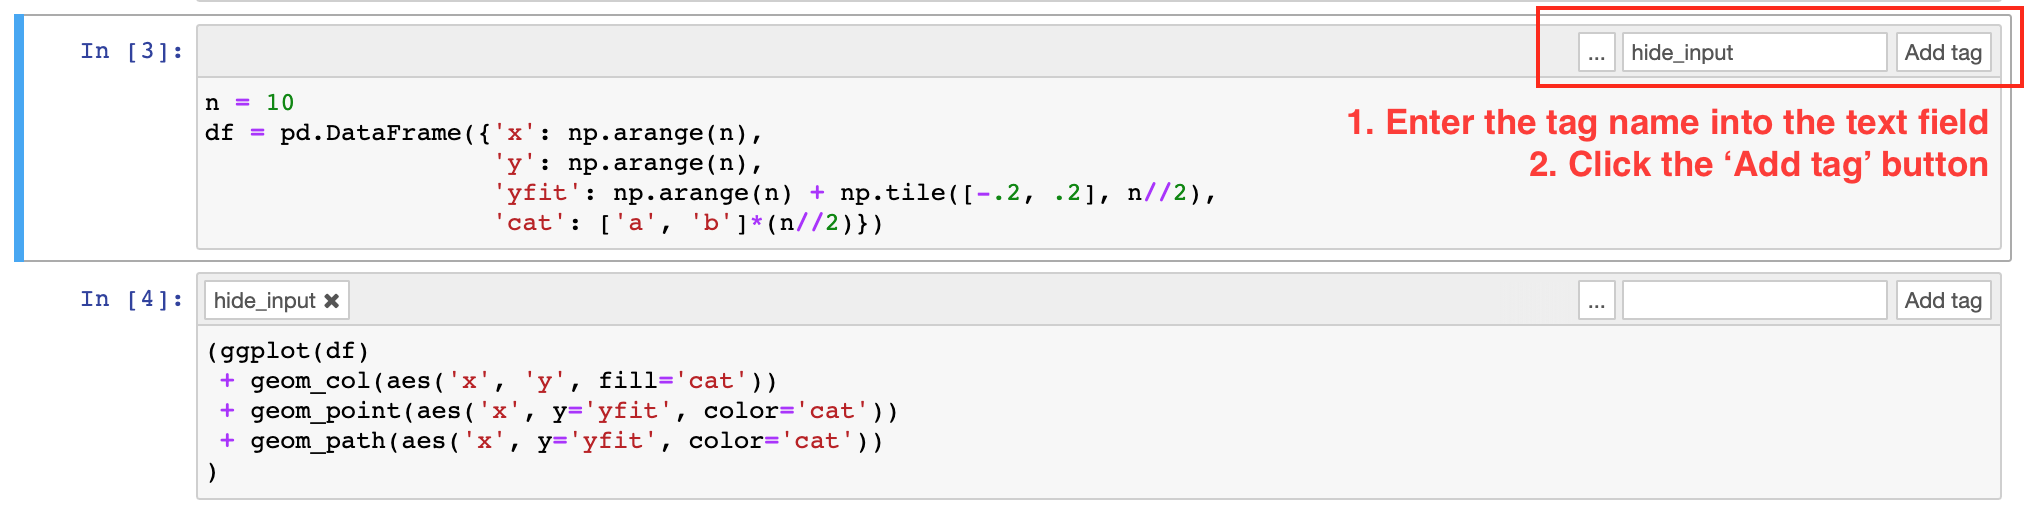
Once enabled, tag each cell where you would like to hide the input code. The tag must be named hide_input:
Enter
hide_inputinto the text field.Click Add tag to apply the tag to a code cell.
Additional Files
If your notebook needs some external file to render, add the file using the Select Files… button. You can select any file within the notebook folder. However, these files may not be made available to users after render.
Generating Manifests for git Publishing
Posit Connect can poll git repositories for deployable content and update as you add new commits to your repository. To be deployable, a directory must have a valid manifest.json. Python content should also have some kind of environment file (i.e.: requirements.txt) to be able to restore the package set in your current environment.
To begin, click the Publish button and select Create Manifest for git Publishing.
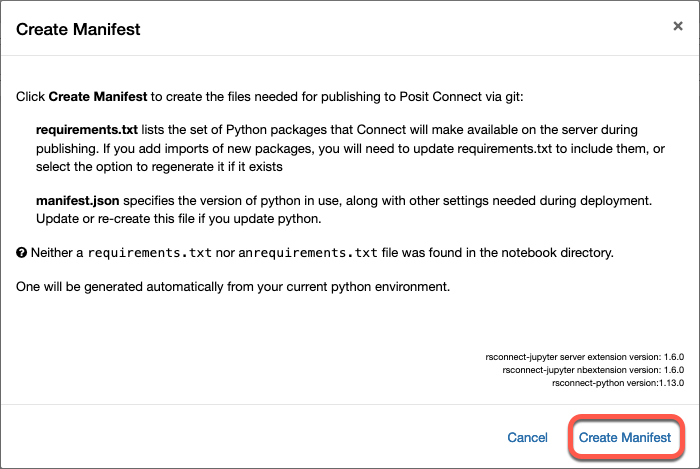
When you click Create Manifest, one of the following will happen:
If a
manifest.jsonor arequirements.txtfile does not exist, one will be generated for the current notebook using your current environment.If either file exists, you will be presented with a message informing you of this fact. If you need to regenerate the files, delete them in the Jupyter UI or using the console, then repeat this process.
For more information on git publishing, see the Git-Backed Content section.