7 Web Scraping in R
After working through Tutorial 7, you’ll…
- know how to scrape the content of websites in R
To do so, remember the steps of scraping you learned about in the last tutorial:
Identify the URL of the website you want to scrape
Download its content
From downloaded data, separate „junk“ from relevant data
7.1 Identify URL of website
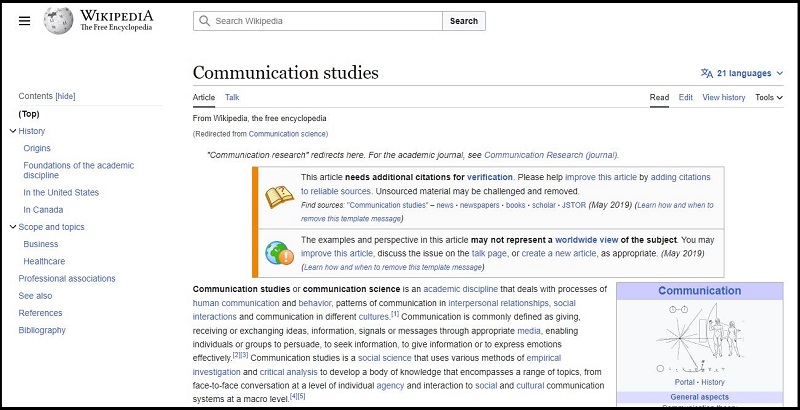
Let’s again take the Wikipedia page on “Communication studies” as an example: https://en.wikipedia.org/wiki/Communication_studies
This is how the website looks like in my browser:
Image: Wikipedia page
Now, look at the underlying code (click on the right, then choose “View Page Source” or “View Source” depending on your computer/browser).
Image: Wikipedia page Source Code

To be sure that we can scrape the website, take a look at Wikipedia’s “robots.txt” file here.
7.2 Download website content
To download the source code, we download and activate two packages:
While rvest allows us to scrape and parse content, polite assures that we adhere to “good behavior” while doing so. With polite, we can…
- tell website owners who we are
- respect which website content we are (not) allowed to scrape
- time our scraper so that we do not constantly hit websites with our scraping requests
Next, we use the bow() command polite to “introduce” us to the website and see whether we can scrape it:
session <- bow(url = "https://en.wikipedia.org/wiki/Communication_studies",
               user_agent = "Teaching project,
               Valerie Hase,
               Department of Media and Communication,
               LMU Munich")
#Result
session
## <polite session> https://en.wikipedia.org/wiki/Communication_studies
## User-agent: Teaching project,
## Valerie Hase,
## Department of Media and Communication,
## LMU Munich
## robots.txt: 456 rules are defined for 33 bots
## Crawl delay: 5 sec
## The path is scrapable for this user-agentWhen inspecting the result, we can see that we are allowed to scrape this website. However, we should wait for 5 seconds in-between scraping requests.
We now use the scrape() command to implement these rules while scraping the website:
Important: If the url object is empty (i.e. NULL), it may be that you are not allowed/cannot scrape this website.
7.3 Identify relevant HTML elements
Remember the third part of scraping: separating „junk“ from relevant data. Now this is actually the hardest part. From the long HTML code, how do we find (and keep) relevant data?
The solution: We have to identify the right selector (e.g., an element, a class, an attribute) and retrieve it via html_element (retrieves the first match) or html_elements (retrieves all matches).
The following Table gives you a small overview of common commands for retrieving selectors based on this great, more detailed overview by T. Gessler. The W3 school also has a great overview here.
| Command | Example | Meaning |
|---|---|---|
html_elements(element) |
html_elements(p) |
retrieves all elements p |
html_elements(element, element) |
html_elements(div, p) |
retrieves all elements div and p |
html_elements(element element) |
html_elements(div p) |
retrieves all elements p inside div |
html_elements(.class) |
html_elements(.article) |
retrieves all elements with class article |
html_elements(element.class) |
html_elements(p.article) |
retrieves all p elements with class article |
html_elements(element) %>% html_attr(attribute) |
html_elements(a) %>% html_attr(href) |
retrieves all links within elements a |
html_elements(element) %>% html_attr(attribute) |
html_elements(img) %>% html_attr(src) |
retrieves the source of all images within elements img |
To find the right selector, you can…
- use SelectorGadget to automatically find the right selectors
- manually inspect the source code to find the right selectors (only choose this option if using SelectorGadget does not work)
To install SelectorGadget, click on this link. Install the Chrome Extension (link at the end of the website, search for “Try our new Chrome Extension”). For a more detailed instruction of how the tool works, see here.
After installing the extension, the following sign should appear in your browser (if it does not, you may have to “pin” the extension first to make it visible).
Image: Installing SelectorGadget

Activate the extension by clicking on it. Then, hover over the part of the website you want to scrape to find the correct selector.
Here, note that SelectorGadget uses different colors when you search for selectors:
- green for all elements that you actively selected, i.e., that should be retrieved
- red for all elements that you actively deselected, i.e., that should not be retrieved
- yellow for all elements that match the selector (and thus will, together with green elements, be retrieved)
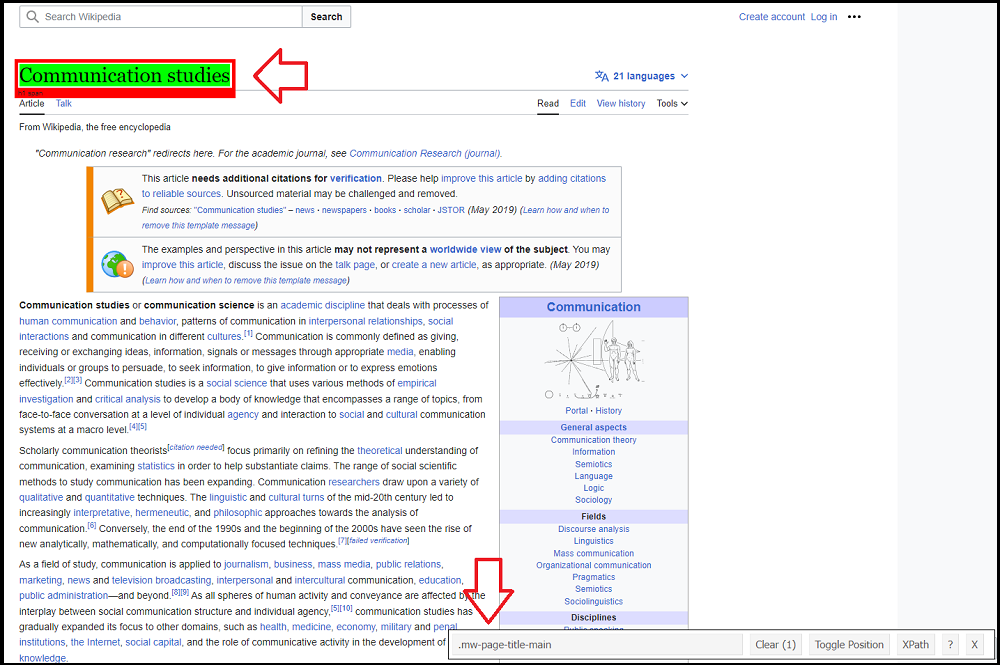
7.3.1 Example 1: Get website title
For example, let’s say I want to extract the title of the website. Using the SelectorGadget, we can see that Wikipedia has defined its own class for the title: .mw-page-title-main.
Image: Using SelectorGadget
Using the html_elements function from rvest, we now only keep relevant content:
## {xml_nodeset (1)}
## [1] <span class="mw-page-title-main">Communication studies</span>
Great, but we only want the content within span, not all “junk” around it.
To clean our data, we can now use the html_text() command:
## [1] "Communication studies"7.3.2 Example 2: Get subheadings
Let’s try another example: Let’s say we want to extract all subheadings.
We already know that subheadings are often indicated by h1, h2, etc., so we use this information to retrieve all headings from h1 to h6. We can combine selectors like so:
##  [1] "Contents"                                     "Communication studies"
##  [3] "History[edit]"                                "Origins[edit]"
##  [5] "Foundations of the academic discipline[edit]" "In the United States[edit]"
##  [7] "In Canada[edit]"                              "Scope and topics[edit]"
##  [9] "Business[edit]"                               "Healthcare[edit]"
## [11] "Professional associations[edit]"              "See also[edit]"
## [13] "References[edit]"                             "Bibliography[edit]"
7.3.3 Example 3: Get article text
Let’s try another example: Let’s say we want to text of the article.
We are not sure where to find it, which is why we use SelectorGadget:
Image: Using SelectorGadget
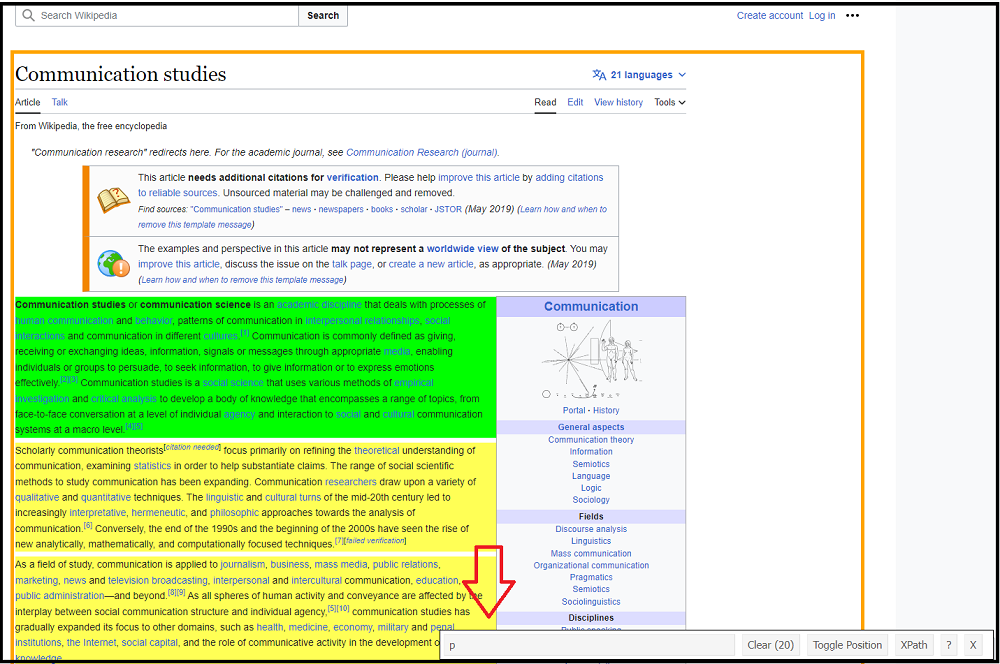
Using this information, we then include only relevant info:
If you look at the output, you see that this worked (although the text is a bit messy and probably needs some more cleaning).
7.3.4 Example 4: Get links
One last example: Let’s say we want to extract all links included in the main text (something also discussed in the context of “crawling”, i.e., identifying links to follow on websites to identify further content).
- We know that these links are inside the main text within the element(s)
p - We know that links are usually included within the element
a - We know that links are saved as attributes
hrefwithina
Combining the html_elements() and the html_attr() commands, we can now get all links:
## [1] "/wiki/Academic_discipline"        "/wiki/Human_communication"        "/wiki/Human_behavior"
## [4] "/wiki/Interpersonal_relationship" "/wiki/Social_interaction"         "/wiki/Culture"
These are all links to other Wikipedia pages (i.e., internal links), which is why they do not start with “https” etc.
7.4 Automate the process
Oftentimes, you may want to automate your scraping process, for example by additionally taking screenshots of websites or writing a timer that automatically runs your scraping script every x-th minute.
7.4.1 Using pagedown to take screenshots
For example, you may need PDF screenshots of webpages to understand what content was shown how where. To automate this process, you can use the pagedown package.
Using chrome_print(), you can take screenshots. Just define the URL via input and the file name for the resulting screenshot via output
Important: Usually, these screenshots are not perfect. You often have to include some “waiting” time via the wait argument so the website can fully load before you take a screenshot. Some hosts also use automated means of disallowing automated screenshots.
7.4.2 Using taskscheduleR to run tasks
For example, you may not wish to manually run the R script every hour to see how a news page changes. To automate this process, packages like taskscheduleR offer great a solution.
Using taskscheduler_create(), you can tell your computer to run a scraping script automatically. Just define the task name via taskname and tell R which script to run via rscript. Next, well R that you want to run the script every 5 minutes via schedule and modifier.
💡 Take Aways
- introduce your scraping agent:
bow() - scrape website:
scrape() - parse content:
hmtl_elements(),hmtl_attr(),hmtl_text() - screenshots:
chrome_print() - automate script execution:
taskscheduler_create()
📚 More tutorials on this
You still have questions? The following tutorials & papers can help you with that:
- Automated Data Collection with R: A Practical Guide to Web Scraping and Text Mining by S. Munzert, C. Rubba, P. Meißner, & D.Nyhuis
- Webscraping and the Text Analysis Pipeline by T. Gessler
- Computational Methods in der politischen Kommunikationsforschung by J. Unkel, Tutorial 14 and 15 9
- HTML Tutorial by W3 School as well as CSS Tutorial by W3 School
📌 Test your knowledge
You’ve worked through all the material of Tutorial 7? Let’s see it - the following tasks will test your knowledge.
Task 7.3
For the “front page” article (i.e., the first article on the page), can you identify its headline and the link to the article?
This is where you’ll find solutions for Tutorial 7.