Chapter 14 ESRI and Leaflet
14.1 An overview of ESRI
Alright. If you are a GIS practitioner, you have probably heard about ESRI, one of the world’s leading geospatial software and services provider. You (might) have also come across various ESRI basemap servers, such as ESRI topographic, ESRI streets and ESRI Imagery layers. They also have plugins that allow Leaflet users to access the ArcGIS functionalities. For example, the ESRI plugins for Leaflet allow you to access some ESRI basemaps and products, while also allowing you to become an ESRI ArcGIS JavaScript developer.
To use ESRI Leaflet, you have to create an ArcGIS Developer account and also get an API key. Kindly do so before proceeding.
14.2 ESRI Leaflet plugins
As we had mentioned earlier, you need ESRI Leaflet plugins to experience all the ArcGIS functionalities possible with your Application Programming Interface (API) key. Remember your map.html file? To experience Leaflet in ESRI, add the following <script> tags to the <head> element of your map.html file.
<!-- Load Esri Leaflet from CDN -->
        <script src="https://unpkg.com/esri-leaflet@3.0.10/dist/esri-leaflet.js"></script>
        <script src="https://unpkg.com/esri-leaflet-vector@4.0.2/dist/esri-leaflet-vector.js"></script>
Create a new JavaScript file called esri_leaflet.js and get ready to enjoy ESRI services!
14.3 Creating an ESRI Leaflet map
On your blank esri_leaflet.js file, create a variable to store your API Key. This key is important to access your ESRI benefits, much like the magic phrase “Open Sesame” which would open a doorway to a cave full of treasures in the legendary story of Ali Baba and the Forty Thieves!
Below is an example of how to access your API key from your ArcGIS Developer account.
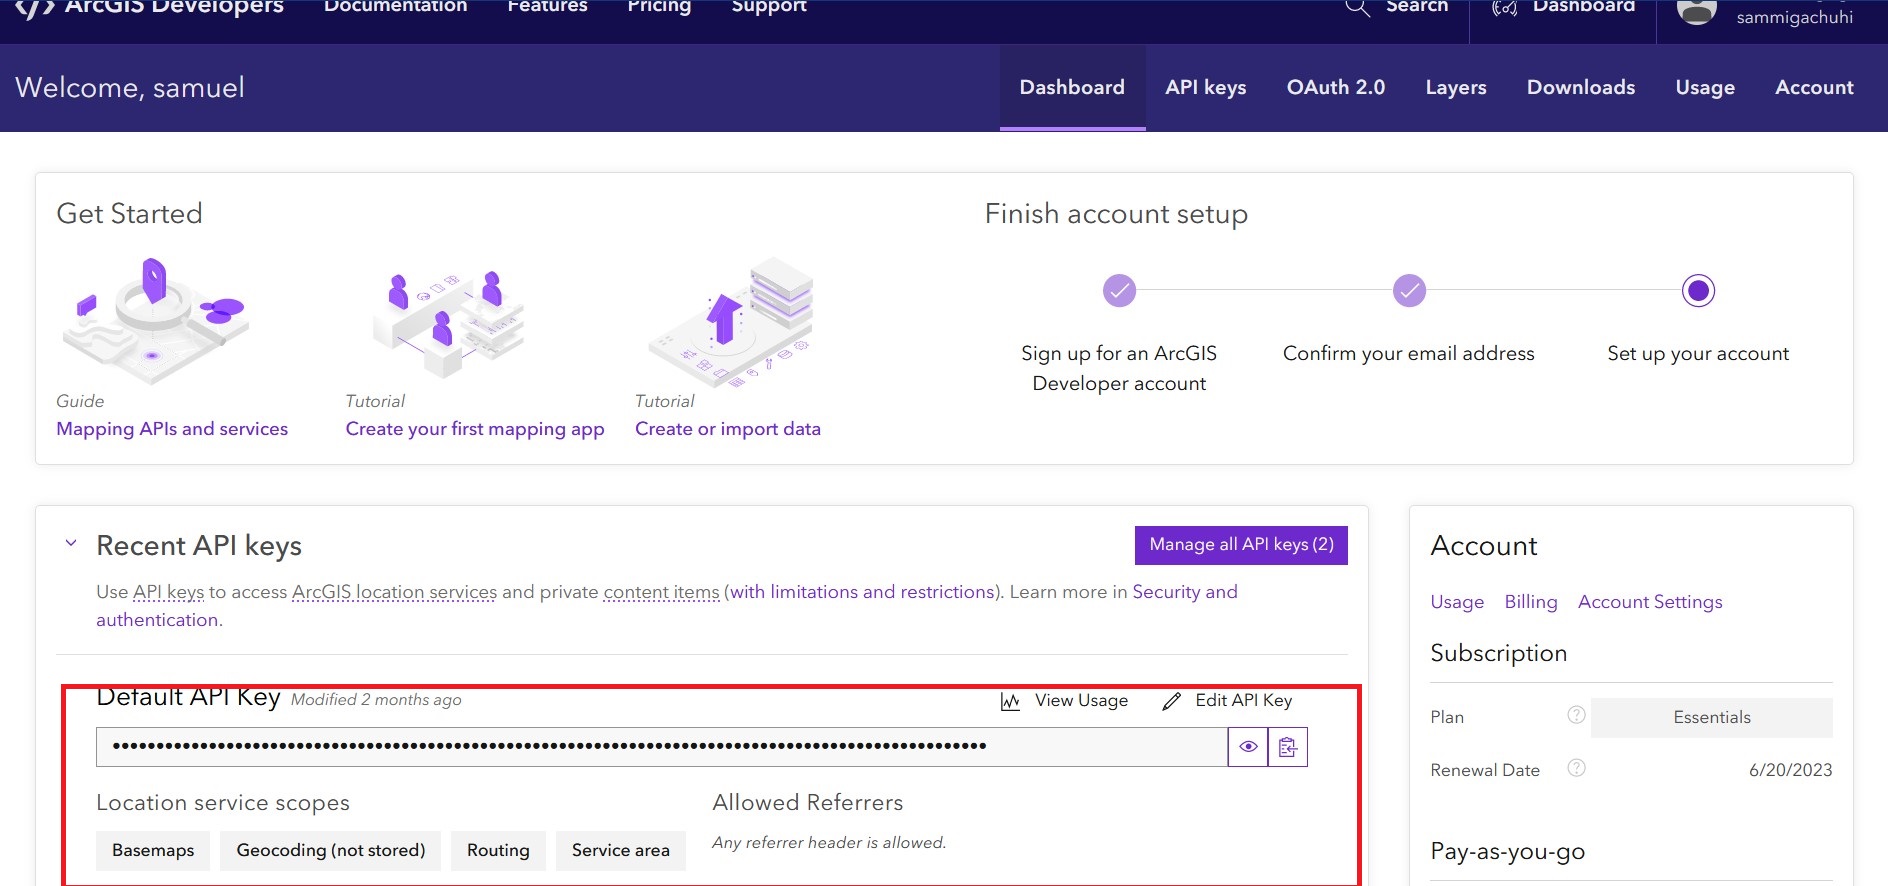
Copy paste that key to your esri_leaflet.js file.
const apiKey = "Your key";
Let’s proceed to create a basemap. To create one, just create a variable called basemapEnum that stores the ESRI basemap identifier. In ESRI Leaflet, a basemap is called by parsing the provider name and the desired style, like so: {Provider}:{Style name} or
{Provider}:{Style name}:{Component}. In our case, we want the ArcGIS streets basemap layer.
const basemapEnum = "ArcGIS:Streets";Alright. It’s about time we fired up our mapping power. Create an ESRI Leaflet map instance much like we have always been doing.
const map = L.map("myMap", {
    minZoom: 2
}).setView([0.3556, 37.5833], 6.5);
We had created a basemap variable earlier, so we will parse it to the L.esri.Vector.vectorBasemapLayer class which is responsible for creating basemaps. Actually one can also parse the {Provider}:{Style name} to the L.esri.vector.vectorBasemapLayer() class but our method of using variable names looks cleaner.
L.esri.Vector.vectorBasemapLayer(basemapEnum, {
    apiKey: apiKey,
}).addTo(map);
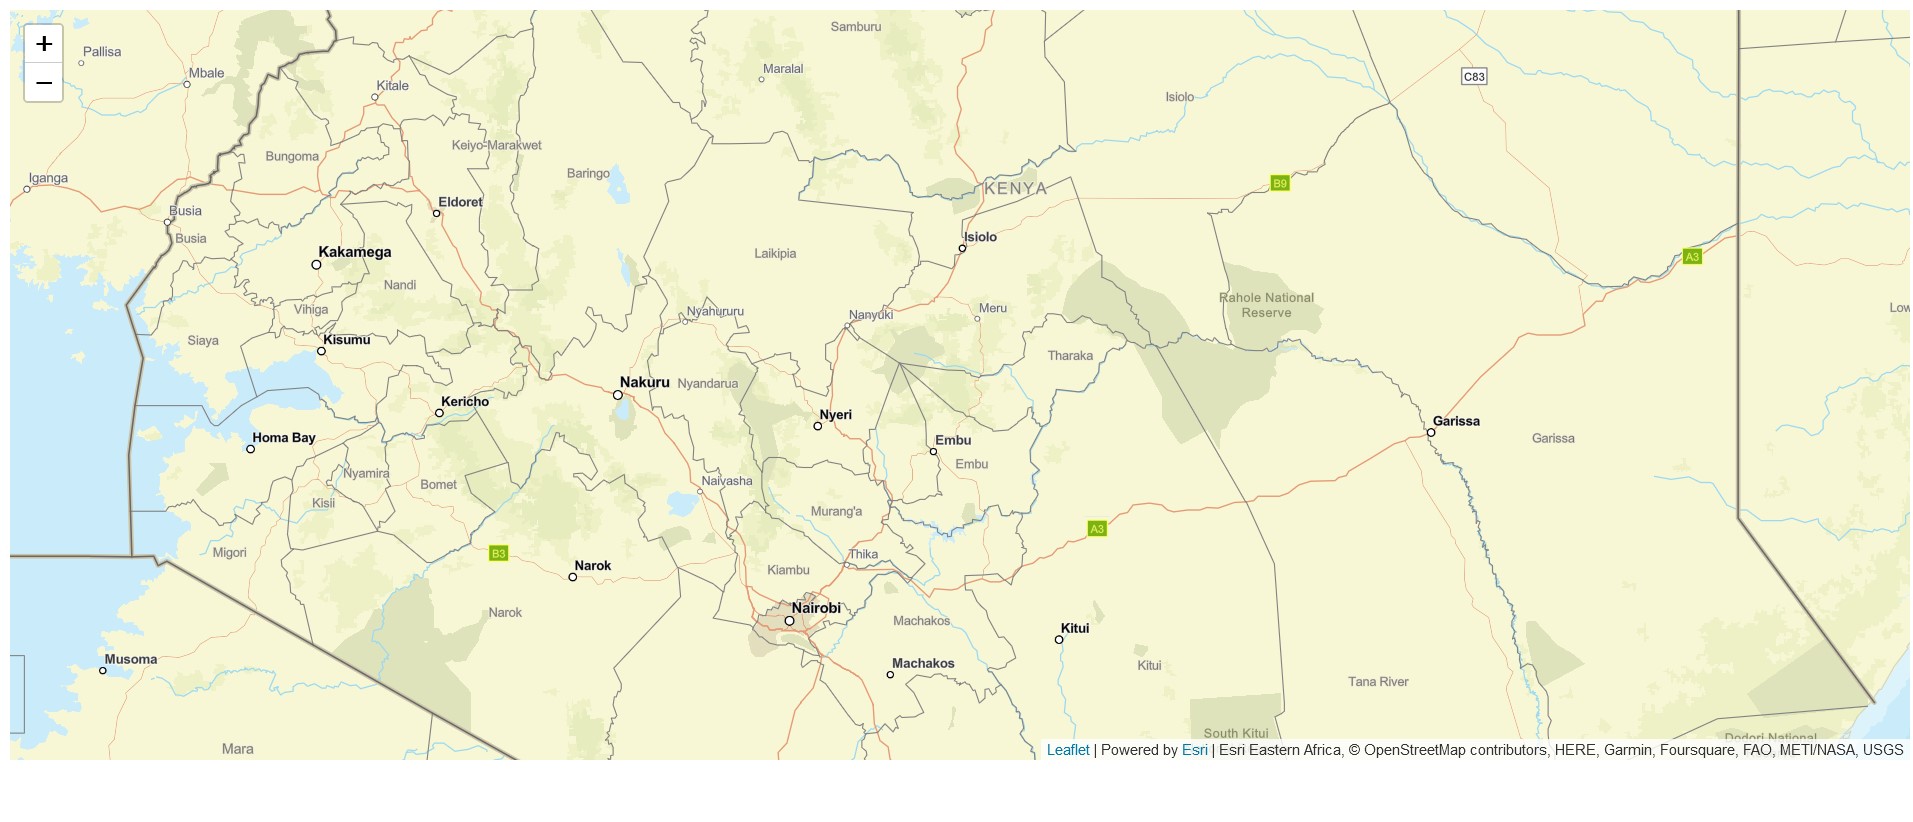
Now open your map.html file. It should look like below.
Now imagine there are other basemap styles as shown in this webpage.
14.4 Geocode search
Of course there are other ESRI Leaflet functionalities. Out of curiousity, a brief search was made to find out an ESRI plugin that loads raster layers in the hope it would be simpler in operation compared to the georaster plugin of Leaflet. Although both have a plugin for downloading .jpeg and .png image formats, none is good enough for loading geospatial raster files such as .tiff. Nevertheless, there are other cool services that ESRI Leaflet offers, such as geocode search3.
For the rest of this chapter, we shall create a geocoding service using ESRI Leaflet.
14.5 Add search bar
Add the following <link> and <script> to your <head> element.
<!-- Load Esri Leaflet Geocoder from CDN -->
        <link rel="stylesheet" href="https://unpkg.com/esri-leaflet-geocoder@3.1.4/dist/esri-leaflet-geocoder.css">
        <script src="https://unpkg.com/esri-leaflet-geocoder@3.1.4/dist/esri-leaflet-geocoder.js"></script>
We will first add a search control widget to the topright of our ESRI Leaflet map. Search control widgets are created using the L.esri.Geocoding.geosearch class. In the below code, we have parsed the L.esri.Geocoding.geosearch to the variable searchControl.
const searchControl = L.esri.Geocoding.geosearch({
        position: "topright",
        placeholder: "Enter an address or place e.g. 1 York St",
        useMapBounds: false,

      }).addTo(map);
Just like in Leaflet, ESRI Leaflet constructors have their options. Please refer to the options for this specific constructor here.
Another small thing; change your const basemapEnum to read ArcGis:Navigation.
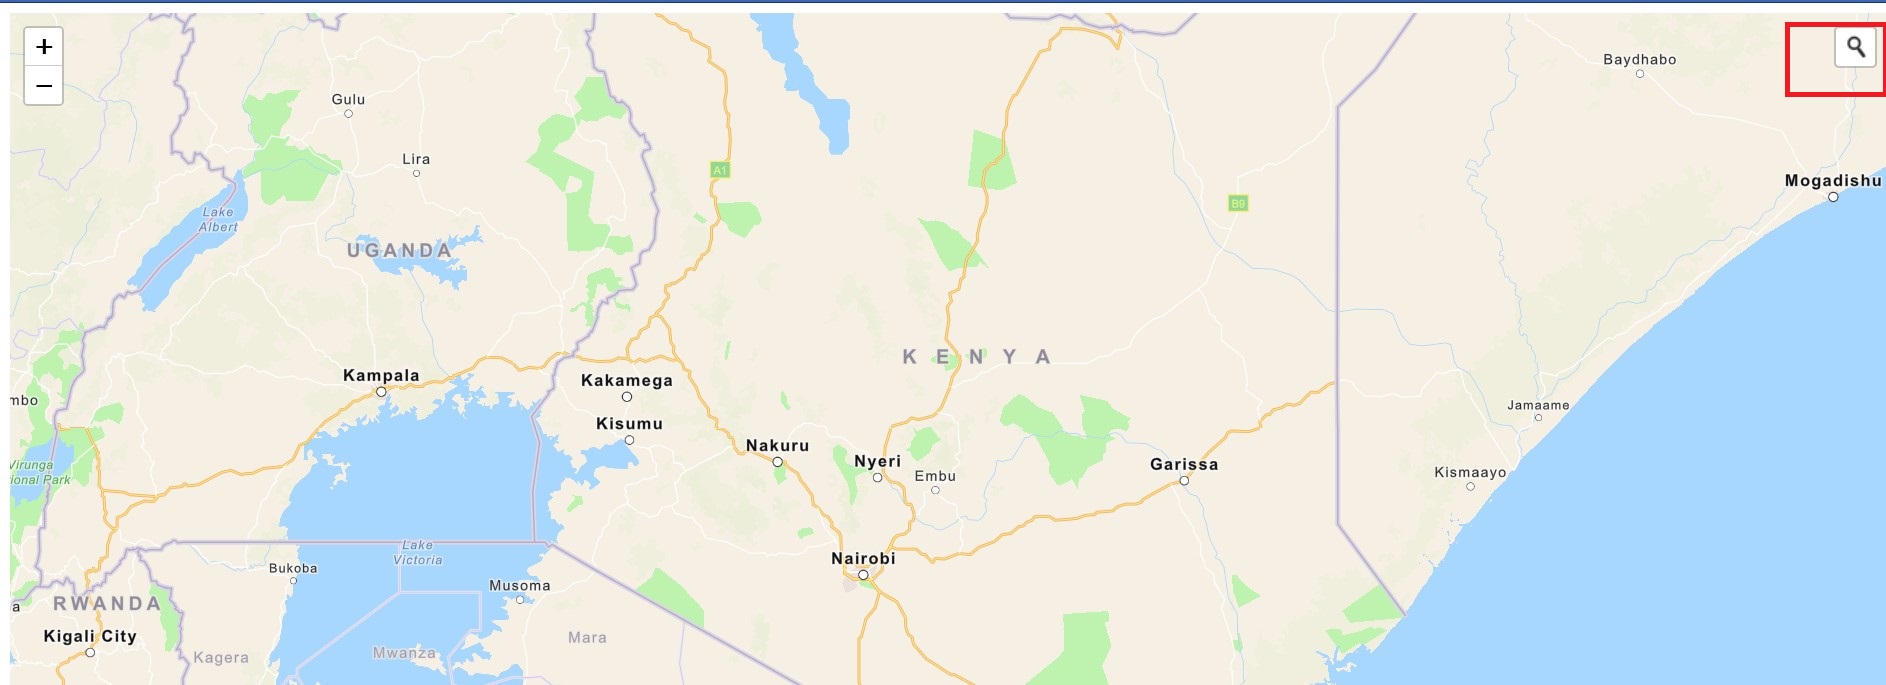
const basemapEnum = "ArcGIS:Navigation";Upon refreshing your map.html file, apart from having a new basemap style, you will see a new search bar at the top right. However, it is non-functional. It takes us nowhere.
14.6 Make the search bar functional
In order to make the search bar do what it says, we will set the value of the providers key to a arcgisOnlineProvider. The latter is instantiated with the constructor L.esri.Geocoding.arcgisOnlineProvider. ESRI has various open source tutorials on its platform that provide succinct and concise explanation for most of its tools.
const searchControl = L.esri.Geocoding.geosearch({
    position: "topright",
    placeholder: "Enter an address or place e.g. 1 York St",
    useMapBounds: false,

    // Add provider
    providers: [
        L.esri.Geocoding.arcgisOnlineProvider({
          apikey: apiKey,
          nearby: {
            lat: 0.3556,
            lng: 37.5833
          }
        })
      ]

  }).addTo(map);
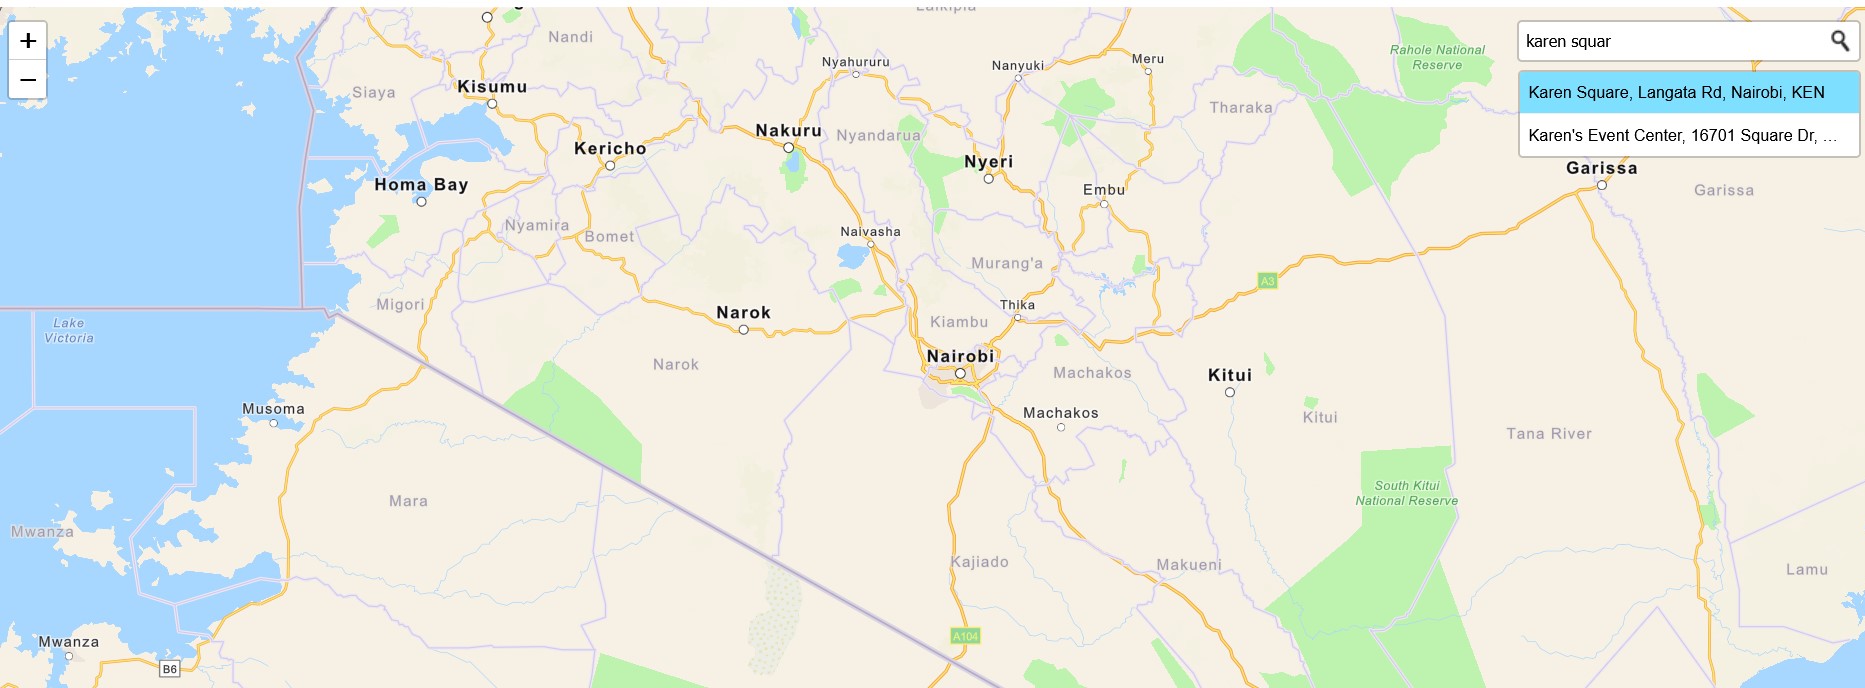
Now try your search bar again. Some location names appear as you type them in, and if you press Enter it takes you to the exact location. This is good except for one thing: there is no marker to pinpoint that specific address. The following section outlines how to enable ESRI create a marker on the fly at any searched location name.
14.7 Adding an auto-generated location pin
First add a layer group to store the geocoding results.
const results = L.layerGroup().addTo(map);
We will create an event handler to access the data from the search results. We shall also add a clearLayers call to remove the previous data from the layer group. This is beginning to sound complicated, but if the reader desires further clarity, they should refer to the ESRI Leaflet geocoding tutorial.
searchControl.on("results", (data) => {
        results.clearLayers();

      });
The following loop adds the coordinates of the searched location to the marker. This loop goes into the searchControl code block.
for (let i = data.results.length - 1; i >= 0; i--) {
          const marker = L.marker(data.results[i].latlng);

          results.addLayer(marker);

        }
The lngLatString variable below will store the rounded coordinates, and our familiar bindPopup and openPopup will show the coordinates and our address.
const lngLatString = `${Math.round(data.results[i].latlng.lng * 100000) / 100000}, ${
            Math.round(data.results[i].latlng.lat * 100000) / 100000
          }`;
          marker.bindPopup(`<b>${lngLatString}</b><p>${data.results[i].properties.LongLabel}</p>`);

          results.addLayer(marker);

          marker.openPopup();
The entire searchControl code block should look like below.
searchControl.on("results", (data) => {
    results.clearLayers();

    for (let i = data.results.length - 1; i >= 0; i--) {
        const marker = L.marker(data.results[i].latlng);

        const lngLatString = `${Math.round(data.results[i].latlng.lng * 100000) / 100000}, ${
            Math.round(data.results[i].latlng.lat * 100000) / 100000
          }`;
          marker.bindPopup(`<b>${lngLatString}</b><p>${data.results[i].properties.LongLabel}</p>`);

        results.addLayer(marker);

        marker.openPopup();

      }

  });
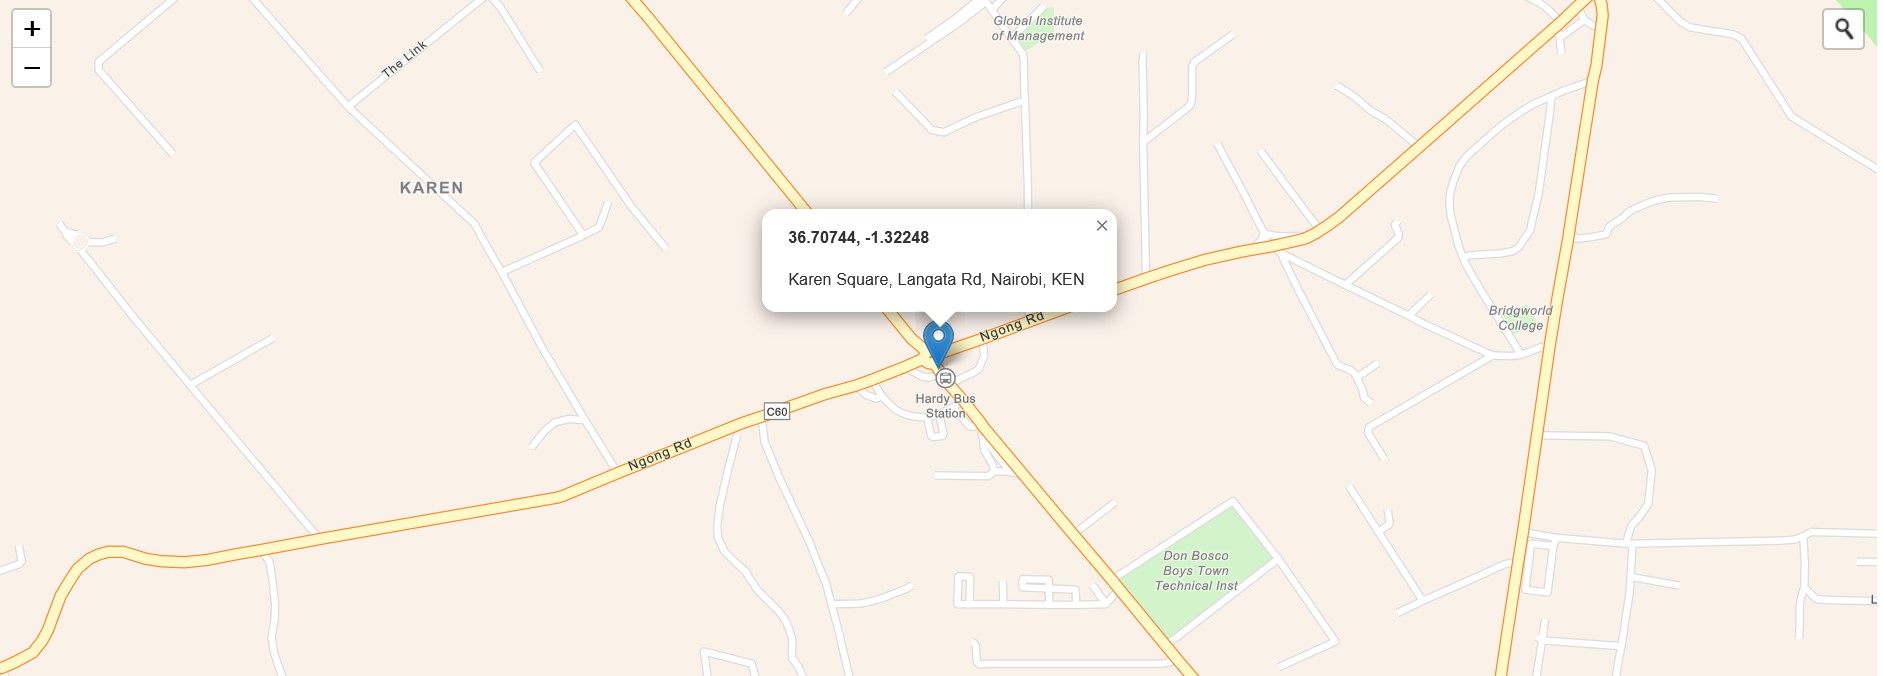
So now when you search for a particular place in the search bar and press Enter, a marker and with a pop up showcasing the address and longitude-latitude coordinates of the location should appear.
The ArcGIS Developers website provides several more tutorials on using ESRI Leaflet.
Here are the files used in this exercise.
14.8 Summary
Using ESRI Leaflet brings many of the ArcGIS functionalities to the open source Leaflet plugin.
Here are the lessons learnt in this chapter.
An ArcGIS Developer account is needed to use ESRI Leaflet features.
An Application Programming Interface (API) key serves like a real life key in granting the user access to ESRI Leaflet functionalities and features.
The standalone Leaflet and ESRI Leaflet are similar in many respects. ArcGIS features can be built on top of Leaflet via various ESRI Leaflet constructors such as
L.esri.Geocoding.arcgisOnlineProvider.
Geocoding is the process of converting address or place text into a location. The geocoding service provides address and place geocoding as well as reverse geocoding↩︎