2.1 Adding vector layers to QGIS and joining table data
In order to add vector layers to QGIS we will go to the Layer Menu again and click the Add Vector Layer option. A Data Source Manager window will open and we can click on the three dots on the right top corner to select the file we would like to add from our local directory. This time the file format needs to be in a vector file format such as an Esri shapefile (.shp) or a GeoJSON. Here you can see our file is in a .shp format, the file contains the footprints (also known as a polygon layer) of the municipal buildings in Rosario, to add it we click on the Add button. (See 2.4 and 2.5)
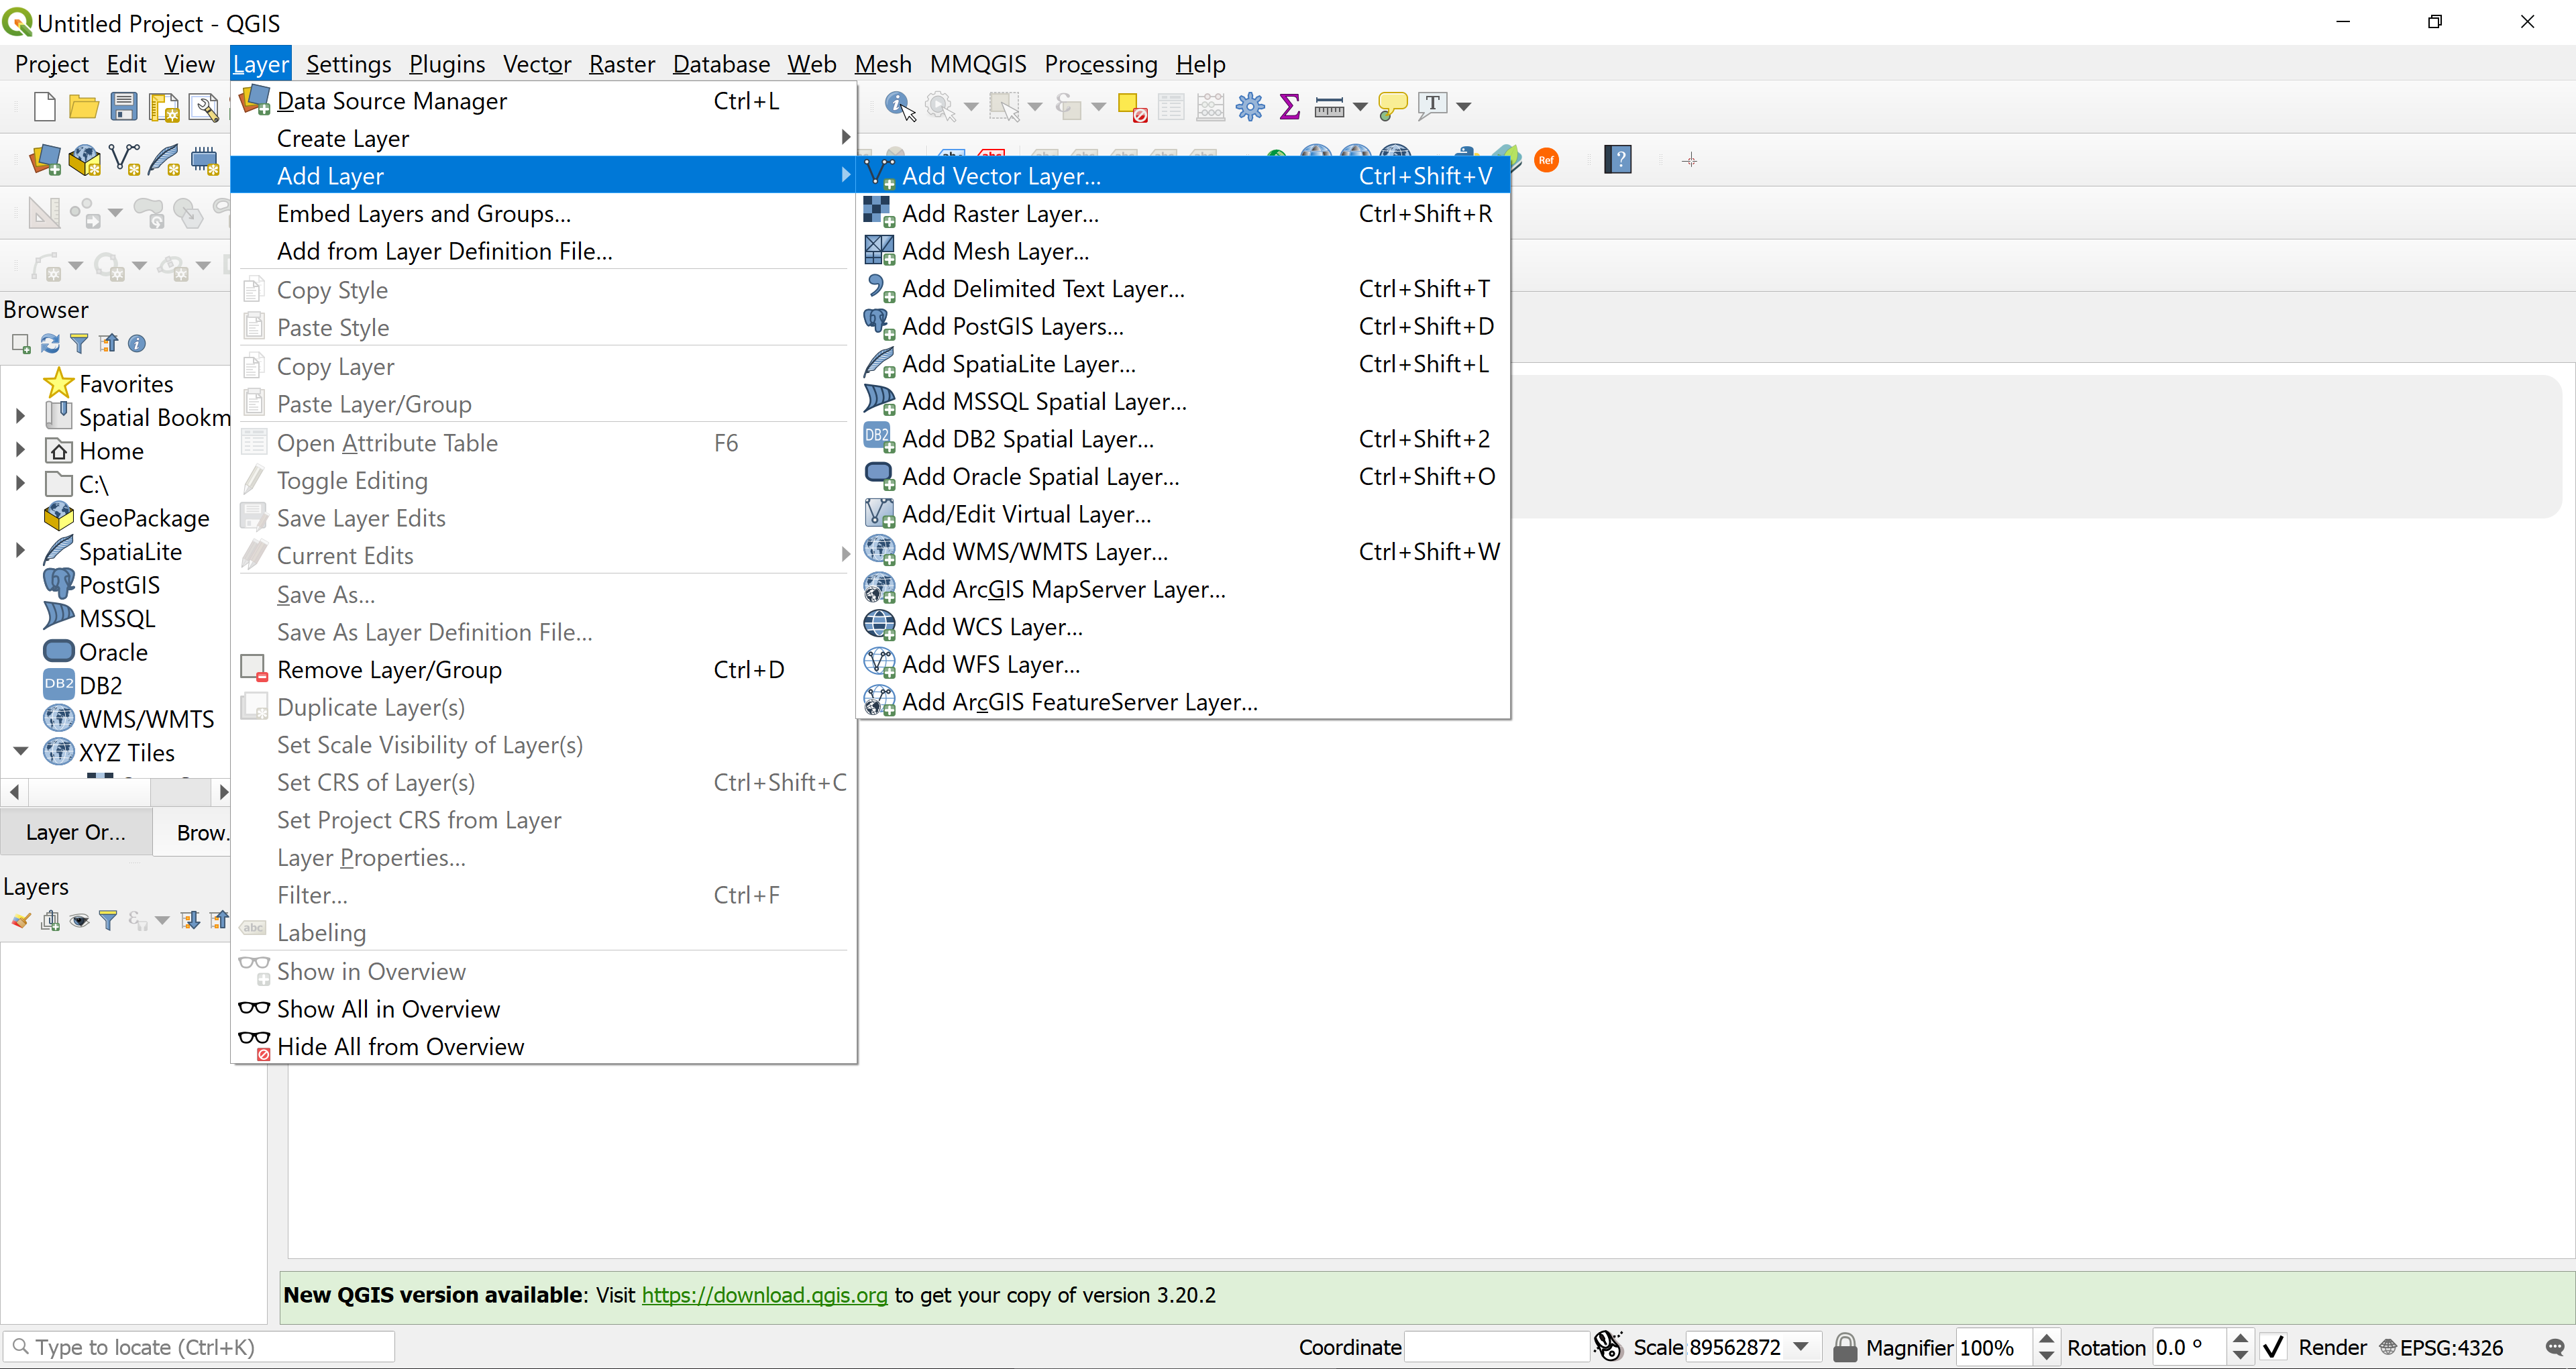
Figure 2.4: Add Vector Layer
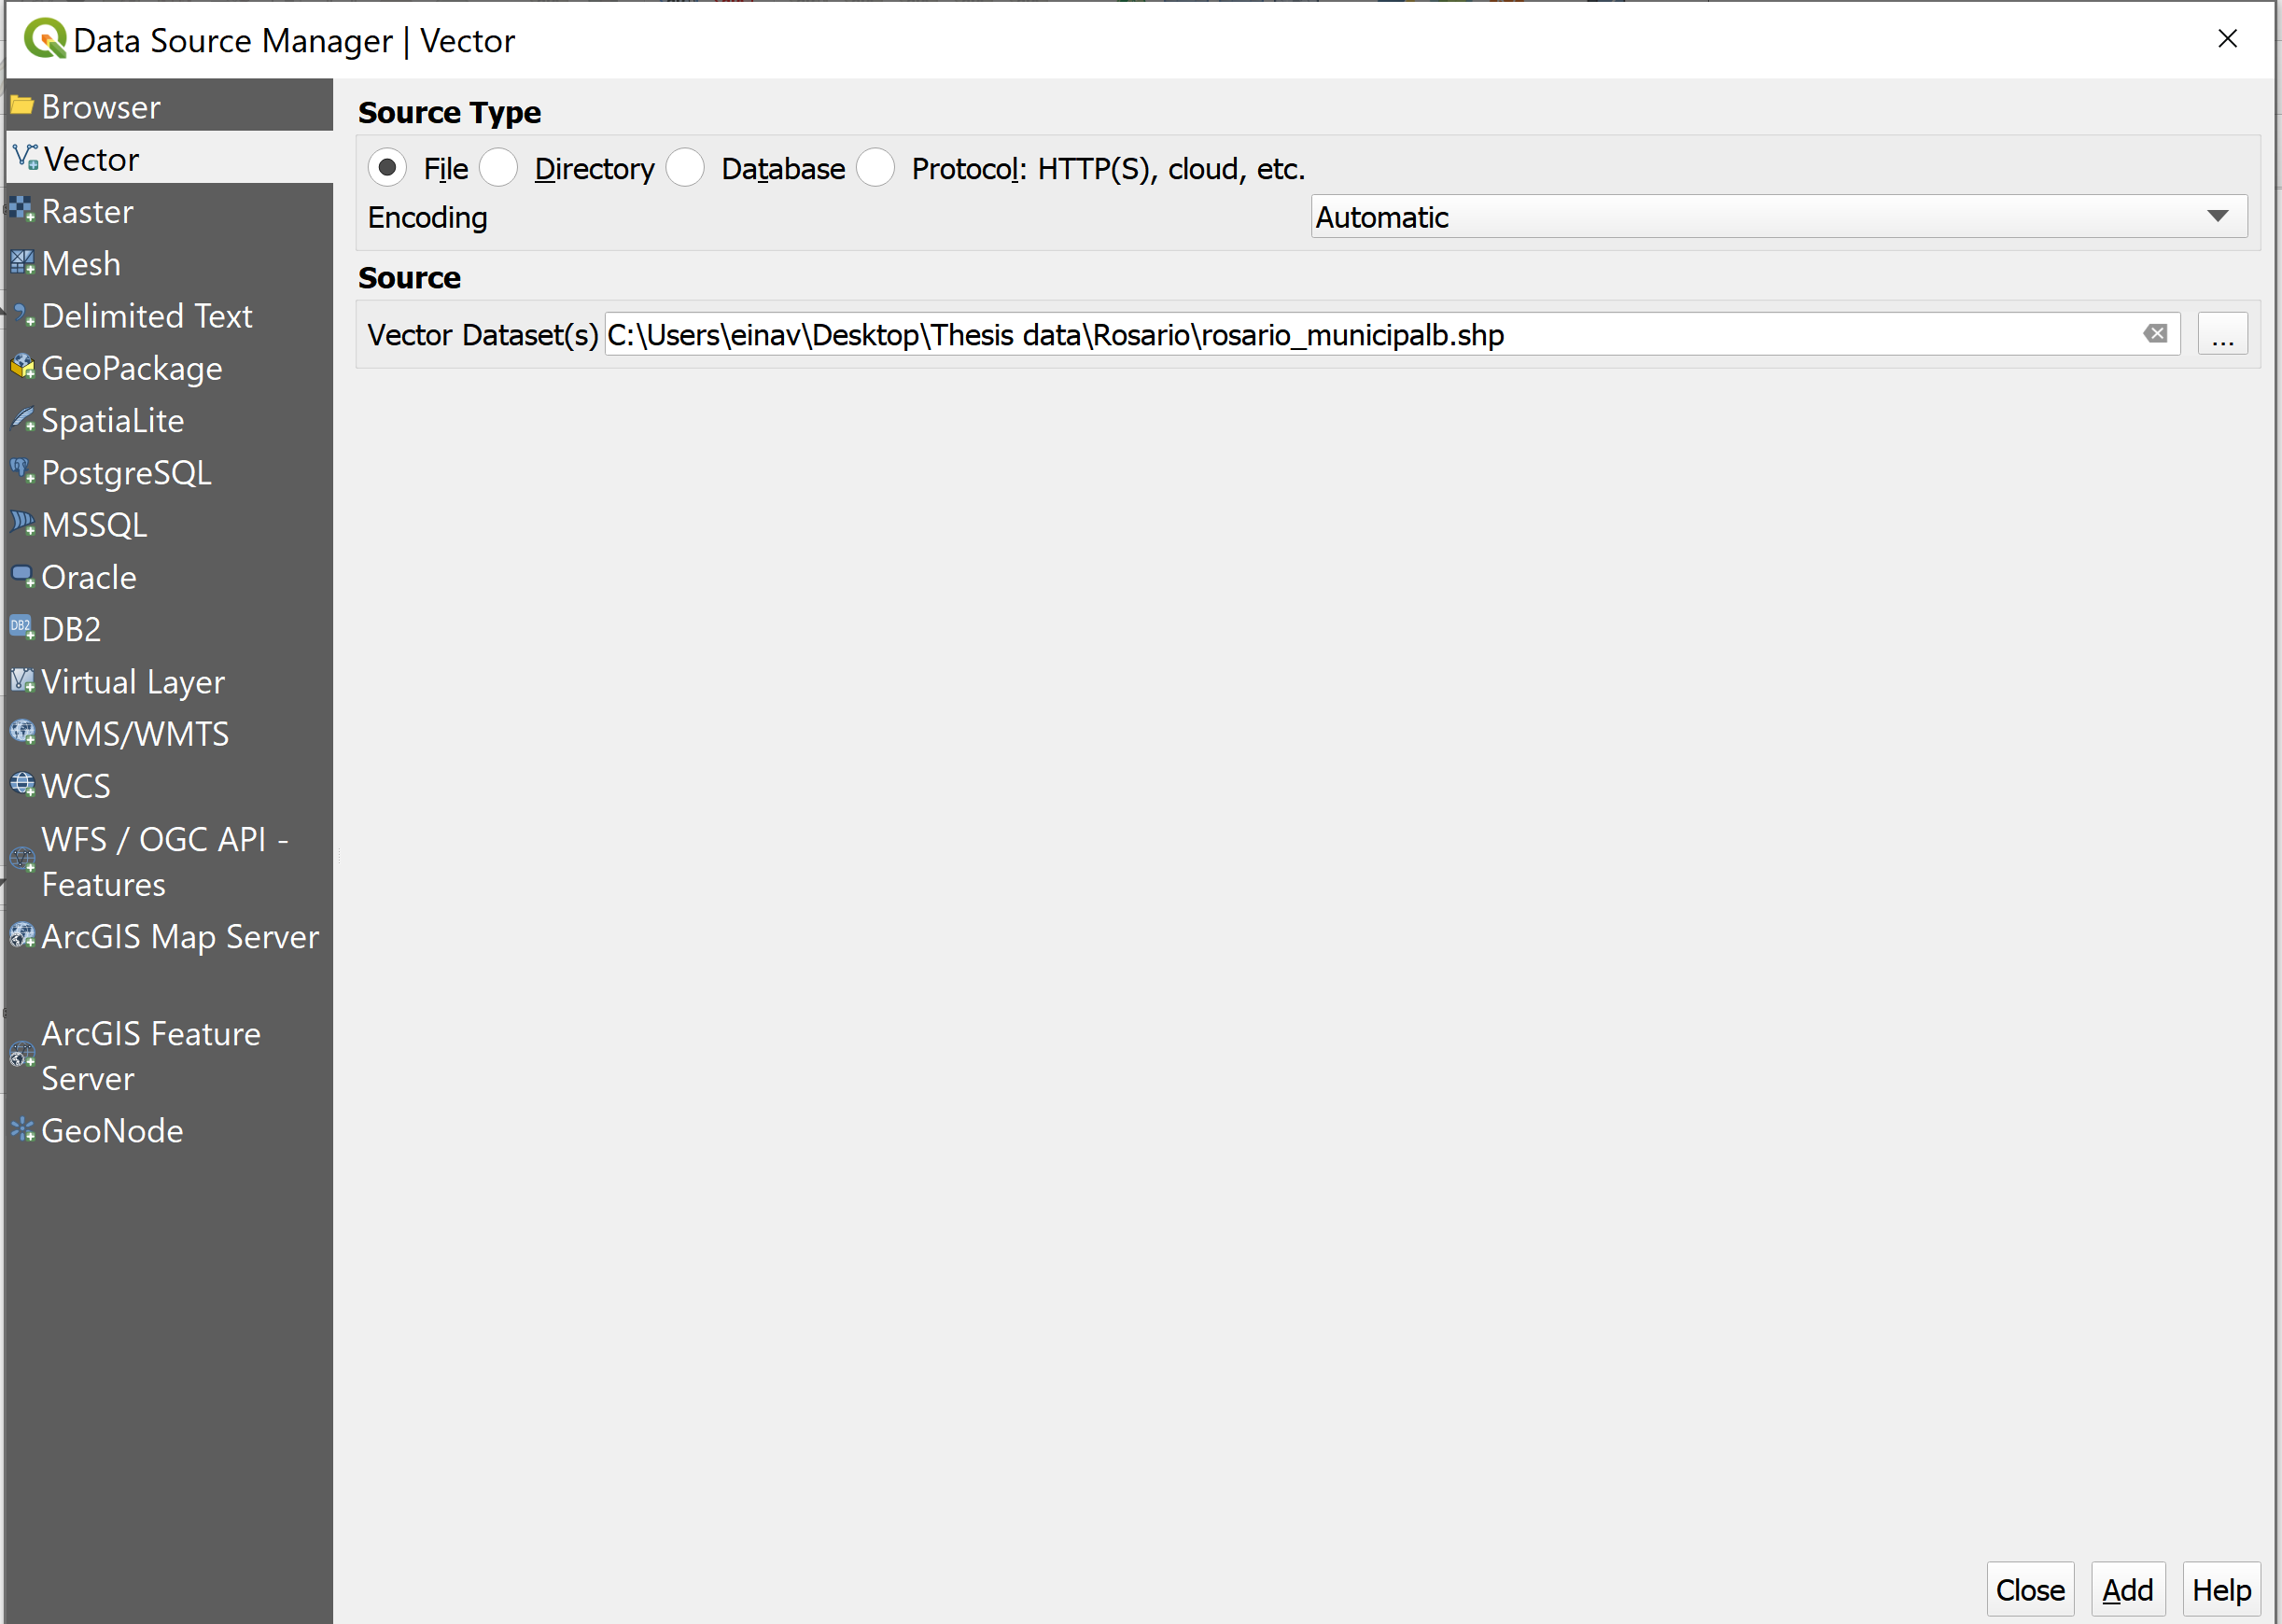
Figure 2.5: Add Vector Layer
Next we would like to join the table data containing the electricity consumption with the polygon layer of the buildings. First we will right click on the layer which we want to join attributes to, in our case it is the polygon layer of the buildings called here rosario_municipalb.shp. Once we right click on the layer we will select the last button called Properties and The Vector Properties Dialog window will open. This dialog provides general settings to manage appearance of layer features in the map (symbology, labeling, diagrams), interaction with the mouse (actions, map tips, form design). It also provides information about the layer, this is a good opportunity to check what is our layer’s coordinate reference system (CRS), here we can see the layer is in The World Geodetic System 1984 (WGS84). (See 2.6 and 2.7) (It is important that the geographic layers in our QGIS project are in the same and correct CRS. For more information about CRS)
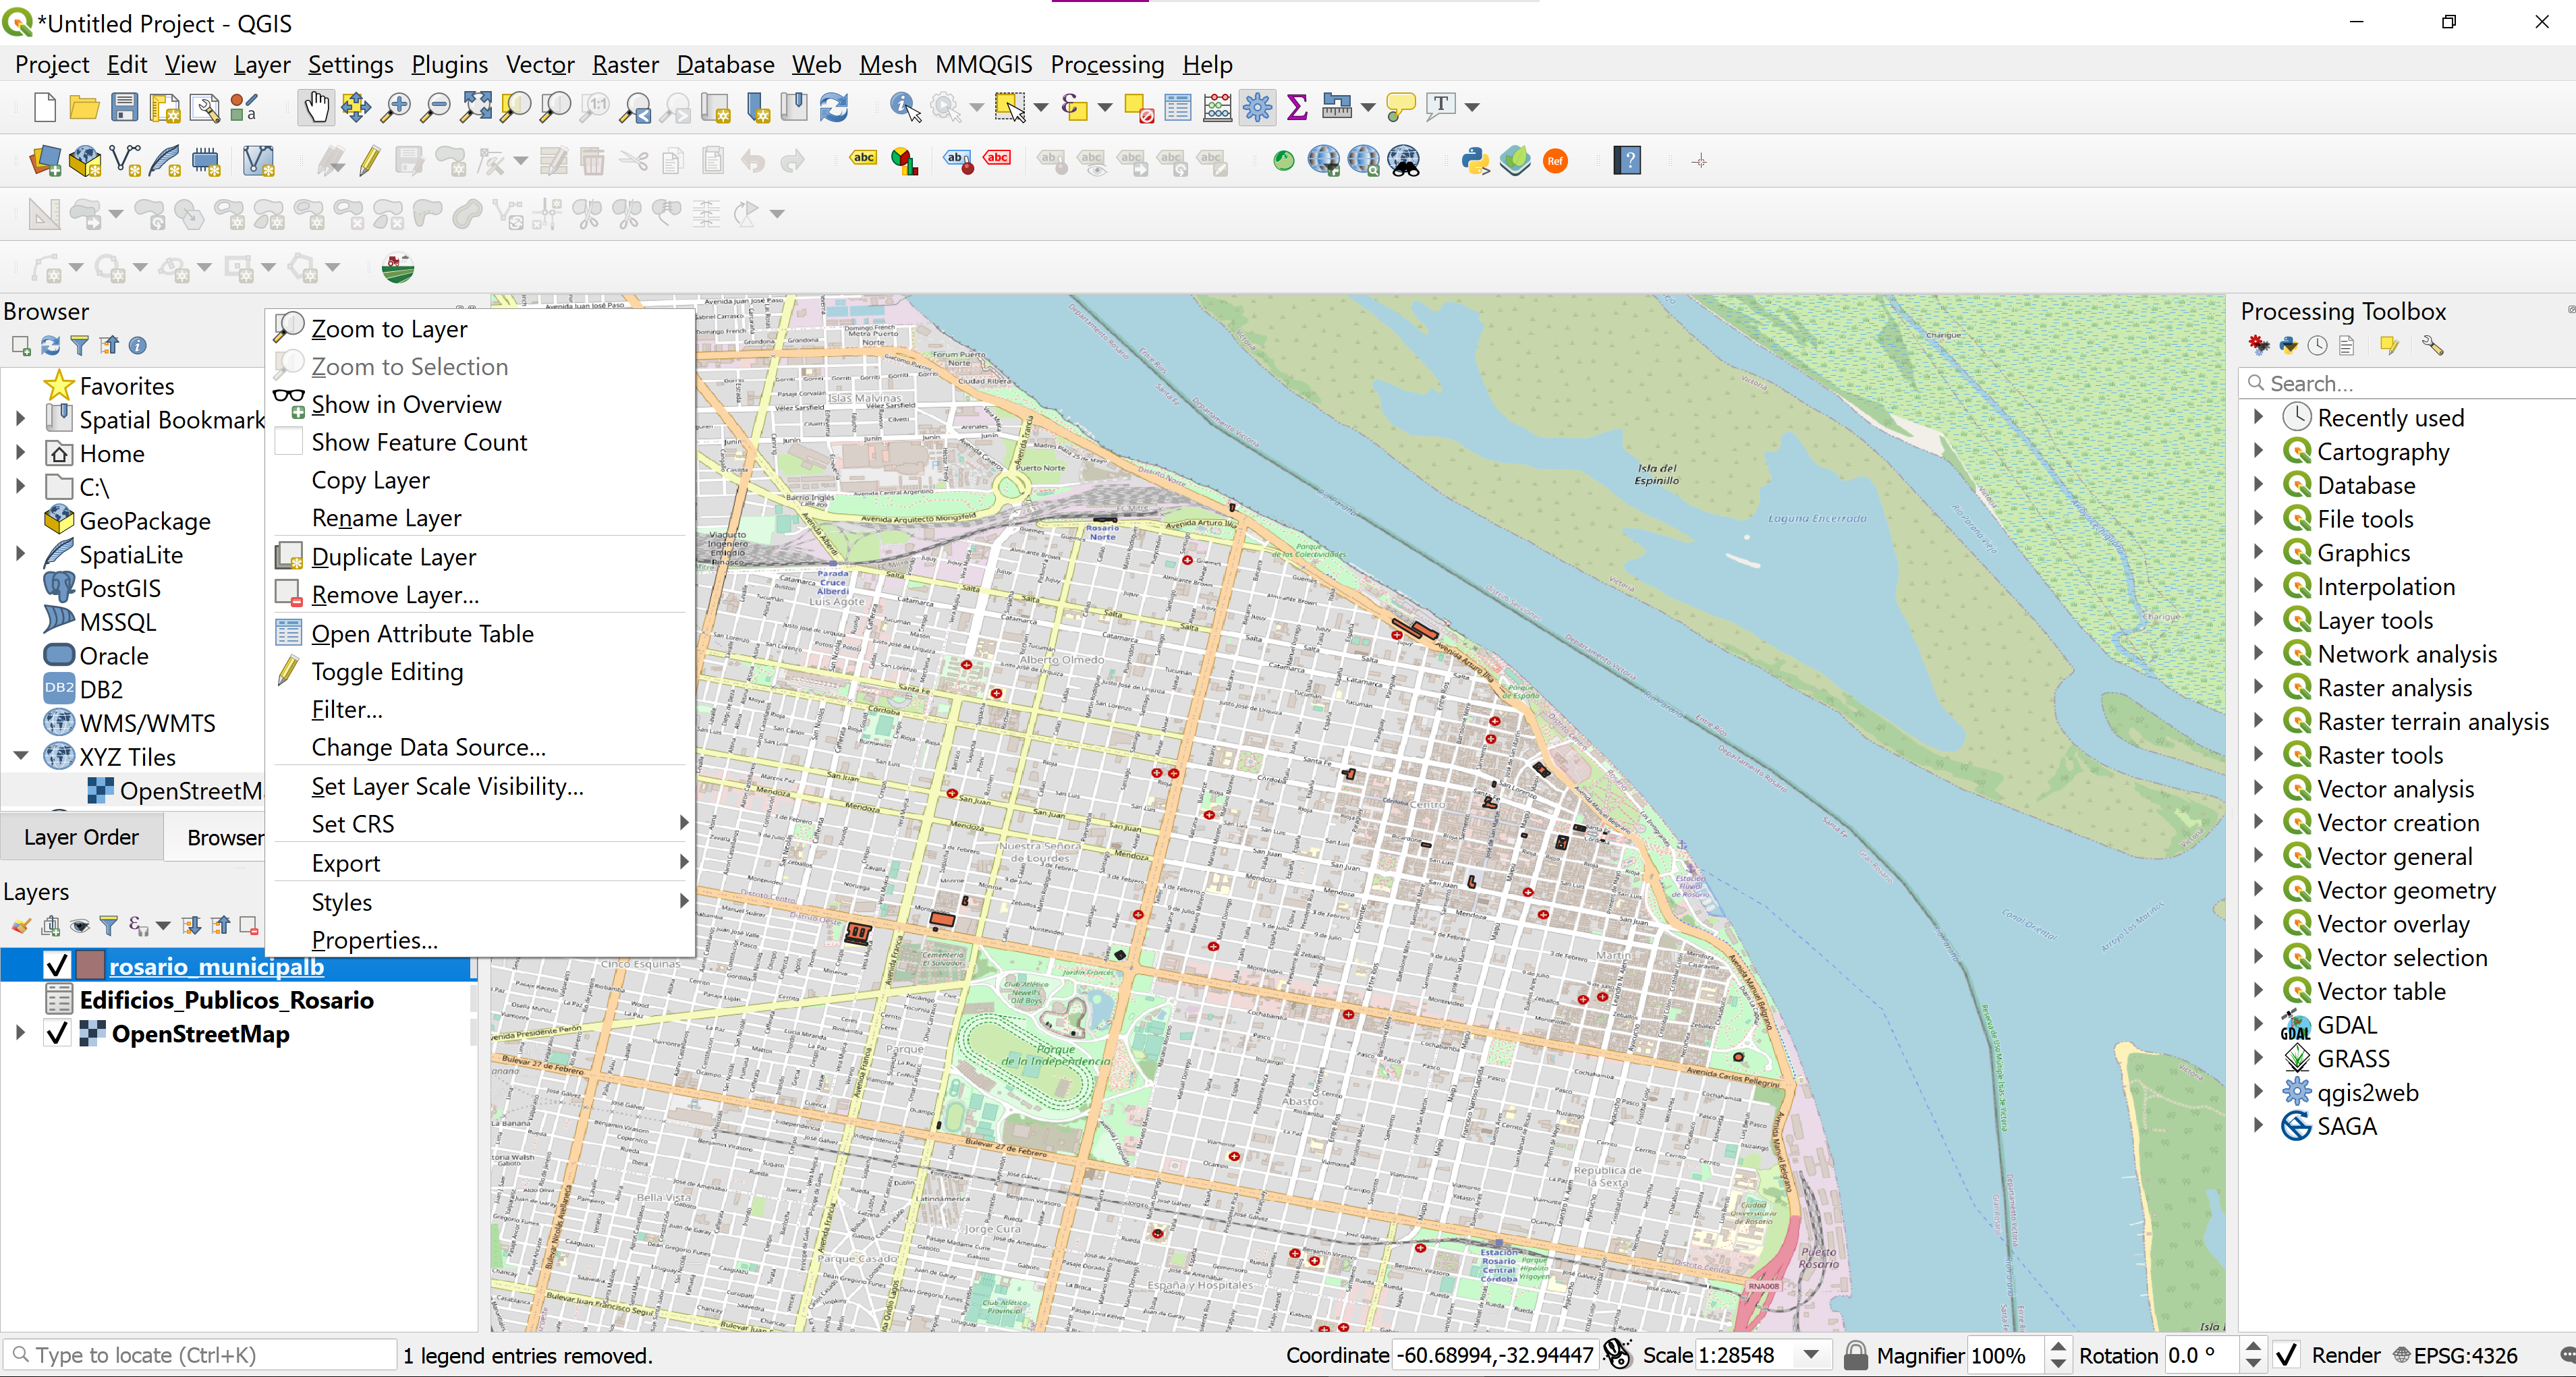
Figure 2.6: Layer Properties
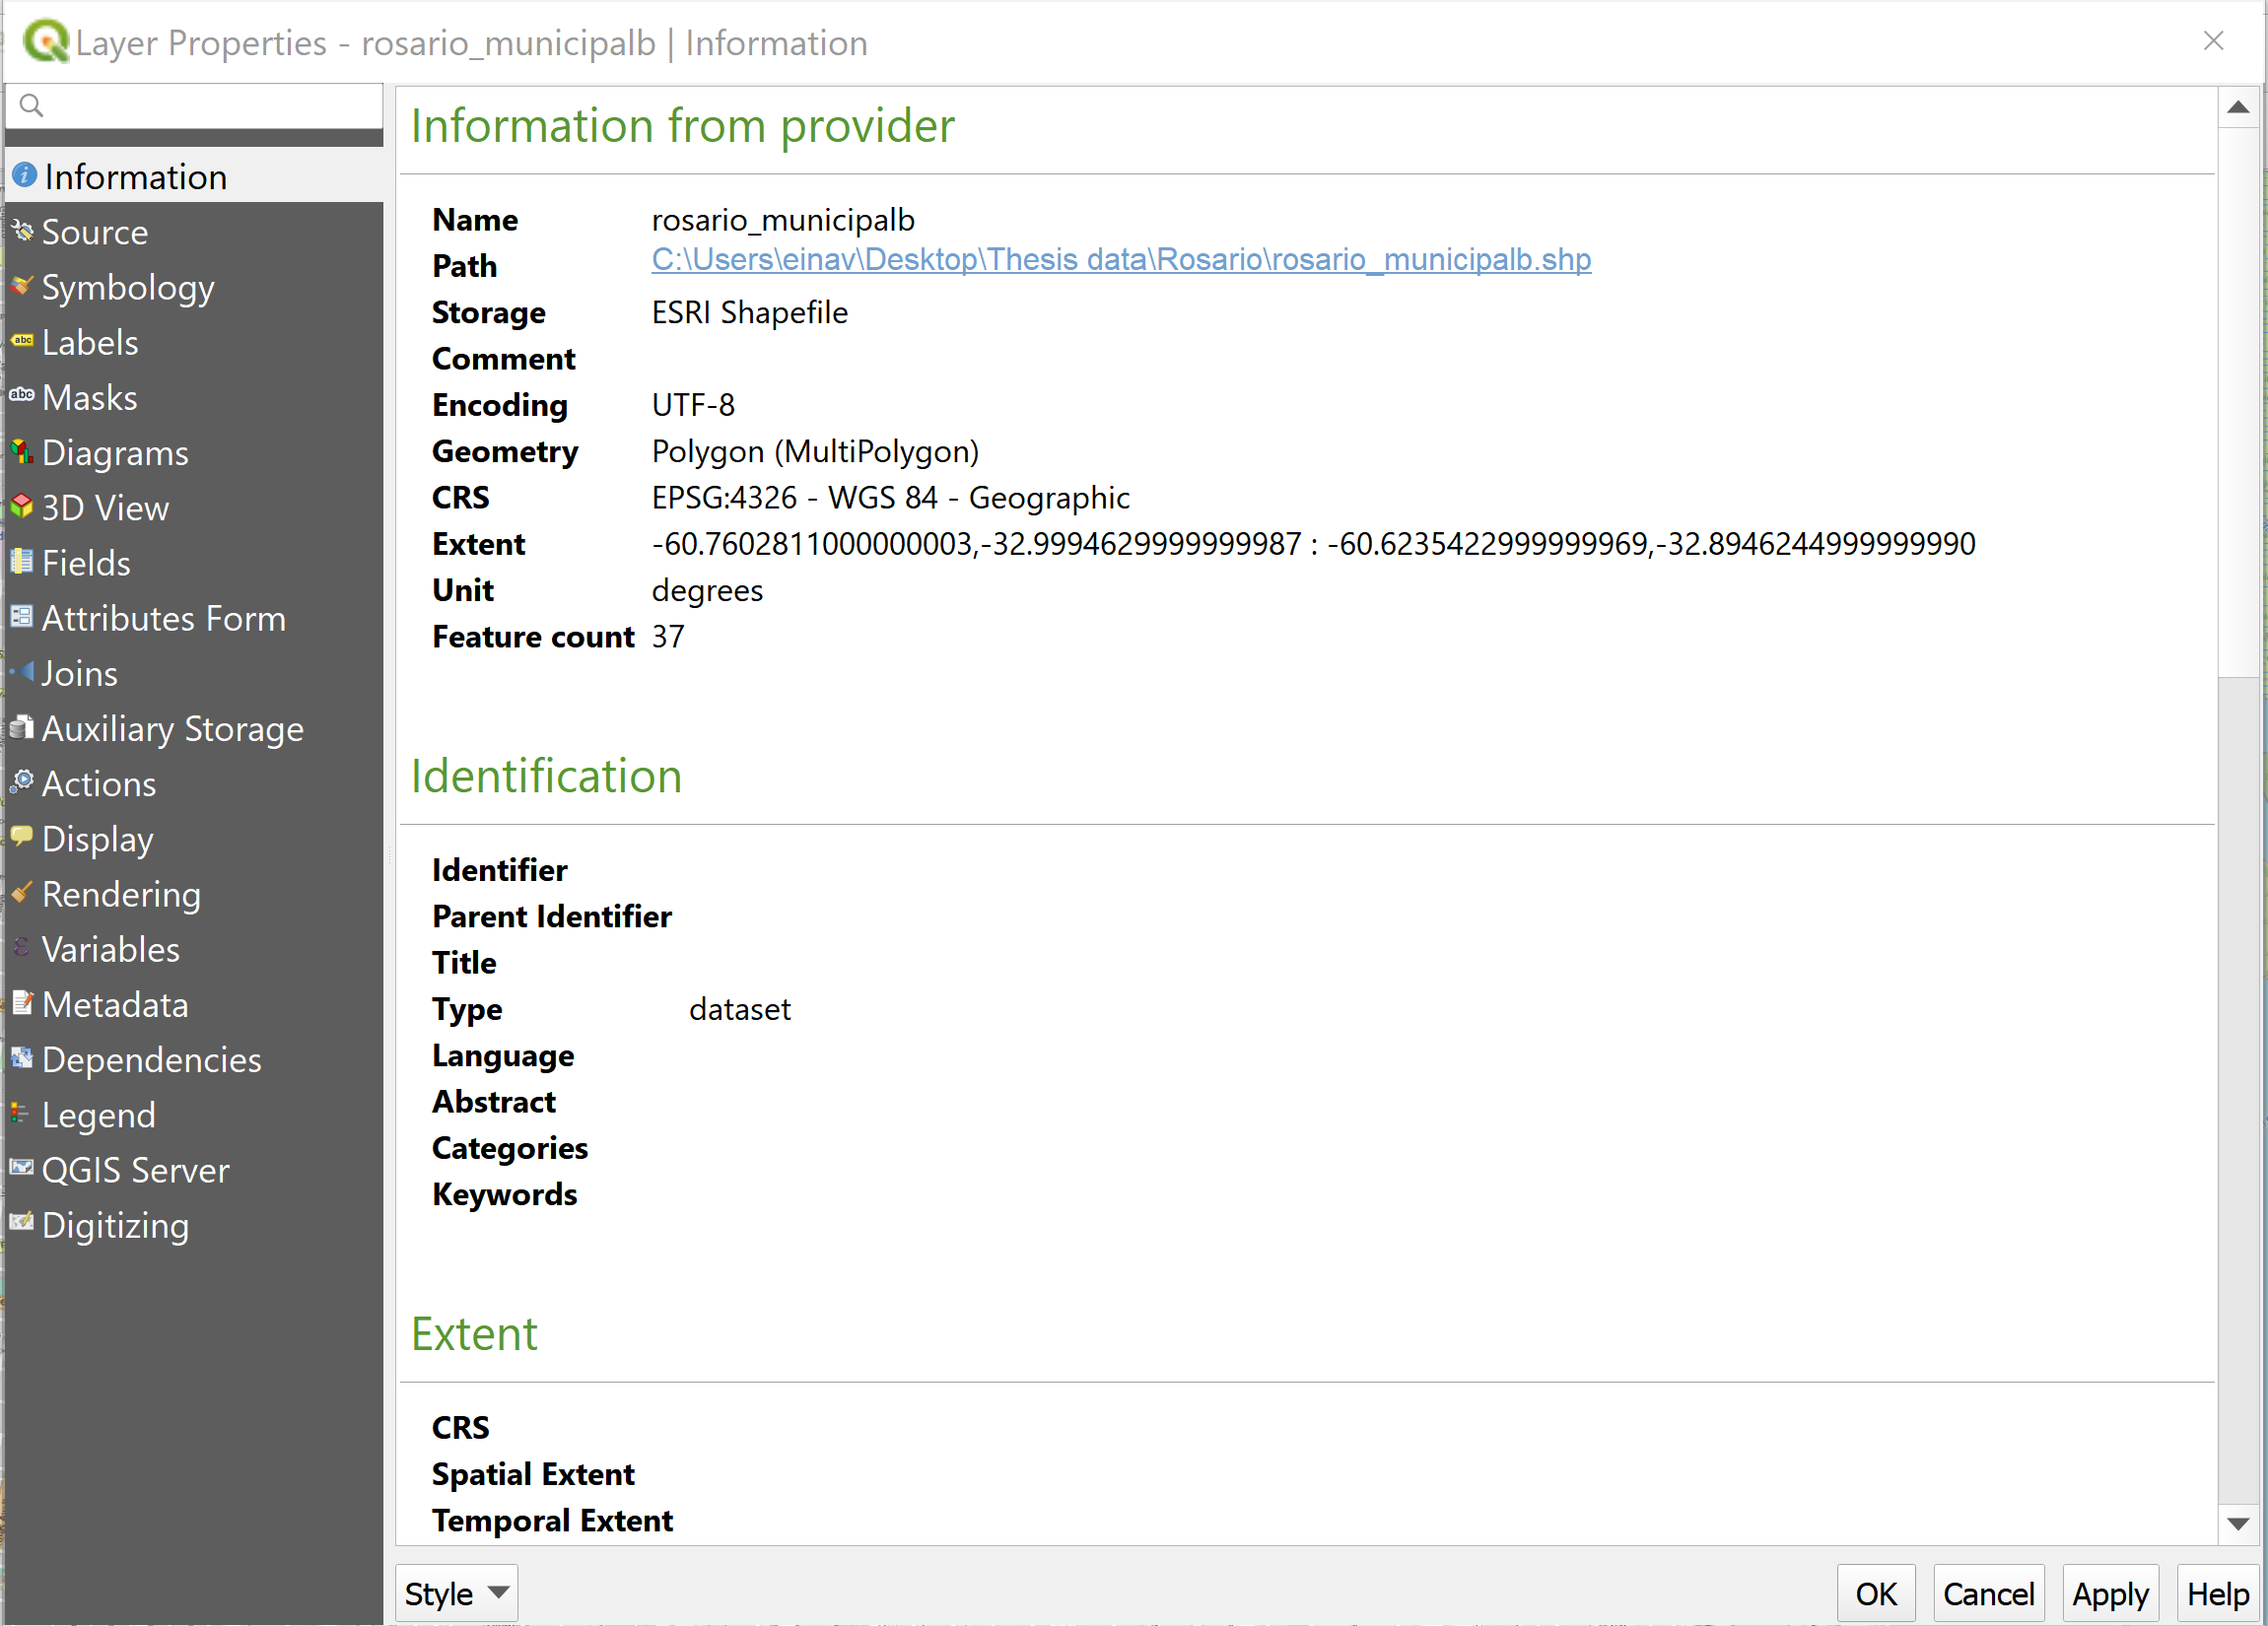
Figure 2.7: Layer Information
On the left side panel we can see an option called Joins. Join is associating records in one table or layer with records in another table or layer through a common field, known as a key. The join between a table of data to a layer is based on the value of a field that can be found in both tables. The name of the field does not have to be the same, but the data type must be the same; you join numbers to numbers, strings to strings, and so on (for more information about data types).
To join between the rosario_municipalb layer and the Edificios_Publicos_Rosario we will click on the + sign on the bottom left and the Edit Vector Join window will open. In this window we can select the table or layer we would like to join attributes from and what would be the Join Field of that table or layer and which field is associated with the same key in the target layer or table. In addition we can choose if we want to associate all fields in the target layer or table or choose specific ones, in our case we are interested joining only the Total Consumos field.
Once we are done editing, we can click on the OK button and then see the join configuration, to apply it on the target layer, we click Apply on the bottom right. (See 2.8 and 2.9)
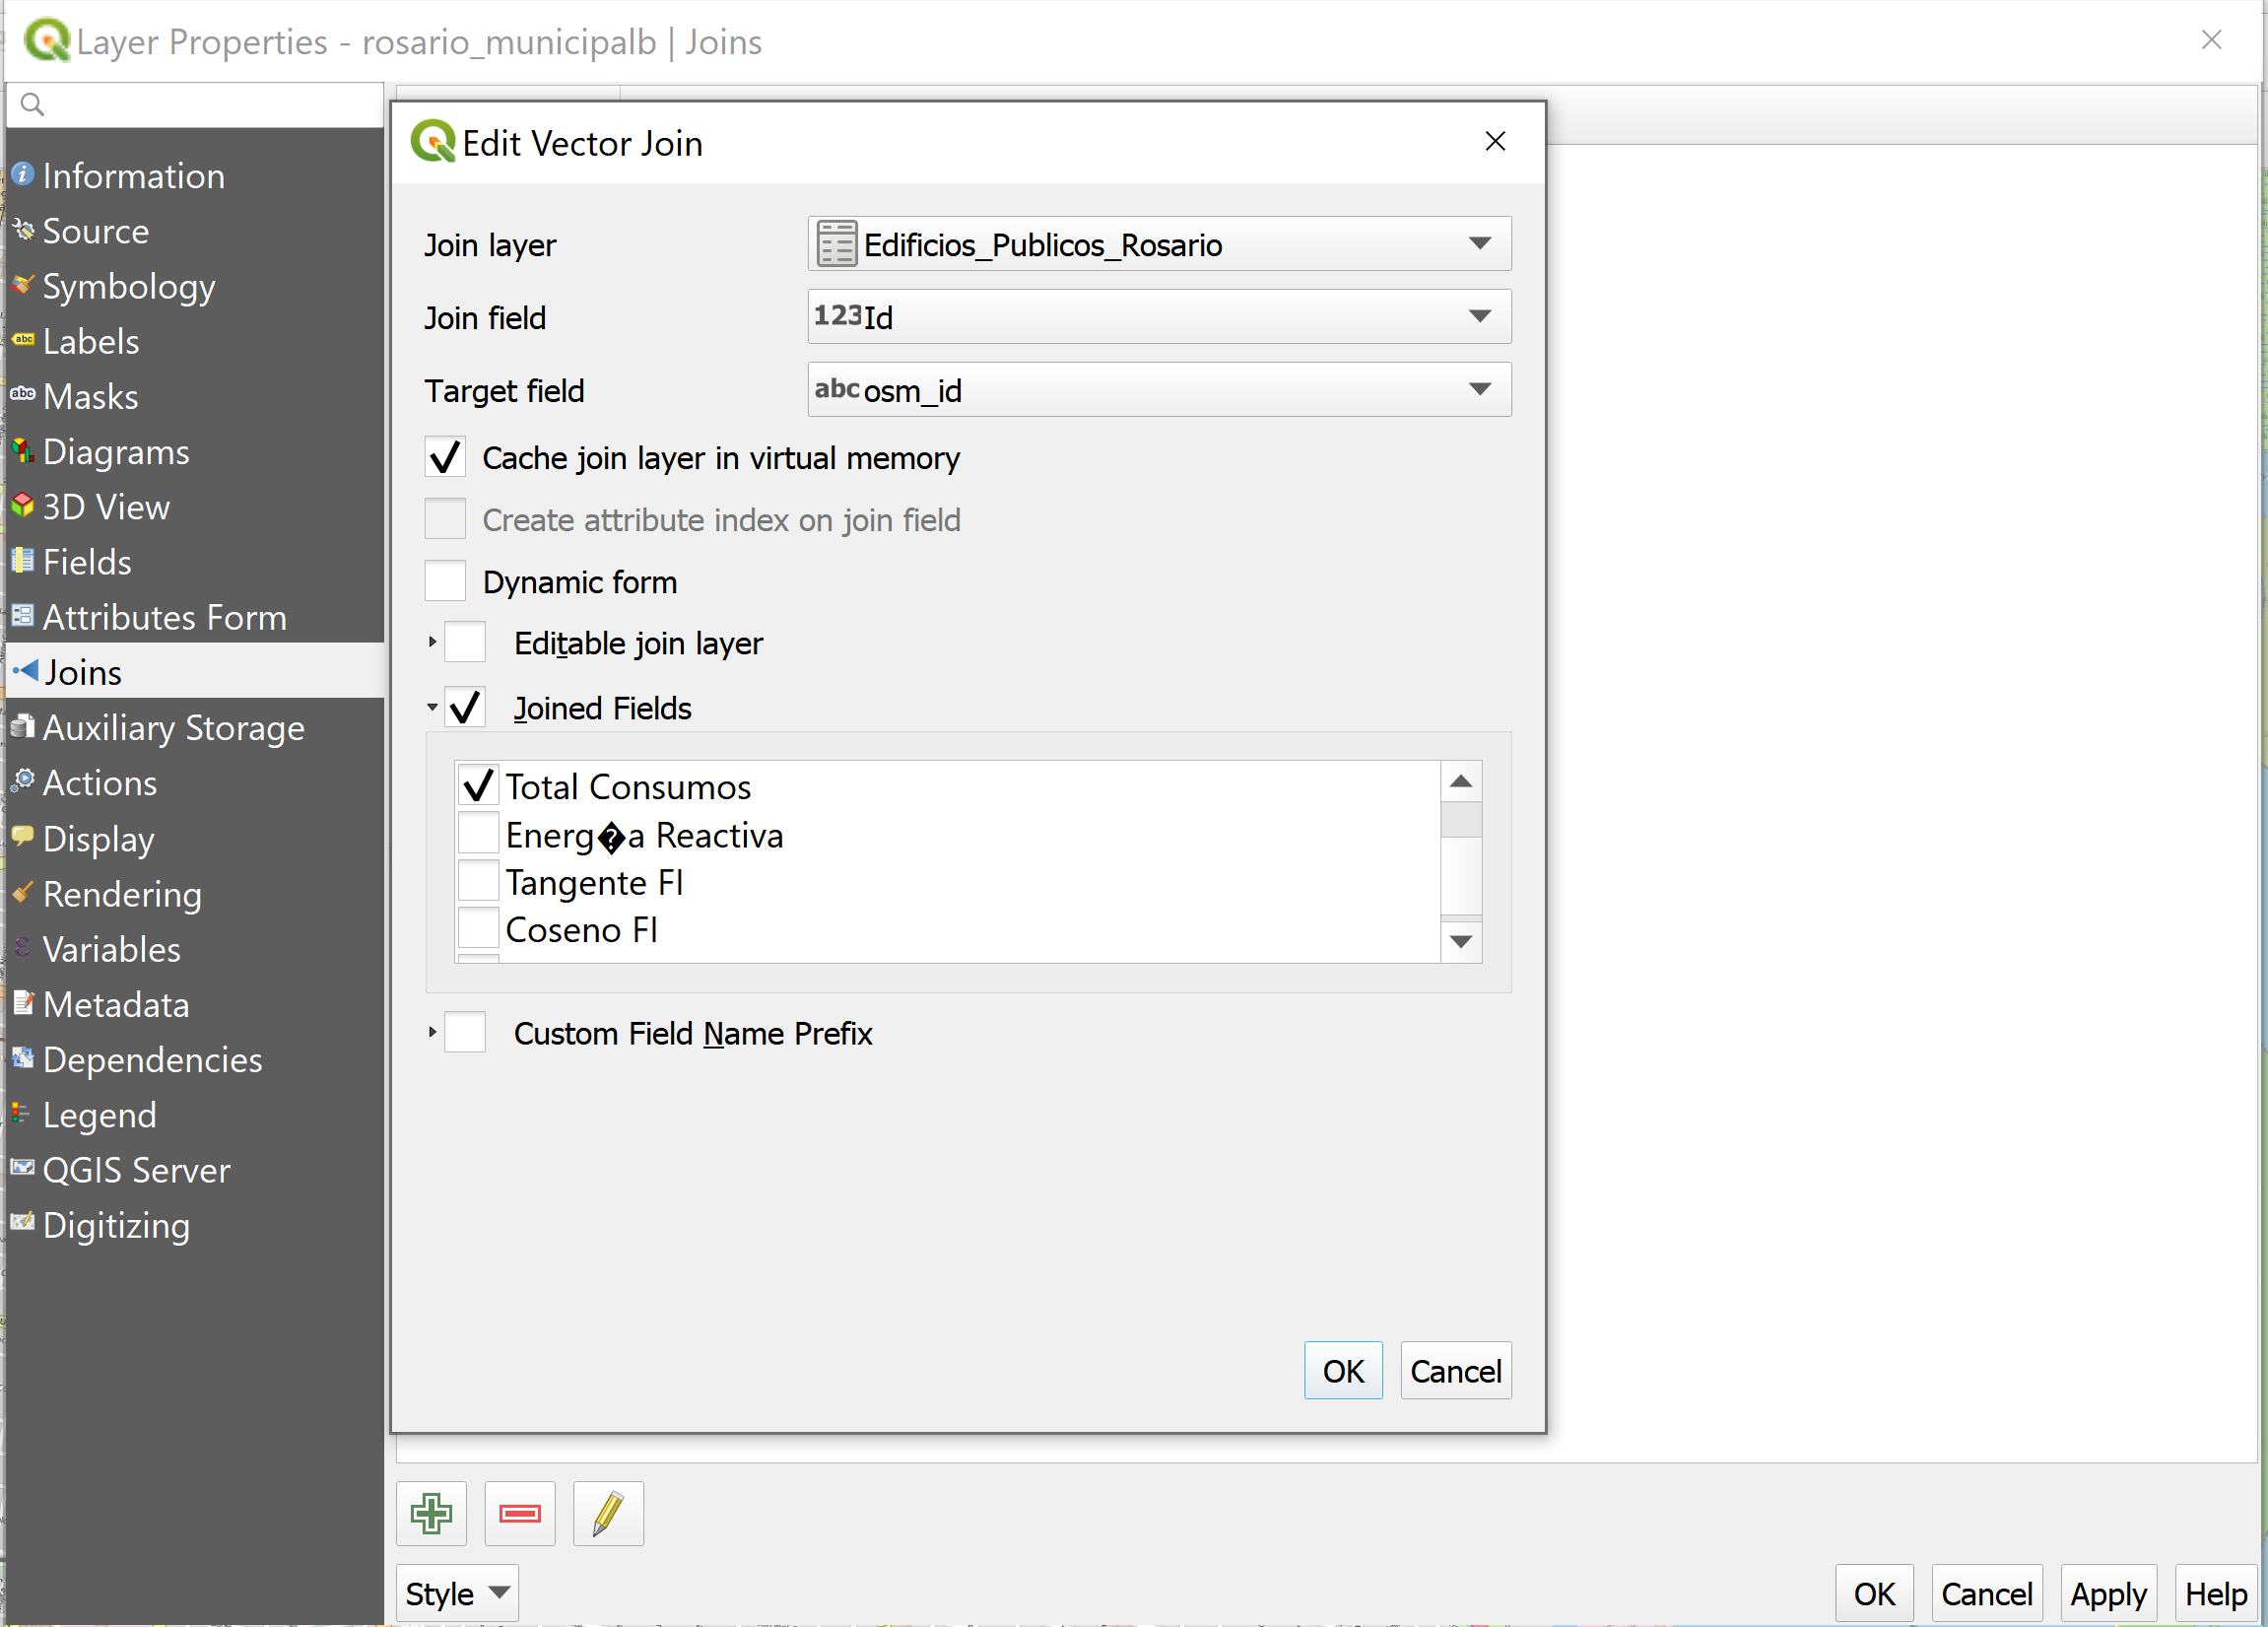
Figure 2.8: Join
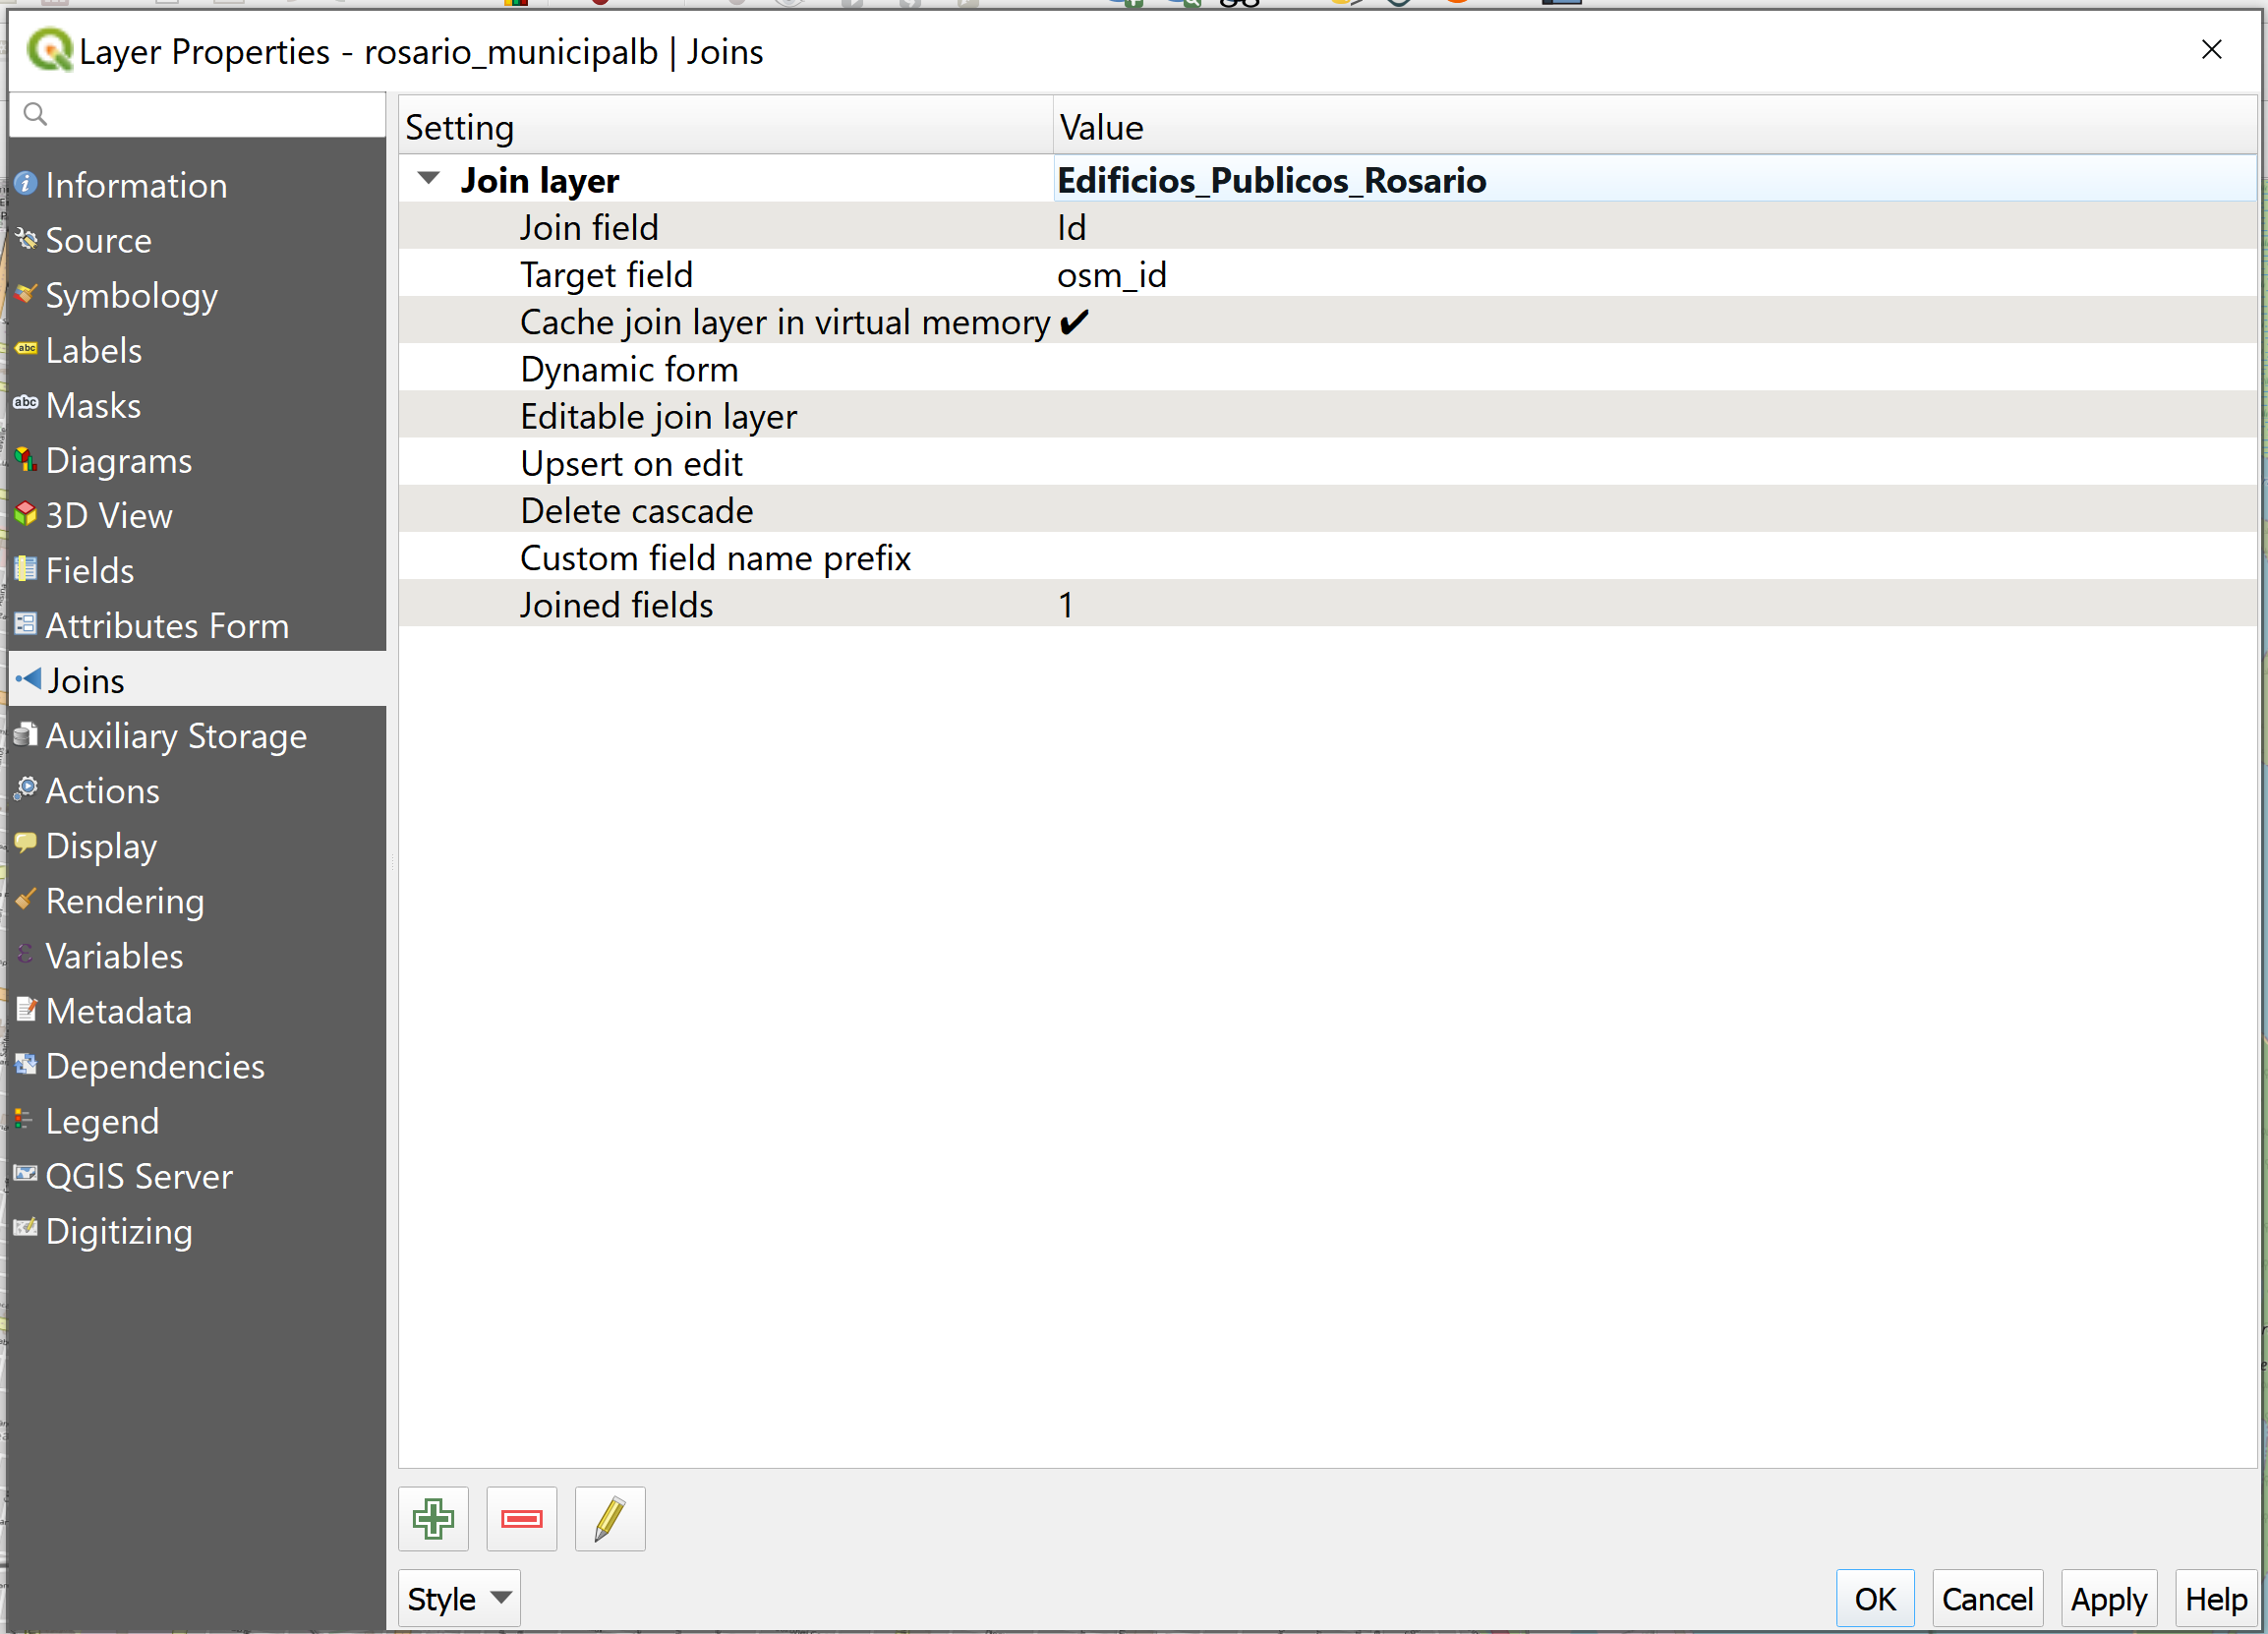
Figure 2.9: Join
To make sure the field was added correctly we can open the Attribute Table of the rosario_municipalb layer and check that the column was indeed joined. (See 2.10 and 2.11)

Figure 2.10: Attribute Table
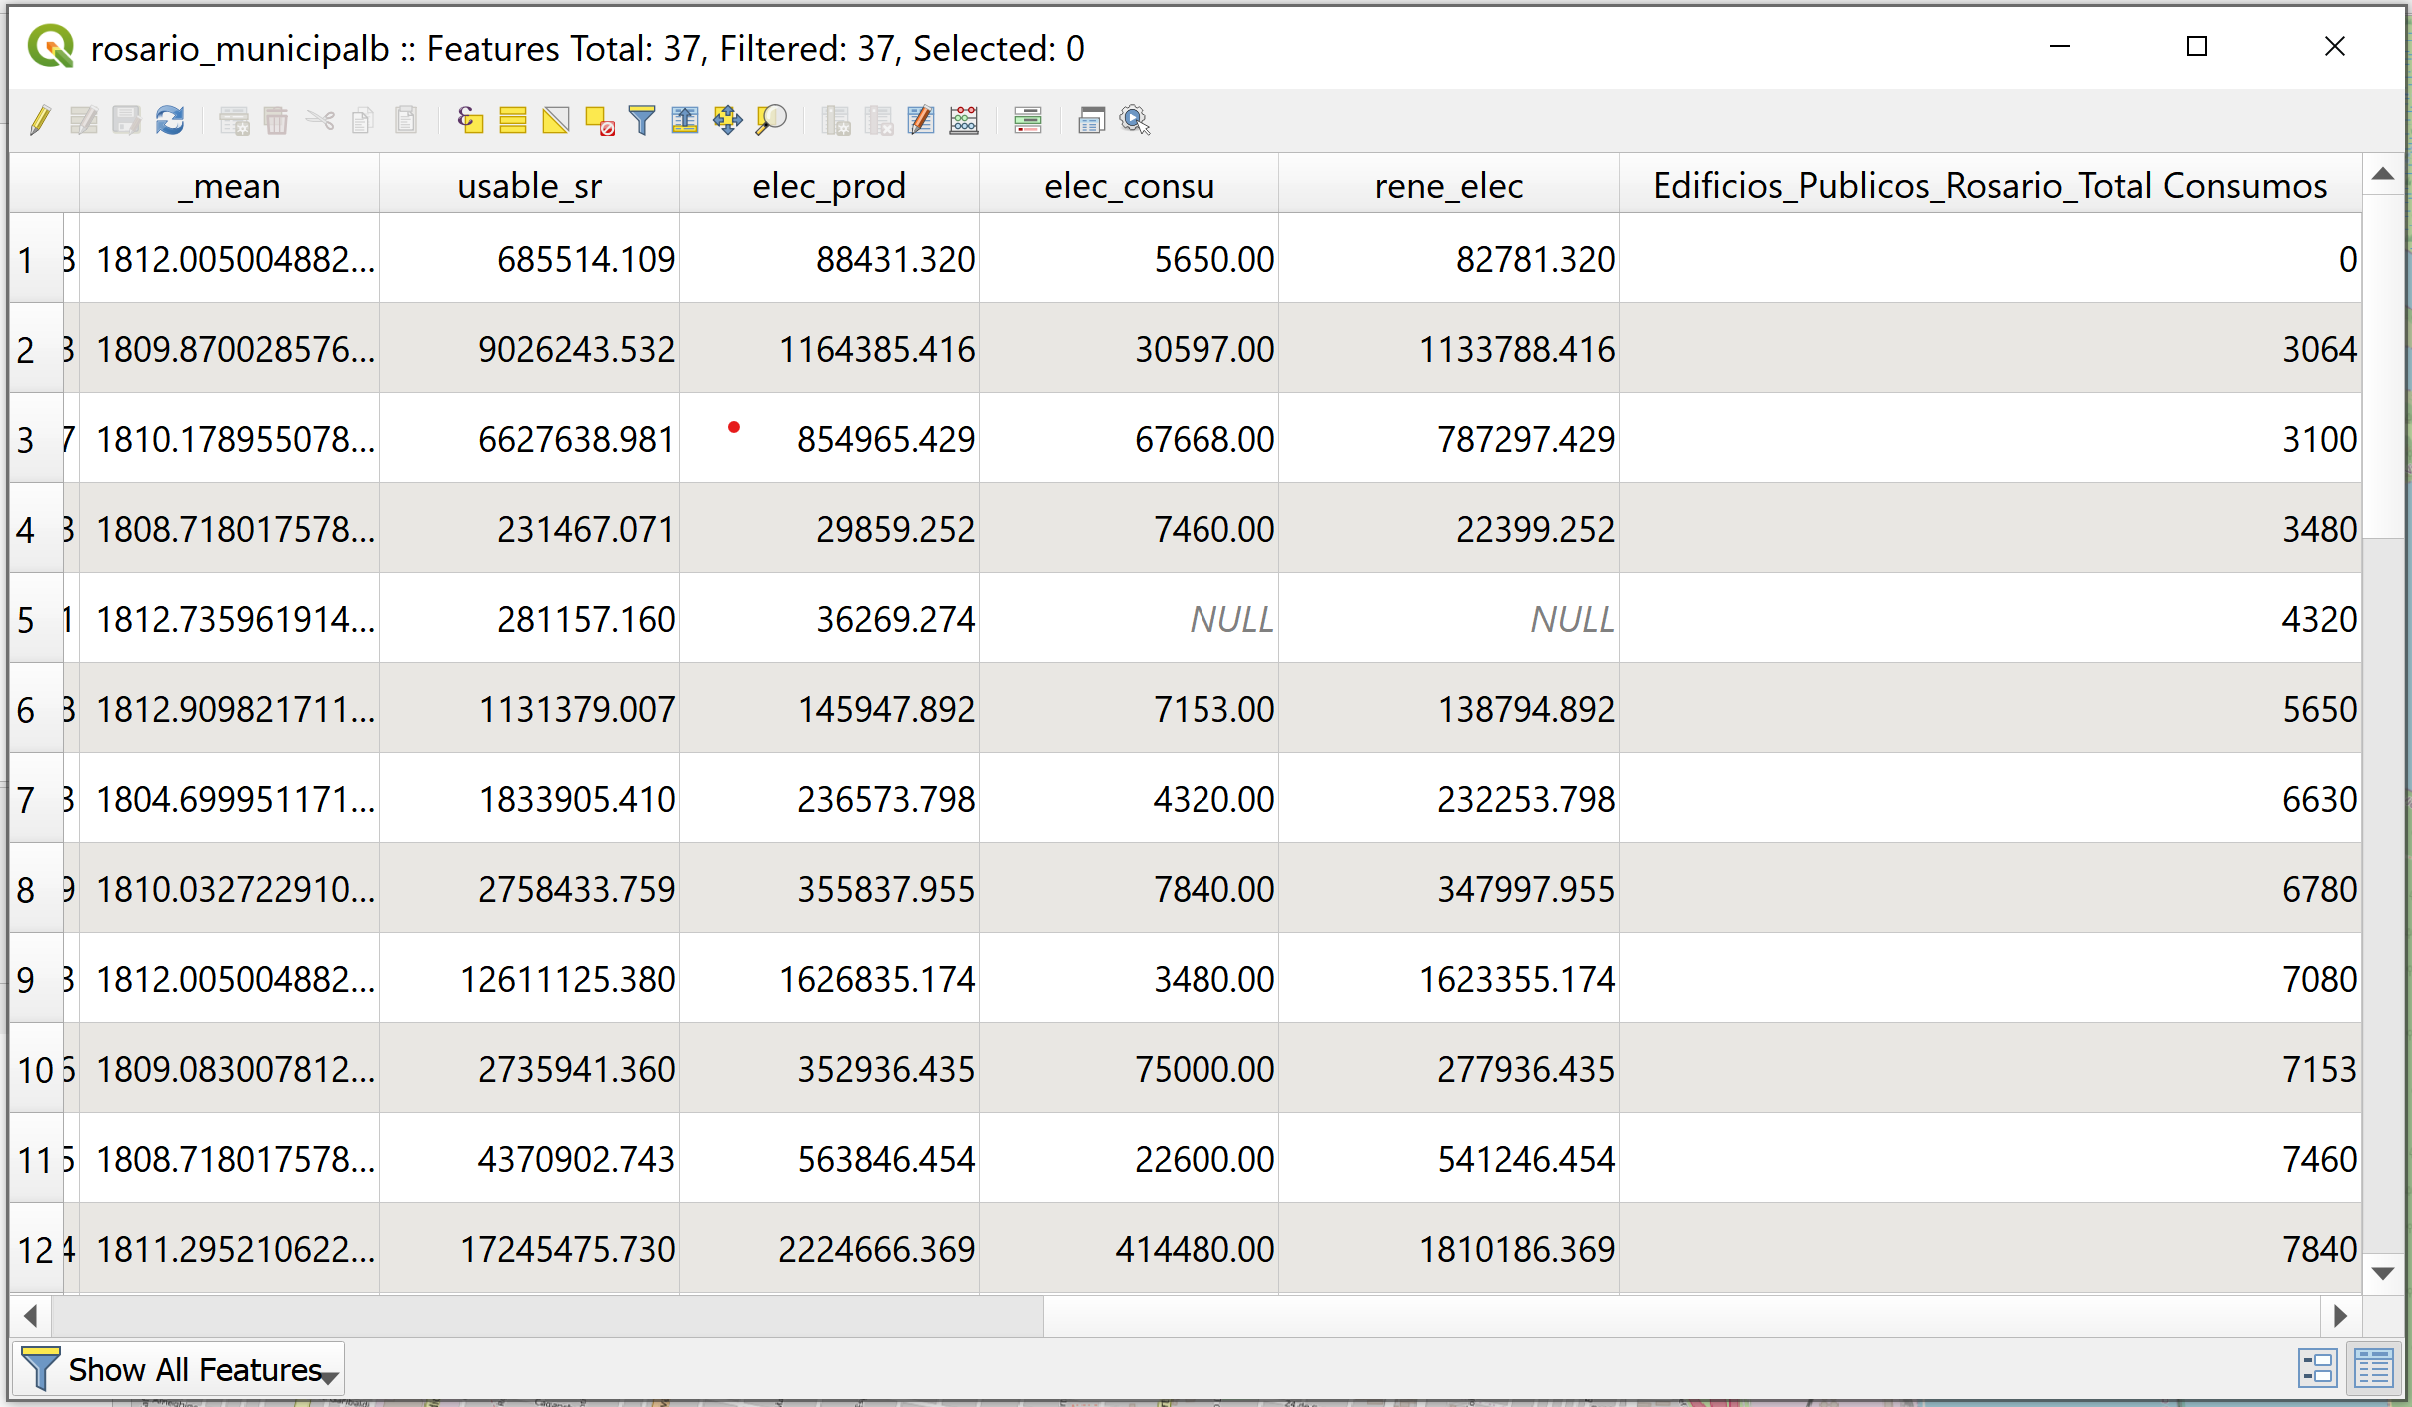
Figure 2.11: Attribute Table