A note from the authors: Some of the information and instructions in this book are now out of date because of changes to Hugo and the blogdown package. If you have suggestions for improving this book, please file an issue in our GitHub repository. Thanks for your patience while we work to update the book, and please stay tuned for the revised version!
In the meantime, you can find an introduction to the changes and new features in the v1.0 release blog post and this "Up & running with blogdown in 2021" blog post.
— Yihui, Amber, & Alison
2.5 Templates
A Hugo theme consists of two major components: templates, and web assets. The former is essential, and tells Hugo how to render a page.20 The latter is optional but also important. It typically consists of CSS and JavaScript files, as well as other assets like images and videos. These assets determine the appearance and functionality of your website, and some may be embedded in the content of your web pages.
You can learn more about Hugo templates from the official documentation (https://gohugo.io/templates/overview/). There are a great many different types of templates. To make it easier for you to master the key ideas, I created a very minimal Hugo theme, which covers most functionalities that an average user may need, but the total number of lines is only about 150, so we can talk about all the source code of this theme in the following subsection.
2.5.1 A minimal example
XMin is a Hugo theme I wrote from scratch in about 12 hours. Roughly half an hour was spent on templates, 3.5 hours were spent on tweaking the CSS styles, and 8 hours were spent on the documentation (https://xmin.yihui.org). I think this may be a representative case of how much time you would spend on each part when designing a theme. It is perhaps our nature to spend much more time on cosmetic stuff like CSS than essential stuff like templates. Meanwhile, coding is often easier than documentation.
We will show the source code of the XMin theme. Because the theme may be updated occasionally in the future, you may follow this link to obtain a fixed version that we will talk about in this section: https://github.com/yihui/hugo-xmin/tree/4bb305. Below is a tree view of all files and directories in the theme:
hugo-xmin/
├── LICENSE.md
├── README.md
├── archetypes
│   └── default.md
├── layouts
│   ├── 404.html
│   ├── _default
│   │   ├── list.html
│   │   ├── single.html
│   │   └── terms.html
│   └── partials
│       ├── foot_custom.html
│       ├── footer.html
│       ├── head_custom.html
│       └── header.html
├── static
│   └── css
│       ├── fonts.css
│       └── style.css
└── exampleSite
    ├── config.toml
    ├── content
    │   ├── _index.md
    │   ├── about.md
    │   ├── note
    │   │   ├── 2017-06-13-a-quick-note.md
    │   │   └── 2017-06-14-another-note.md
    │   └── post
    │       ├── 2015-07-23-lorem-ipsum.md
    │       └── 2016-02-14-hello-markdown.md
    ├── layouts
    │   └── partials
    │       └── foot_custom.html
    └── public
        └── ...
LICENSE.md and README.md are not required components of a theme, but you definitely should choose a license for your source code so that other people can properly use your code, and a README can be the brief documentation of your software.
The file archetypes/default.md defines the default template based on which users can create new posts. In this theme, default.md only provided empty YAML metadata:
---
---
The most important directories of a theme are layouts/ and static/. HTML templates are stored under layouts/, and assets are stored under static/.
To understand layouts/, you must know some basics about HTML (see Section B.1) because the templates under this directory are mostly HTML documents or fragments. There are many possible types of subdirectories under layouts/, but we are only going to introduce two here: _default/ and partials/.
The
_default/directory is where you put the default templates for your web pages. In the XMin theme, we have three templates:single.html,list.html, andterms.html.single.htmlis a template for rendering single pages. A single page basically corresponds to a Markdown document undercontent/, and it contains both the (YAML) metadata and content. Typically we want to render the page title, author, date, and the content. Below is the source code of XMin’ssingle.html:{{ partial "header.html" . }} <div class="article-meta"> <h1><span class="title">{{ .Title }}</span></h1> {{ with .Params.author }} <h2 class="author">{{ . }}</h2> {{ end }} {{ if .Params.date }} <h2 class="date">{{ .Date.Format "2006/01/02" }}</h2> {{ end }} </div> <main> {{ .Content }} </main> {{ partial "footer.html" . }}You see a lot of pairs of double curly braces
{{}}, and that is how you program the templates using Hugo’s variables and functions.The template starts with a partial template
header.html, for which you will see the source code soon. For now, you can imagine it as all the HTML tags before the body of your page (e.g.,<html><head>). Partial templates are mainly for reusing HTML code. For example, all HTML pages may share very similar<head></head>tags, and you can factor out the common parts into partial templates.The metadata of a page is included in a
<div>element with the classarticle-meta. We recommend that you assign classes to HTML elements when designing templates, so that it will be easier to apply CSS styles to these elements using class names. In a template, you have access to many variables provided by Hugo, e.g., the.Titlevariable stores the value of the page title, and we write the title in a<span>in a first-level header<h1>. Similarly, the author and date are written in<h2>, but only if they are provided in the YAML metadata. The syntax{{ with FOO }}{{ . }}{{ end }}is a shorthand of{{if FOO }}{{ FOO }}{{ end }}, i.e., it saves you the effort of typing the expressionFOOtwice by using{{ . }}. The method.Formatcan be applied to a date object, and in this theme, we format dates in the formYYYY/mm/dd(2006/01/02is the way to specify the format in Go).Then we show the content of a page, which is stored in the variable
.Content. The content is wrapped in a semantic HTML tag<main>.The template is finished after we include another partial template
footer.html(source code to be shown shortly).To make it easier to understand how a template works, we show a minimal example post below:
---
title: Hello World
author: Frida Gomam
date: 2017-06-19
---

A single paragraph.
Using the template
single.html, it will be converted to an HTML page with source code that looks more or less like this (with the header and footer omitted):<div class="article-meta"> <h1><span class="title">Hello World</span></h1> <h2 class="author">Frida Gomam</h2> <h2 class="date">2017/06/19</h2> </div> <main> <p>A single paragraph.</p> </main>For a full example of a single page, you may see https://xmin.yihui.org/about/.
list.htmlis the template for rendering lists of pages, such as a list of blog posts, or a list of pages within a category or tag. Here is its source code:{{ partial "header.html" . }} {{if not .IsHome }} <h1>{{ .Title }}</h1> {{ end }} {{ .Content }} <ul> {{ range (where .Data.Pages "Section" "!=" "") }} <li> <span class="date">{{ .Date.Format "2006/01/02" }}</span> <a href="{{ .URL }}">{{ .Title }}</a> </li> {{ end }} </ul> {{ partial "footer.html" . }}Again, it uses two partial templates
header.htmlandfooter.html. The expression{{if not .IsHome }}means, if this list is not the home page, show the page title. This is because I do not want to display the title on the homepage. It is just my personal preference. You can certainly display the title in<h1>on the home page if you want.The
{{ .Content }}shows the content of the list. Please note that typically.Contentis empty, which may be surprising. This is because a list page is not generated from a source Markdown file by default. However, there is an exception. When you write a special Markdown file_index.mdunder a directory corresponding to the list name, the.Contentof the list will be the content of this Markdown file. For example, you can define the content of your homepage incontent/_index.md, and the content of the post list page undercontent/post/_index.md.Next we generate the list using a loop (
range) through all pages filtered by the condition that the section of a page should not be empty. “Section” in Hugo means the first-level subdirectory name undercontent/. For example, the section ofcontent/post/foo.mdispost. Therefore the filter means that we will list all pages under subdirectories ofcontent/. This will exclude pages under the rootcontent/directory, such ascontent/about.md.Please note that the variable
.Datais dynamic, and its value changes according to the specific list you want to generate. For example, the list page https://xmin.yihui.org/post/ only contains pages undercontent/post/, and https://xmin.yihui.org/note/ only contains pages undercontent/note/. These list pages are automatically generated by Hugo, and you do not need to explicitly loop through the sectionspostandnote. That is, a single templatelist.htmlwill generate multiple lists of pages according to the sections and taxonomy terms (e.g., categories and tags) you have on your website.The list items are represented by the HTML tags
<li>in<ul>. Each item consists of the date, link, and title of a page. You may see https://xmin.yihui.org/post/ for a full example of a list page.terms.htmlis the template for the home page of taxonomy terms. For example, you can use it to generate the full list of categories or tags. The source code is below:{{ partial "header.html" . }} <h1>{{ .Title }}</h1> <ul class="terms"> {{ range $key, $value := .Data.Terms }} <li> <a href='{{ (print "/" $.Data.Plural "/" $key) | relURL }}'> {{ $key }} </a> ({{ len $value }}) </li> {{ end }} </ul> {{ partial "footer.html" . }}Similar to
list.html, it also uses a loop. The variable.Data.Termsstores all terms under a taxonomy, e.g., all category names. You can think of it as a named list in R (called amapin Go), with the names being the terms and the values being lists of pages. The variable$keydenotes the term and$valuedenotes the list of pages associated with this term. What we render in each<li>is a link to the term page as well as the count of posts that used this term (lenis a Go function that returns the length of an object).Hugo automatically renders all taxonomy pages, and the path names are the plural forms of the taxonomies, e.g., https://xmin.yihui.org/categories/ and https://xmin.yihui.org/tags/. That is the meaning of
.Data.Plural. The leading$is required because we are inside a loop, and need to access variables from the outside scope. The link of the term is passed to the Hugo functionrelURLvia a pipe|to make it relative, which is good practice because relative links are more portable (independent of the domain name).
The
partials/directory is the place to put the HTML fragments to be reused by other templates via thepartialfunction. We have four partial templates under this directory:header.htmlmain defines the<head>tag and the navigation menu in the<nav>tag.<!DOCTYPE html> <html lang="{{ .Site.LanguageCode }}"> <head> <meta charset="utf-8"> <title>{{ .Title }} | {{ .Site.Title }}</title> <link href='{{ "/css/style.css" | relURL }}' rel="stylesheet" /> <link href='{{ "/css/fonts.css" | relURL }}' rel="stylesheet" /> {{ partial "head_custom.html" . }} </head> <body> <nav> <ul class="menu"> {{ range .Site.Menus.main }} <li><a href="{{ .URL | relURL }}">{{ .Name }}</a></li> {{ end }} </ul> <hr/> </nav>The
<head>area should be easy to understand if you are familiar with HTML. Note that we also included a partial templatehead_custom.html, which is empty in this theme, but it will make it much easier for users to add customized code to<head>without rewriting the whole template. See Section 2.6 for more details.The navigation menu is essentially a list, and each item of the list is read from the variable
.Site.Menus.main. This means users can define the menu inconfig.toml, e.g.,[[menu.main]] name = "Home" url = "/" [[menu.main]] name = "About" url = "/about/"It will generate a menu like this:
<ul class="menu">
  <li><a href="/">Home</a></li>
  <li><a href="/about/">About</a></li>
</ul>
Hugo has a powerful menu system, and we only used the simplest type of menu in this theme. If you are interested in more features like nested menus, please see the full documentation at http://gohugo.io/extras/menus/.
footer.htmldefines the footer area of a page and closes the HTML document:<footer> {{ partial "foot_custom.html" . }} {{ with .Site.Params.footer }} <hr/> {{ . | markdownify }} {{ end }} </footer> </body> </html>The purpose of the partial template
foot_custom.htmlis the same ashead_custom.html; that is, to allow the user to add customized code to the<footer>without rewriting the whole template.Lastly, we use the variable
.Site.Params.footerto generate a page footer. Note we used thewithfunction again. Recall that the syntax{{ with .Site.Params.footer }}{{ . }}{{ end }}is a shorthand for{{if .Site.Params.footer }}{{ .Site.Params.footer }}{{ end }}. This syntax saves you from typing the expression.Site.Params.footertwice by using{{ . }}as a placeholder for the variablefooter, which is defined as a site parameter in ourconfig.tomlfile. The additional functionmarkdownifycan convert Markdown to HTML (i.e.,{{ . | markdownify }}. Altogether, this sequence means we can define afooteroption using Markdown underparamsinconfig.toml, e.g.,[params] footer = "© [Yihui Xie](https://yihui.org) 2017"
There is a special template 404.html, which Hugo uses to create the 404 page (when a page is not found, this page is displayed):
{{ partial "header.html" . }}

404 NOT FOUND

{{ partial "footer.html" . }}
With all templates above, we will be able to generate a website from Markdown source files. You are unlikely to be satisfied with the website, however, because the HTML elements are not styled at all, and the default appearance may not look appealing to most people. You may have noticed that in header.html, we have included two CSS files, /css/style.css and /css/fonts.css.
You can find many existing open-source CSS frameworks online that may be applied to a Hugo theme. For example, the most popular CSS framework may be Bootstrap: http://getbootstrap.com. When I was designing XMin, I wondered how far I could go without using any of these existing frameworks, because they are usually very big. For example, bootstrap.css has nearly 10000 lines of code when not minimized. It turned out that I was able to get a satisfactory appearance with about 50 lines of CSS, which I will explain in detail below:
style.cssdefines all styles except the typefaces:body { max-width: 800px; margin: auto; padding: 1em; line-height: 1.5em; }The maximum width of the page body is set to 800 pixels because an excessively wide page is difficult to read (
800is an arbitrary threshold that I picked). The body is centered using the CSS trickmargin: auto, which means the top, right, bottom, and left margins are automatic. When a block element’s left and right margins areauto, it will be centered./* header and footer areas */ .menu li { display: inline-block; } .article-meta, .menu a { text-decoration: none; background: #eee; padding: 5px; border-radius: 5px; } .menu, .article-meta, footer { text-align: center; } .title { font-size: 1.1em; } footer a { text-decoration: none; } hr { border-style: dashed; color: #ddd; }Remember that our menu element is a list
<ul class="menu">defined inheader.html. I changed the default display style of<li>within the menu toinline-block, so that they will be laid out from left to right as inline elements, instead of being stacked vertically as a bullet list (the default behavior).For links (
<a>) in the menu and the metadata area of an article, the default text decoration (underlines) is removed, and a light background color is applied. The border radius is set to 5 pixels so that you can see a subtle round-corner rectangle behind each link.The horizontal rule (
<hr>) is set to a dashed light-gray line to make it less prominent on a page. These rules are used to separate the article body from the header and footer areas./* code */ pre { border: 1px solid #ddd; box-shadow: 5px 5px 5px #eee; padding: 1em; overflow-x: auto; } code { background: #f9f9f9; } pre code { background: none; }For code blocks (
<pre>), I apply light gray borders with drop-shadow effects. Every inline code element has a very light gray background. These decorations are merely out of my own peculiar interest and emphasis in code./* misc elements */ img, iframe, video { max-width: 100%; } main { hyphens: auto; } blockquote { background: #f9f9f9; border-left: 5px solid #ccc; padding: 3px 1em 3px; } table { margin: auto; border-top: 1px solid #666; border-bottom: 1px solid #666; } table thead th { border-bottom: 1px solid #ddd; } th, td { padding: 5px; } tr:nth-child(even) { background: #eee }Embedded elements like images and videos that exceed the page margin are often ugly, so I restrict their maximum width to 100%. Hyphenation is turned on for words in
<main>. Blockquotes have a gray left sidebar and a light gray background. Tables are centered by default, with only three horizontal rules: the top and bottom borders of the table, and the bottom border of the table head. Table rows are striped to make it easier to read the table especially when the table is wide.fonts.cssis a separate style sheet because it plays a critical role in the appearance of a website, and it is very likely that you will want to customize this file. In most cases, your readers will spend the most time on reading the text on your pages, so it is important to make the text comfortable to read. I’m not an expert in web design, and I just picked Palatino for the body and Lucida Console or Monaco (whichever is available in your system) for the code. It is common to use Google web fonts nowadays. You may try some web fonts and see if you like any of them.body { font-family: "Palatino Linotype", "Book Antiqua", Palatino, serif; } code { font-family: "Lucida Console", Monaco, monospace; font-size: 85%; }
The two CSS files are placed under the static/css/ directory of the theme. In the HTML template header.html, the path /css/style.css refers to the file static/css/style.css.
Lastly, this theme provided an example site under exampleSite/. The directory structure may be a little confusing because this is a theme instead of a website. In practice, everything under exampleSite/ should be under the root directory of a website, and the top-level hugo-xmin/ directory should be under the themes/ directory of this website, i.e.,
├── config.toml
├── content/
├── ...
├── themes/
│   └── hugo-xmin/
│
└── ...
The example site provides a sample config.toml, a home page _index.md, an about page about.md, two posts under note/ and two under post/. It also overrides the foot_custom.html in the theme.
2.5.2 Implementing more features
The XMin is actually a highly functional theme, but we understand that it may be too minimal for you. There are a few commonly used features (intentionally) missing in this theme, and we will teach you how to add them by yourself if desired. All these features and the source code can be applied to other themes, too.
Enable Google Analytics. Hugo has provided a built-in partial template. For XMin, you can add
{{ template "_internal/google_analytics.html" . }}to
layouts/partials/foot_custom.htmlunder the root directory of your website (instead ofthemes/hugo-xmin/), and configuregoogleAnalyticsin theconfig.toml. See https://github.com/yihui/hugo-xmin/pull/3 for details, and the HTML source of this page for the JavaScript rendered from the template: https://deploy-preview-3--hugo-xmin.netlify.com.Enable Disqus comments. Similar to Google Analytics, you can add the built-in template
{{ template "_internal/disqus.html" . }}to
foot_custom.html, and configure the Disqus shortname inconfig.toml. See https://github.com/yihui/hugo-xmin/pull/4 for details, and a preview at https://deploy-preview-4--hugo-xmin.netlify.com.Enable syntax highlighting via highlight.js. Add this to
head_custom.html<link href="//YOUR-CDN-LINK/styles/github.min.css" rel="stylesheet">and this to
foot_custom.html:<script src="//YOUR-CDN-LINK/highlight.min.js"></script> <script src="//YOUR-CDN-LINK/languages/r.min.js"></script> <script> hljs.configure({languages: []}); hljs.initHighlightingOnLoad(); </script>Remember to replace
YOUR-CDN-LINKwith the link to your preferred CDN host of highlight.js, e.g.,cdnjs.cloudflare.com/ajax/libs/highlight.js/9.12.0. For more information about highlight.js, please see its homepage: https://highlightjs.org. If you need to use other CDN hosts, cdnjs.com is a good choice: https://cdnjs.com/libraries/highlight.js You can also see which languages and CSS themes are supported there.You may see https://github.com/yihui/hugo-xmin/pull/5 for an actual implementation, and a sample page with syntax highlighting at https://deploy-preview-5--hugo-xmin.netlify.com/post/2016/02/14/a-plain-markdown-post/.
Support math expressions through MathJax. Add the code below to
foot_custom.html.<script src="//yihui.org/js/math-code.js"></script> <script async src="//YOUR-CDN-LINK/MathJax.js?config=TeX-MML-AM_CHTML"> </script>This requires substantial knowledge of JavaScript and familiarity with MathJax to fully understand the code above, and we will leave the explanation of the code to Section B.3.
Remember to replace
YOUR-CDN-LINKwith the link to your preferred CDN host of MathJax, e.g.,cdnjs.cloudflare.com/ajax/libs/mathjax/2.7.5.Show the table of contents (TOC). To show a TOC for R Markdown posts, you only need to add the output format
blogdown::html_pagewith the optiontoc: trueto YAML:output: blogdown::html_page: toc: trueFor plain Markdown posts, you have to modify the template
single.html. The TOC of a post is stored in the Hugo template variable.TableOfContents. You may want an option to control whether to show the TOC, e.g., you may add an optiontoc: trueto the YAML metadata of a Markdown post to show the TOC. The code below can be added before the content of a post insingle.html:{{ if .Params.toc }} {{ .TableOfContents }} {{ end }}See https://github.com/yihui/hugo-xmin/pull/7 for an implementation with examples.
Display categories and tags in a post if provided in its YAML. Add the code below where you want to place the categories and tags in
single.html, e.g., in<div class="article-meta"></div>.<p class="terms"> {{ range $i := (slice "categories" "tags") }} {{ with ($.Param $i) }} {{ $i | title }}: {{ range $k := . }} <a href='{{ relURL (print "/" $i "/" $k | urlize) }}'>{{$k}}</a> {{ end }} {{ end }} {{ end }} </p>Basically the code loops through the YAML metadata fields
categoriesandtags, and for each field, its value is obtained from.Param, then we use an inside loop to write out the terms with links of the form<a href="/tags/foo/">foo</a>.You may see https://github.com/yihui/hugo-xmin/pull/2 for the complete implementation and a preview at https://deploy-preview-2--hugo-xmin.netlify.com/post/2016/02/14/a-plain-markdown-post/.
Add pagination. When you have a large number of posts on a website, you may not want to display the full list on a single page, but show N posts (e.g., N = 10) per page. It is easy to add pagination to a website using Hugo’s built-in functions and templates. Instead of looping through all posts in a list template (e.g.,
range .Data.Pages), you paginate the full list of posts using the function.Paginate(e.g.,range (.Paginate .Data.Pages)). Below is a template fragment that you may insert to your template filelist.html:<ul> {{ $paginator := .Paginate .Data.Pages }} {{ range $paginator.Pages }} <li> <span class="date">{{ .Date.Format "2006/01/02" }}</span> <a href="{{ .URL }}">{{ .Title }}</a> </li> {{ end }} </ul> {{ template "_internal/pagination.html" . }}See https://github.com/yihui/hugo-xmin/pull/16 for a full implementation.
Add a GitHub Edit button or link to a page. If none of the above features look exciting to you (which would not surprise me), this little feature is really a great example of showing you the power of plain-text files and static websites, when combined with GitHub (or other services that support the online editing of plain-text files). I believe it would be difficult, if not impossible, to implement this feature in dynamic website frameworks like WordPress.
Basically, when you browse any text files in a repository on GitHub, you can edit them right on the page by hitting the Edit button (see Figure 2.3 for an example) if you have a GitHub account. If you have write access to the repository, you can commit the changes directly online, otherwise GitHub will fork the repository for you automatically, so that you can edit the file in your own repository, and GitHub will guide you to create a pull request to the original repository. When the original owner sees the pull request, he/she can see the changes you made and decide whether to accept them or not or ask you to make further changes. Although the terminology “pull request” is highly confusing to beginners,21 it is probably the single greatest feature invented by GitHub, because it makes it so much easier for people to make contributions.
What is really handy is that all you need is a URL of a fixed form to edit a file on GitHub:
https://github.com/USER/REPO/edit/BRANCH/PATH/TO/FILE. For example, https://github.com/rbind/yihui/edit/master/content/knitr/faq.md, whereUSERisrbind,REPOisyihui,BRANCHismaster, and the file path iscontent/knitr/faq.md.The key to implementing this feature is the variable
.File.Path, which gives us the source file path of a page undercontent/, e.g.,post/foo.md. If your website only uses plain Markdown files, the implementation will be very simple. I omitted the full GitHub URL in...below, of which an example could behttps://github.com/rbind/yihui/edit/master/content/.{{ with .File.Path }} <a href="https://github.com/.../{{ . }}">Edit this page</a> {{ end }}However, the case is a little more complicated for blogdown users, when R Markdown posts are involved. You cannot just use
.File.Pathbecause it actually points to the.htmloutput file from an.Rmdfile, whereas the.Rmdfile is the actual source file. The Edit button or link should not point to the.htmlfile. Below is the complete implementation that you may add to a template file depending on where you want to show the Edit link (e.g.,footer.html):{{ if .File.Path }} {{ $Rmd := (print .File.BaseFileName ".Rmd") }} {{ if (where (readDir (print "content/" .File.Dir)) "Name" $Rmd) }} {{ $.Scratch.Set "FilePath" (print .File.Dir $Rmd) }} {{ else }} {{ $.Scratch.Set "FilePath" .File.Path }} {{ end }} {{ with .Site.Params.GithubEdit}} <a href='{{ . }}{{ $.Scratch.Get "FilePath" }}'>Edit this page</a> {{ end }} {{ end }}The basic logic is that for a file, if the same filename with the extension
.Rmdexists, we will point the Edit link to the Rmd file. First, we define a variable$Rmdto be the filename with the.Rmdextension. Then we check if it exists. Unfortunately, there is no function in Hugo likefile.exists()in R, so we have to use a hack: list all files under the directory and see if the Rmd file is in the list.$.Scratchis the way to dynamically store and obtain variables in Hugo templates. Most variables in Hugo are read-only, and you have to use$.Scratchwhen you want to modify a variable. We set a variableFilePathin$.Scratch, whose value is the full path to the Rmd file when the Rmd file exists, and the path to the Markdown source file otherwise. Finally, we concatenate a custom optionGithubEditinconfig.tomlwith the file path to complete the Edit link<a>. Here is an example of the option inconfig.toml:[params] GithubEdit = "https://github.com/rbind/yihui/edit/master/content/"Please note that if you use Hugo on Windows to build and deploy your site, you may have to change the file path separators from backslashes to forward slashes, e.g., you may need
{{ $.Scratch.Set "FilePath" (replace ($.Scratch.Get "FilePath") "\\" "/") }}in the template. To avoid this complication, we do not recommend that you deploy your site through Windows (see Chapter 3 for deployment methods).You may see https://github.com/yihui/hugo-xmin/pull/6 for an actual implementation with R Markdown examples, and see the footer of this page for the Edit link: https://deploy-preview-6--hugo-xmin.netlify.com. You can actually see a link in the footer of every page, except the lists of pages (because they do not have source files).
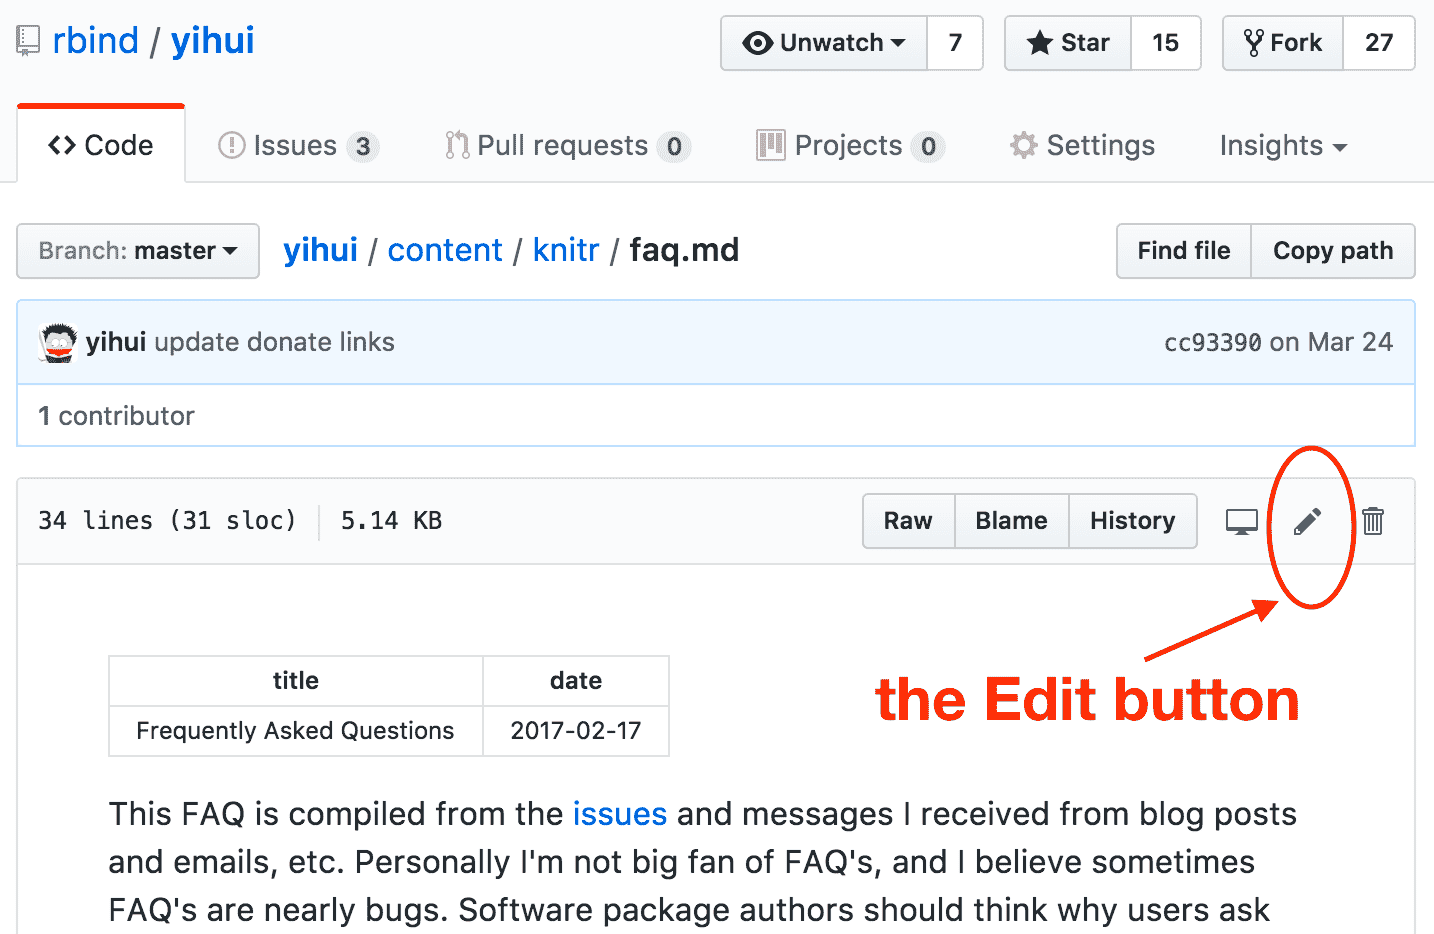
FIGURE 2.3: Edit a text file online on GitHub.
After you digest the XMin theme and the implementations of additional features, it should be much easier to understand other people’s templates. There are a large number of Hugo themes but the primary differences among them are often in styles. The basic components of templates are often similar.