A note from the authors: Some of the information and instructions in this book are now out of date because of changes to Hugo and the blogdown package. If you have suggestions for improving this book, please file an issue in our GitHub repository. Thanks for your patience while we work to update the book, and please stay tuned for the revised version!
In the meantime, you can find an introduction to the changes and new features in the v1.0 release blog post and this "Up & running with blogdown in 2021" blog post.
— Yihui, Amber, & Alison
1.4 RStudio IDE
There are a few essential RStudio addins to make it easy to edit and preview your website, and you can find them in the menu “Addins” on the RStudio toolbar:
“Serve Site”: This addin calls
blogdown::serve_site()to continuously serve your website locally using the LiveReload technology, so you can live preview the website. You can continue to edit material for your site while you are previewing it.“New Post”: This addin provides a dialog box for you to enter the metadata of your blog post, including the title, author, date, and so on. See Figure 1.7 for an example. This addin actually calls the function
blogdown::new_post()under the hood, but does a few things automatically:As you type the title of the post, it will generate a filename for you, and you can edit it if you do not like the automatically generated one. In fact, you can also use this addin to create normal pages under any directories under
content/. For example, if you want to add a resume page, you can change the filename toresume.mdfrom the defaultpost/YYYY-mm-dd-resume.md.You can select the date from a calendar widget provided by Shiny.6
It will scan the categories and tags of existing posts, so when you want to input categories or tags, you can select them from the dropdown menus, or create new ones.
After a new post is created, it will be automatically opened, so you can start writing the content immediately.
“Update Metadata”: This addin allows you to update the YAML metadata of the currently opened post. See Figure 1.8 for an example. The main advantage of this addin is that you can select categories and tags from dropdown menus instead of having to remember them.
“Insert Image”: This addin allows you to insert any image in your computer to your currently opened post.7 Figure 1.9 shows how the addin looks like. This addin copies the image to the final location for your post files, and adds the Markdown/HTML code to embed the image. You can specify the width and height of the image, as well as the alternative text. The addin will show the final image file path after the image is uploaded. You can edit the path if necessary. If the image already exists, the addin will ask you whether you want to overwrite it as in Figure 1.10: when in doubt, change the name in the “Target file path” text input to avoid a conflict with previous images you have inserted.

FIGURE 1.7: Create a new post using the RStudio addin.
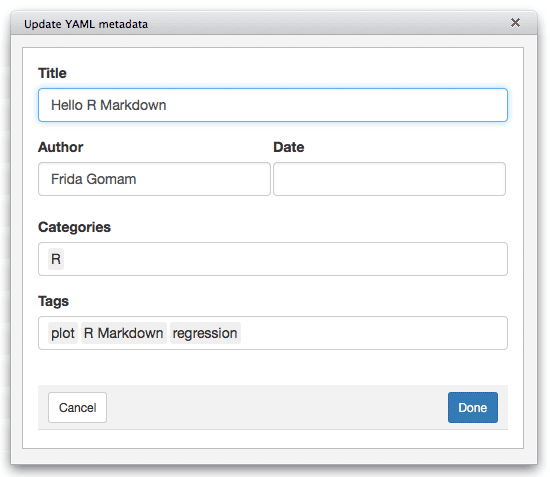
FIGURE 1.8: Update the metadata of an existing post using the RStudio addin.
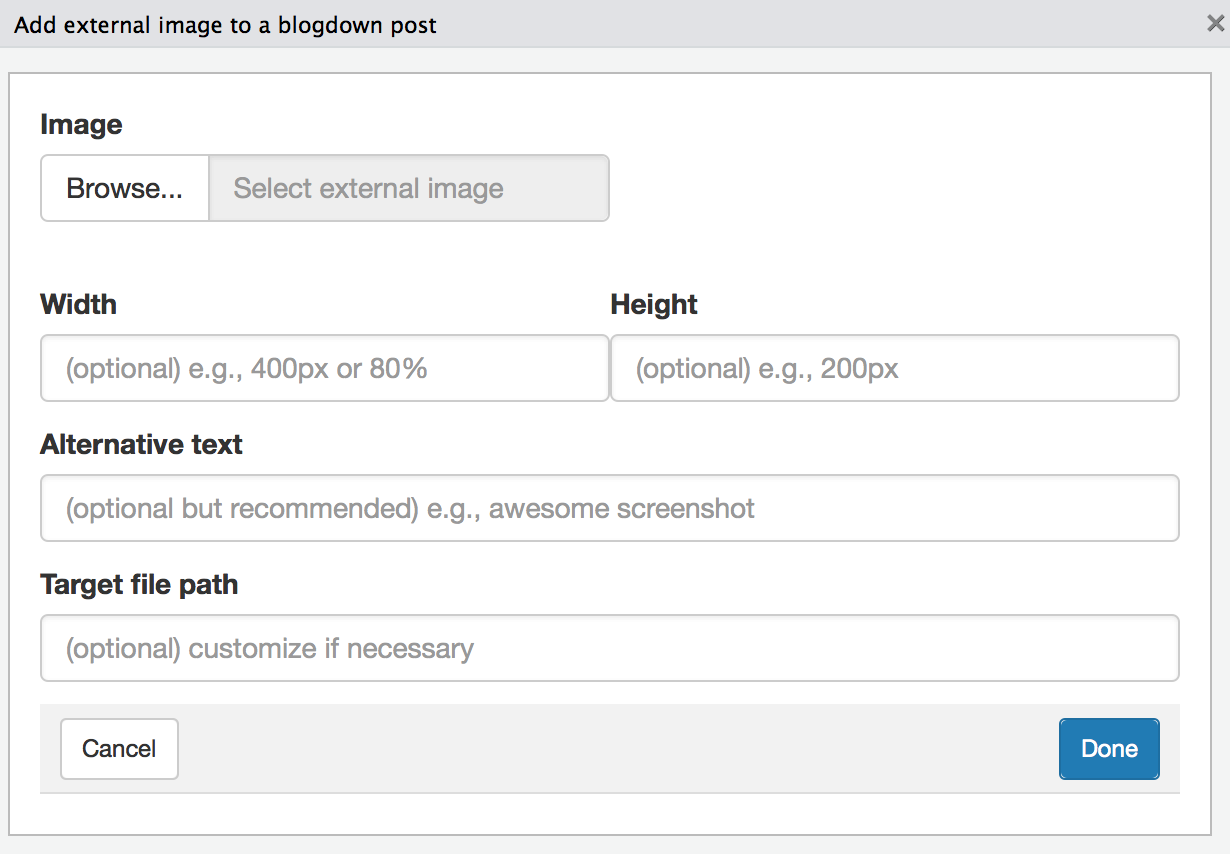
FIGURE 1.9: Insert an image to an existing post using the RStudio addin.
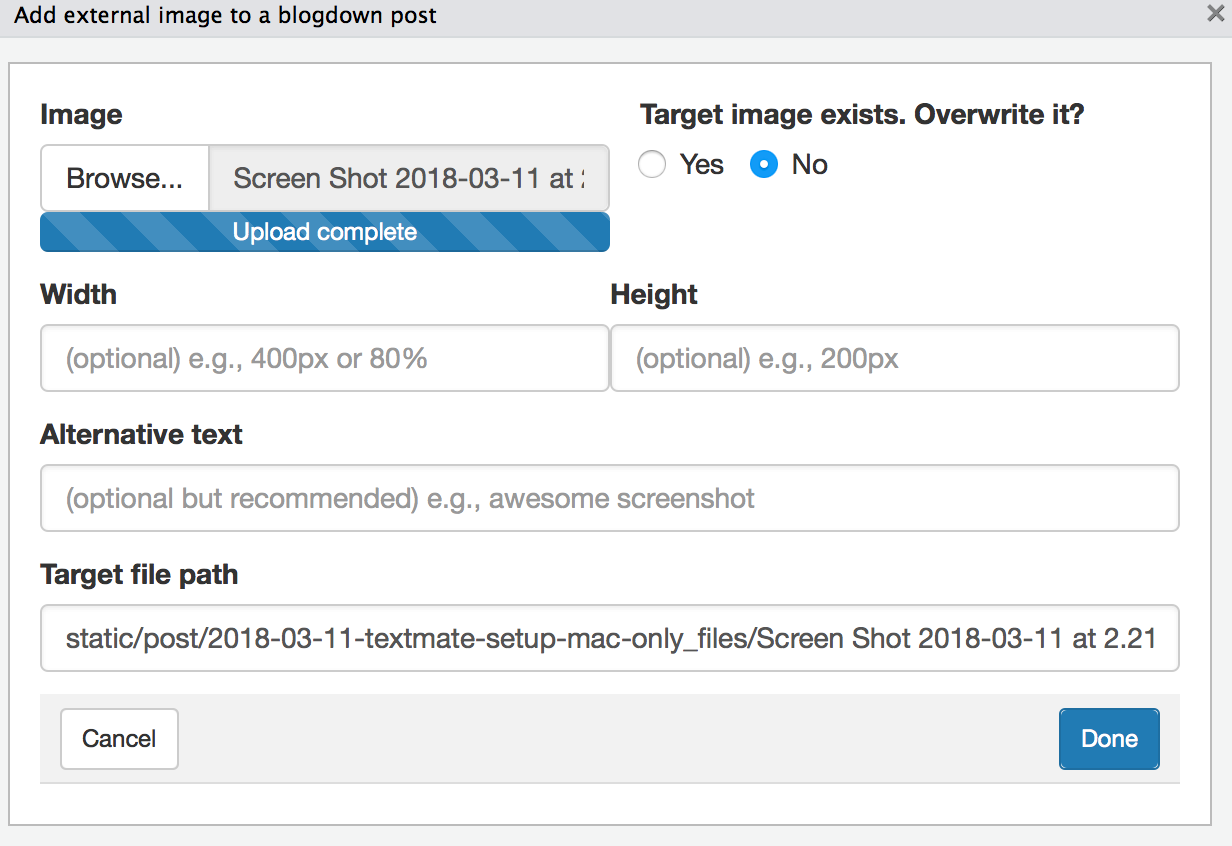
FIGURE 1.10: Overwrite the image you are inserting in your blog post.
With these addins, you should rarely need to run any R commands manually after you have set up your website, since all your posts will be automatically compiled whenever you create a new post or modify an existing post due to the LiveReload feature.
If your website was created using the function blogdown::new_site() instead of the RStudio menu (see Figure 1.1 and 1.2) for the first time, you can quit RStudio and open the project again. If you go to the menu Tools -> Project Options, your project type should be “Website” like what you can see in Figure 1.11.
Then you will see a pane in RStudio named “Build,” and there is a button “Build Website.” When you click this button, RStudio will call blogdown::build_site() to build the website. This will automatically generate files in the public/ directory.8
We strongly recommend that you uncheck the option “Preview site after building” in your RStudio project options (Figure 1.11).9 You can also uncheck the option “Re-knit current preview when supporting files change,” since this option is not really useful after you call serve_site().
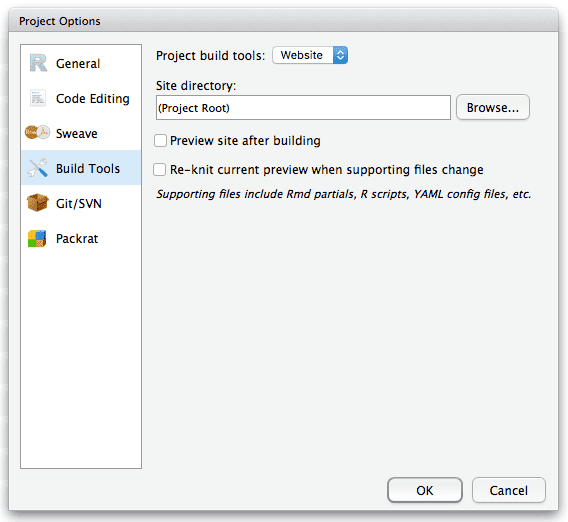
FIGURE 1.11: RStudio project options.
Shiny is an R package for building interactive web apps using R. Using this addin, the calendar widget allows you to view an interactive calendar by month to select dates. This is a simple use of Shiny, but you can read more about Shiny apps here: https://shiny.rstudio.com.↩︎
Check https://lcolladotor.github.io/2018/03/07/blogdown-insert-image-addin for a more in-depth explanation and for how to insert an image without using this addin.↩︎
Or wherever your publishing directory is located. It is
public/by default, but it can be changed by specifying the fieldpublishDir: "myNewDirectory"in theconfig.yamlfile.↩︎In case you wonder why: unless you have set the option
relativeurlstotrueinconfig.toml, it requires a web server to preview the website locally, otherwise even if you can see the homepage of your website in the RStudio Viewer, most links like those links to CSS and JavaScript files are unlikely to work. When the RStudio Viewer shows you the preview, it does not actually launch a web server.↩︎