4 Connector
The tube runs from the slider box to the skeg box, containing the cord.
4.1 Tube
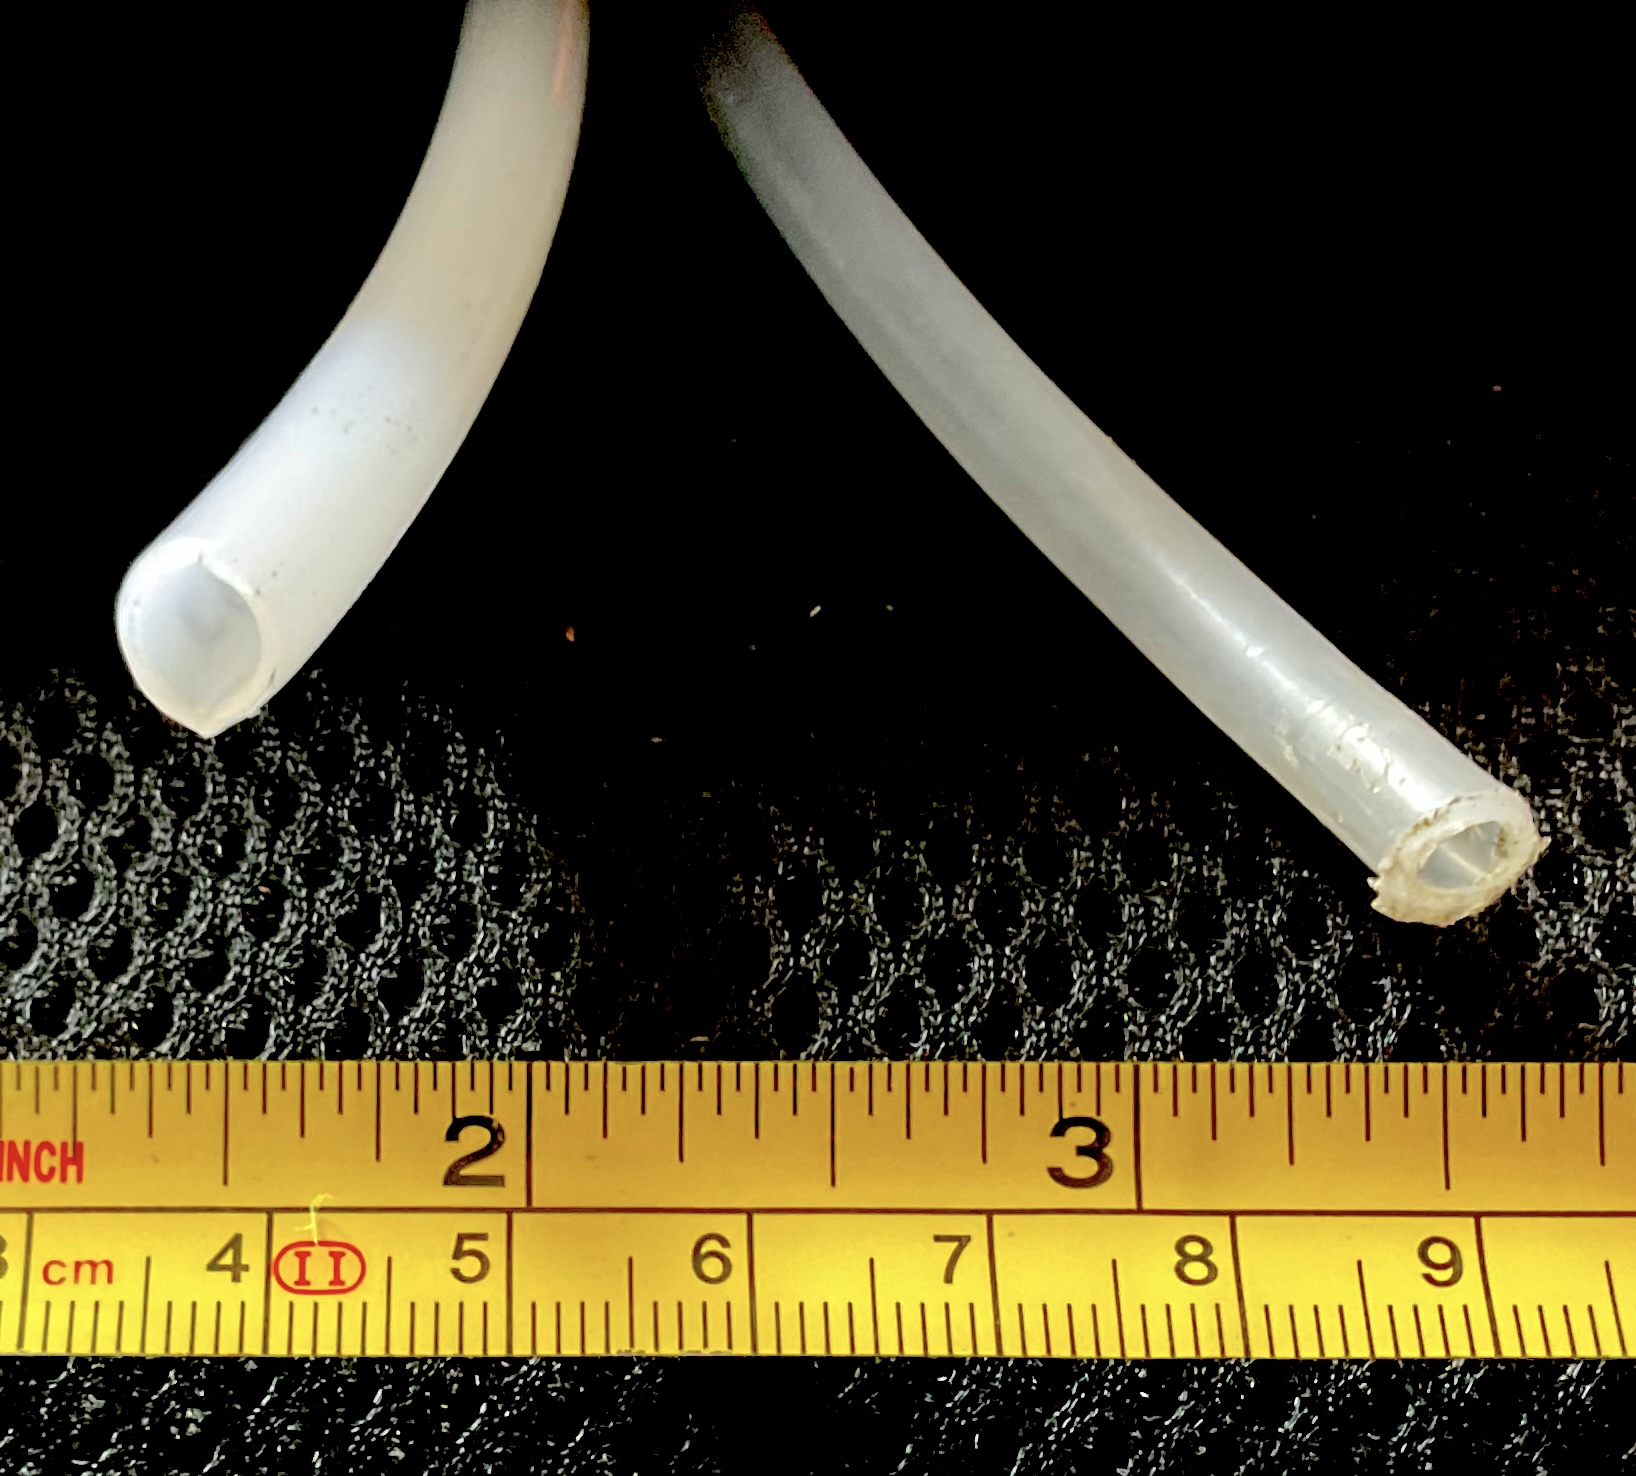
The tube is 8 mm outside diameter, 6 mm inside diameter naturally coloured Nylon 12. It can be purchased in 30 metre lengths (each boat needs around 2 metres!) from RS, stock number 415-0345 (it is used as industrial air hose). Shorter lengths may be available - e.g. on eBay.
Earlier versions of the system used smaller diameter tube with a 6 mm outer diameter, 4 mm inside diameter in Nylon 6.
The earlier versions seem to have been mostly used with the old, thinner, blue cord, with the larger tube associated with the thicker yellow cord. Replacement of the thicker yellow cord is easier with the new larger diameter tube.
4.1.1 Removal/replacement of tube
It may be easiest to tape the skeg in the retracted position. Begin at the controller - disassemble the controller (see notes on the controller) and either cut or untie the cord from the slider button. Remove the blade from the boat (see notes on actuator) and pull on the blade to unthread the cord from the tube.
Open both the day hatch and the rear hatch. Pull the tube through the bulkheads between the cockpit, day hatch compartment and rear compartment. In plastic boats, the tube simply runs through holes made in the foam bulkheads. In composite boats, the tube runs through polymeric fittings in the bulkheads.
The tube is held in place in the rear compartment by a P-clip to the deck of the kayak. It may be useful to mark the tube at the P-clip to identify the correct re-attachment point if planning to re-fit or replace the tube.
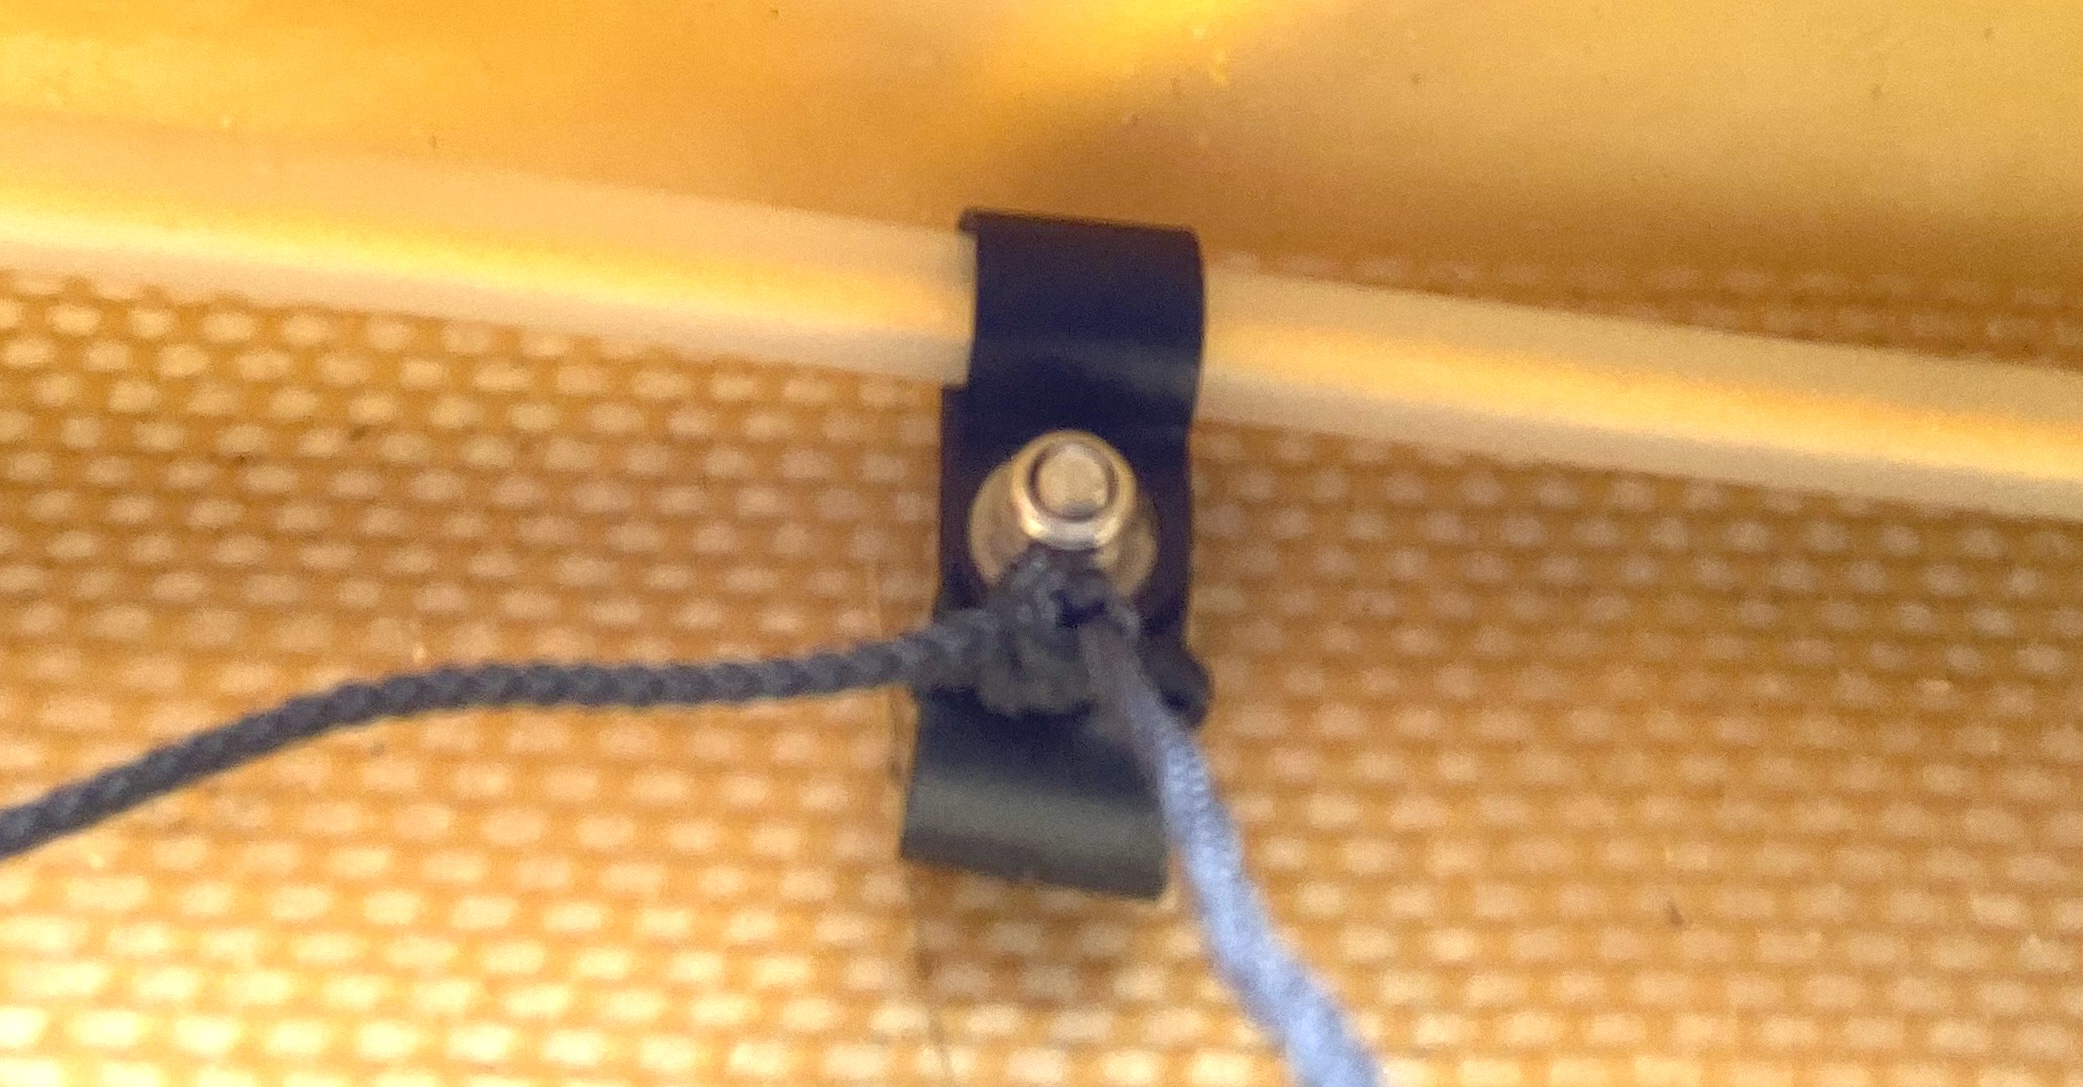
The bolt holding this P-clip in place also holds one of the recessed deck fittings to the boat in plastic boats. In composite boats, the fitting is glassed in separately. Unscrew the polymer domed nut from the bolt - this should be possible by hand. Fit a socket wrench with a 10mm socket, or adjust an adjustable spanner to an appropriate setting to hold the locknut under the deck. Use an Allen key to unscrew the bolt through the deck fitting (if working on a plastic boat) and remove to free the P-clip. It now remains to remove the tube from the skeg box - see notes below.
Replacement of the tube is the opposite to removal. Care should be taken with the point of attachment for the P-clip to ensure a smooth radius of curvature into the skeg box. However, see notes below on terminating the tube at each end - you may wish to alter the way the tube is terminated, especially if you are replacing an older 6mm tube with a new 8mm tube. It is a good idea to run the cord through the tube before installing the tube into the boat, as this saves the need to thread the cord through the installed tube.
4.1.2 Controller termination
At the controller end, the cord must pass through a hole in the boat aligned with the hole in the ratchet box.
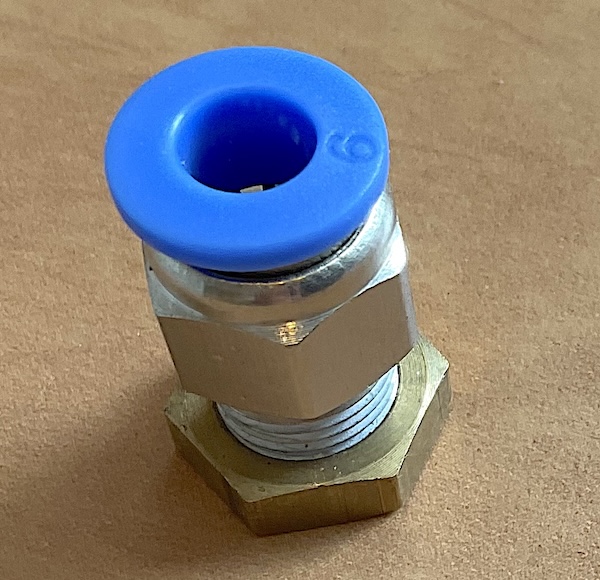
4.1.2.1 Pneumatic line fitting
Some composite boats are fitting with a pneumatic line type fitting in the controller recess. To remove the tube, first push down the top of the fitting before pulling the tube out.
Some newer plastic boats (I’ve only seen this with boats with a skudder-type skeg) also use pneumatic fittings at the controller end of the tube.
4.1.2.2 Polymer compression fitting
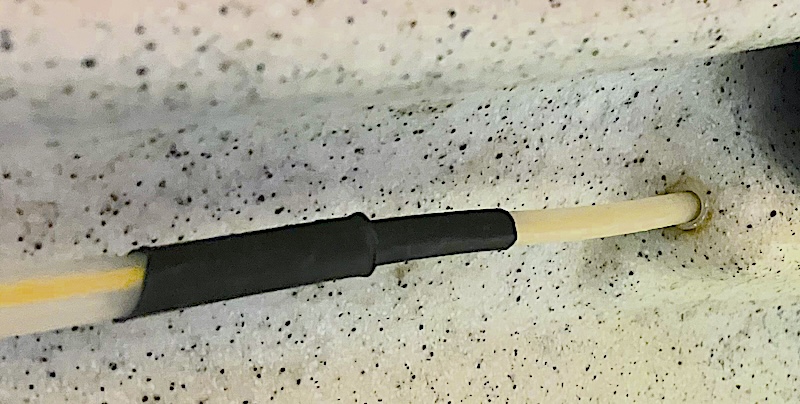
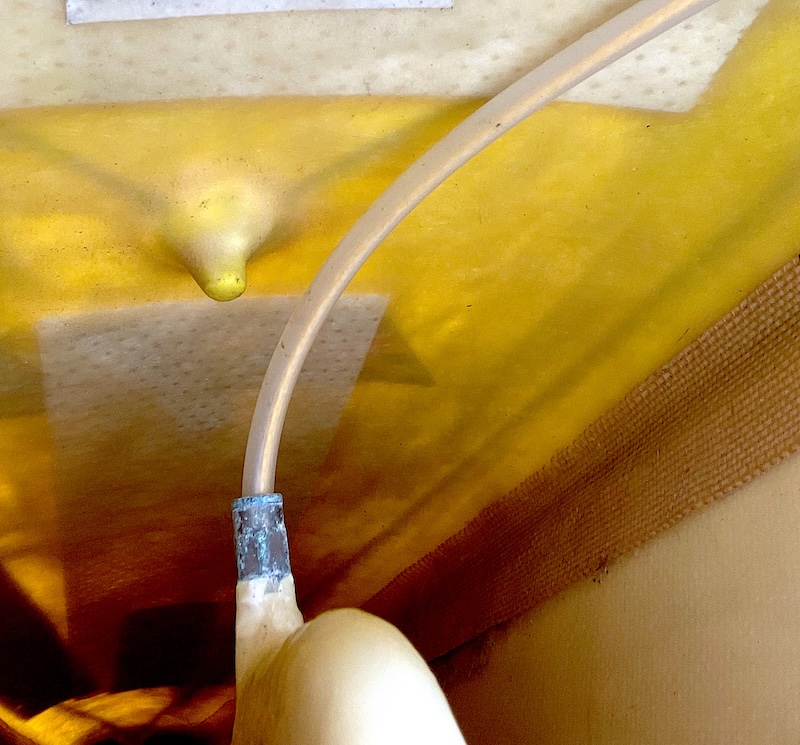
In P&H’s original design, 6 mm outer diameter tube was used throughout the system. This was found to increase friction and made replacing the cord difficult. 8 mm tube is now used (see above). However, the fitting for the hole in the boat is a 7 mm outer diameter, 6 mm inside diameter plastic sleeve / push fitting. In the newer design, the 8 mm tube is thus attached using heat shrink to a short length of 6 mm tube that interfaces with the push fitting. The push fitting is bonded into the hole in the boat with superglue (cyanoacrylate adhesive).
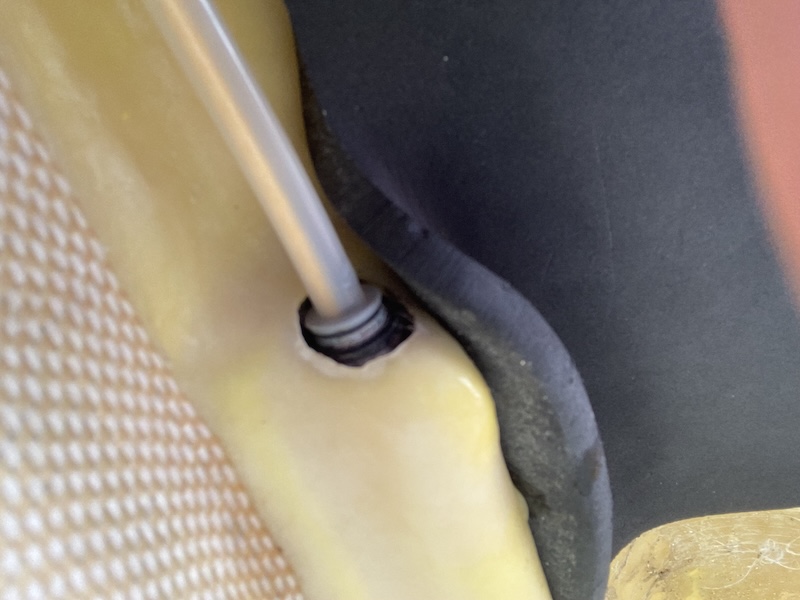
4.1.2.3 Suggested grommet fitting
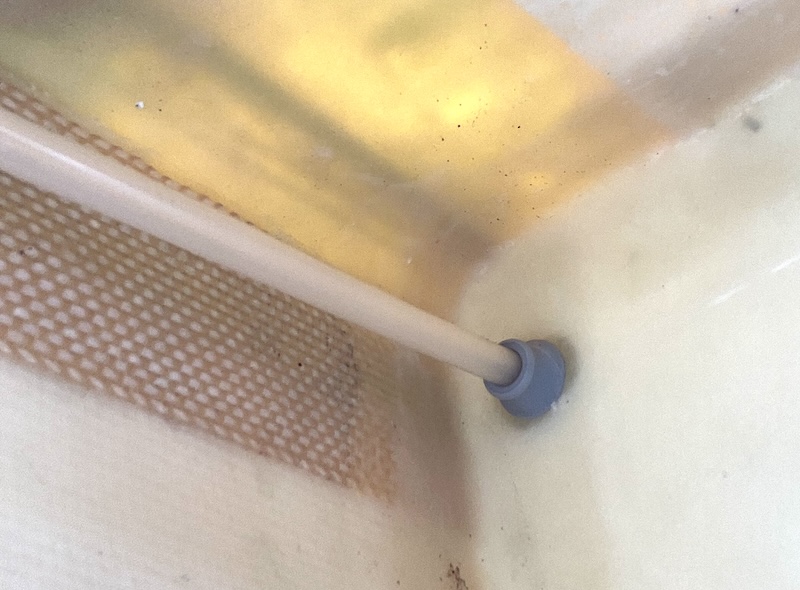
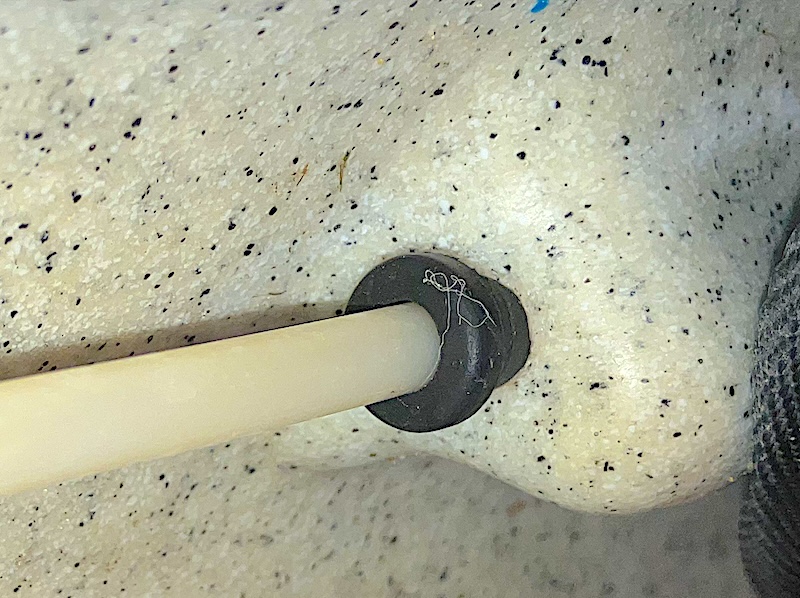
I prefer a different and simpler approach when replacing the skeg tube in a plastic boat. This avoids the need for the short section of thinner tube, making skeg cord replacement simpler in the future and removing a potential source of friction from the system. The 8mm tube is taken right to the ratchet box and a rubber grommet is used to seal the hole.
Enlarge the 7mm hole in the boat to 11 mm. This can be done with a drill, but it may be sensible to remove the seat from the boat to allow the hole to be drilled straight. I normally find it simpler to twist the drill bits by hand. This works well if the hole is opened up progressively in 0.5 mm steps. A larger drill bit can be used to slightly chamfer the hole to make the next step of grommet insertion easier. Remove any shavings of plastic from the hole.
Once the hole is enlarged and cleaned up, insert a rubber grommet (SES Sterling Black Polychloroprene 11mm Round Cable Grommet for Maximum of 8 mm Cable Dia. - RS stock number 136-6294, SES Sterling part no. 02520323010).
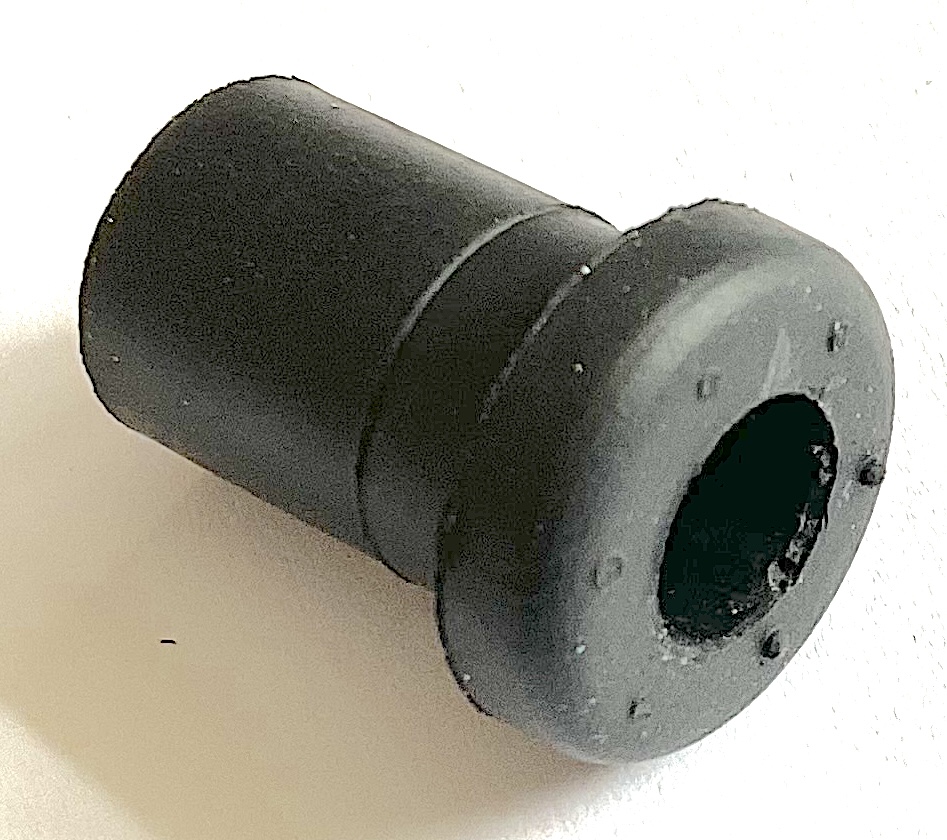
Cutting 6 mm off the end of the grommet allows more freedom of movement in the end of the tube to align itself with the slider box. The tube then fits snugly into the grommet.
The insertion depth of the tube using this method is around 17 mm, although it can, of course, be measured by inserting the tube and marking the insertion with a fine permanent marker. This helps with setting the length of the tube. Once the P-clip is secured at the rear of the boat, the tube can be slid through the bulkheads so that it sits fairly straight. The point where it passes through the hole in the boat can then be marked, and the insertion depth (e.g. 17 mm) can then be added to determine where to cut the tube. For rough cuts of the tube, a pair of cable cutters can be used. A hacksaw gives a better finish for final cuts. A large drill bit can be used to slightly chamfer the inside of the tube and a knife or needle file used to chamfer the outside to aid insertion into the grommet.
4.1.3 Actuator termination
Several methods have been used by P&H to terminate the tube at the skeg box depending on boat type (plastic / composite) and age. In addition, other approaches are suggested below that the author has used.
4.1.3.1 Brass pneumatic fitting
Older plastic boats with 6 mm tube and newer composite boats use brass pneumatic line fittings screwed into the top of the skeg box.
In theory, these fittings can be released by pushing down the top collar around the tube and pulling the tube out. In practice, they tend to seize up over time, and removing the tube may involve breaking the fitting - see below.
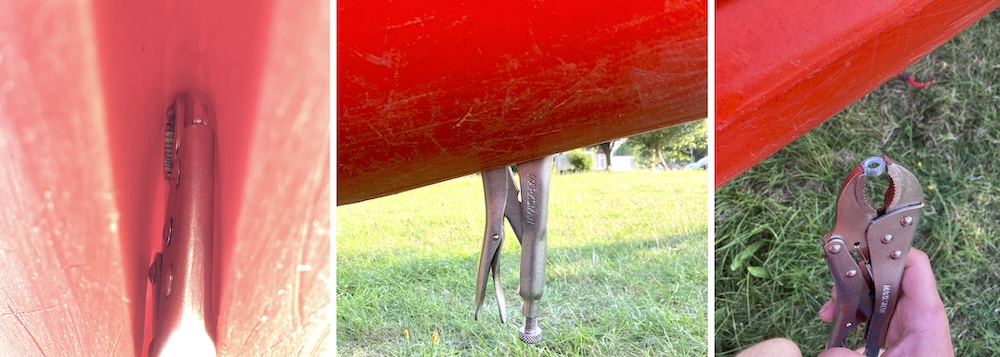
Removing these fittings from the boat can be tricky. The threads have a PTFE coating, and will likely be seized with salt and grit. The upper fitting can be turned with either a 12 mm spanner or a 4mm allen key placed deep into the fitting.

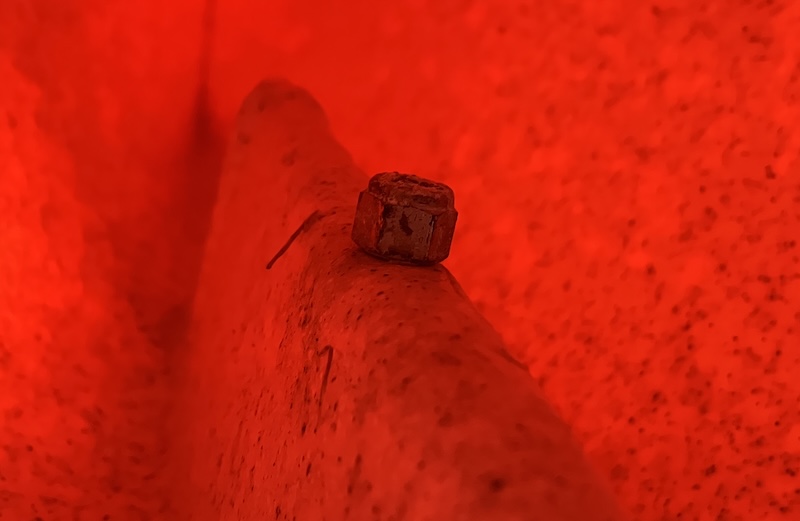
The Allen key or spanner can be used to rotate the fitting until the flats on the nut visible inside the skeg box are aligned across the boat. This nut can then be gripped with mole grips. Once the mole grips are tightly applied, the grips are held from rotating by the walls of the skeg box, making it easier for one person to remove the fitting.
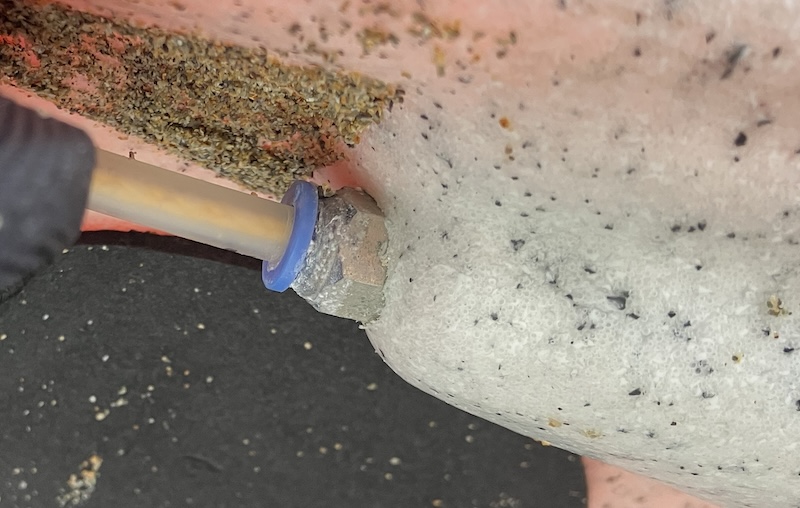
4.1.3.2 Brass fitting and Sugru
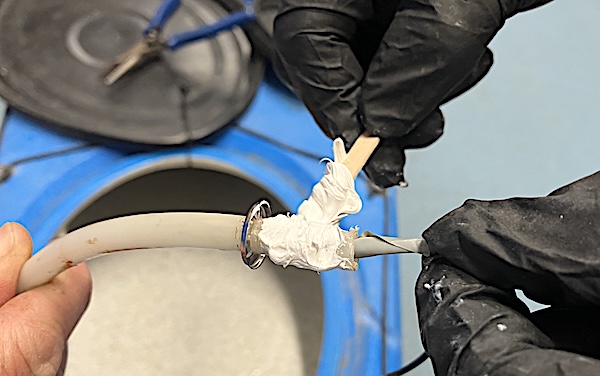
Where the plastic parts of the compression fitting have been destroyed, it is possible to place the end of the tube loose into the hole in the top of the fitting and seal the hole up with Sugru.
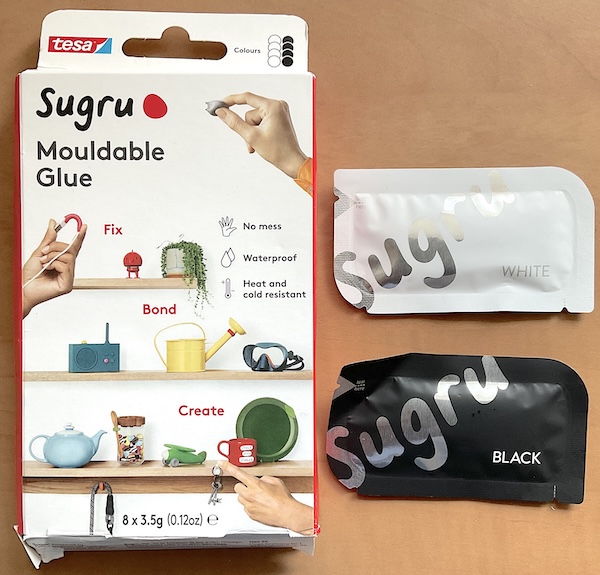
Sugru, also known as Formerol, is a patented multi-purpose, non-slumping brand of adhesive silicone rubber that resembles modelling clay. It is made by Tesa. It comes in small sachets, which make it easy to carry in a small repair kit. 2 sachets are typically needed to seal the tube joint at the skeg box. Whilst Sugru will not bond properly to the polyethylene material of the kayak, it does provide a decent seal, although it may need replacement if it is disturbed (e.g. by packing the boat with expedition kit).
4.1.3.3 Retaining washer and sealant
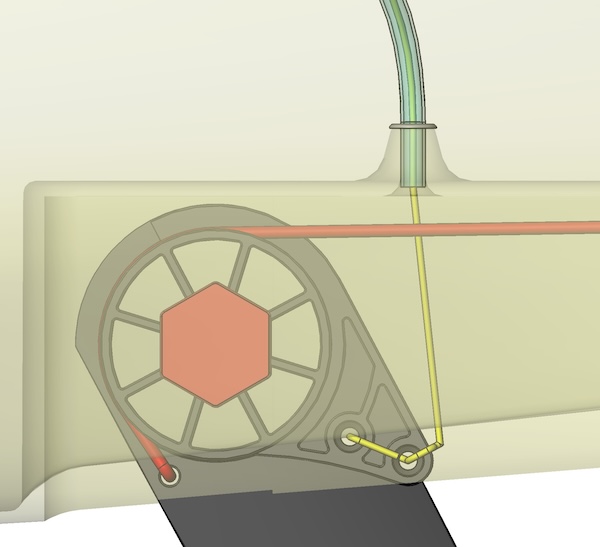
In plastic boats with the 8mm tube, P&H molded a boss on the top of the skeg box, such that it inserts into a longer bore through the plastic.
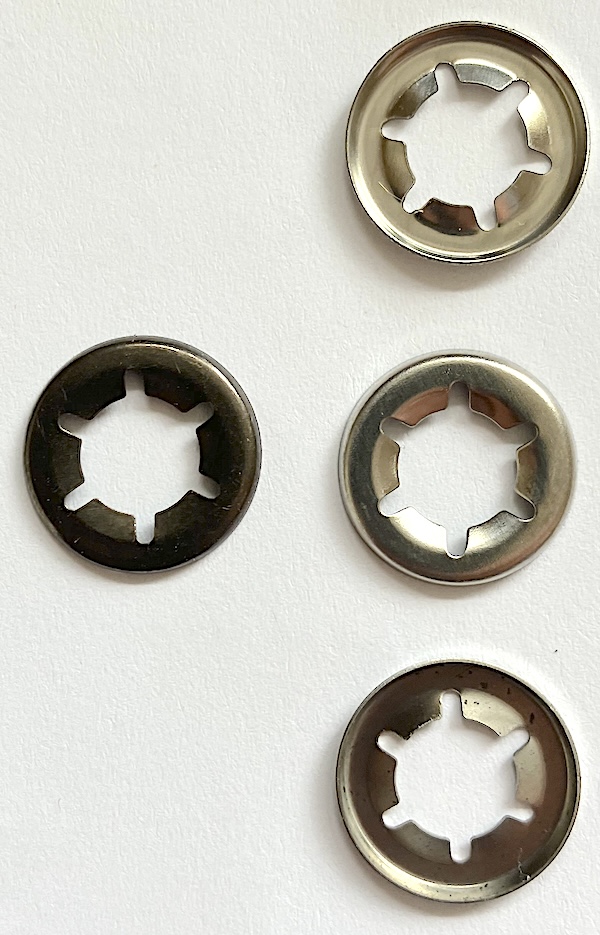
A retaining washer is placed on the tube to set the insertion depth into the skeg box. The retaining washer is a ‘Starlock’ washer, sized for an 8 mm shaft. I used to recommend an ‘open style push-on retainer, 8mm shaft’, RS stock number 172-379, but this was made from enameled steel and tends to rust. Fortunately, these washers are available in A2 (304) stainless steel. They’re not the easiest things to find, but Amazon seems to be a good source
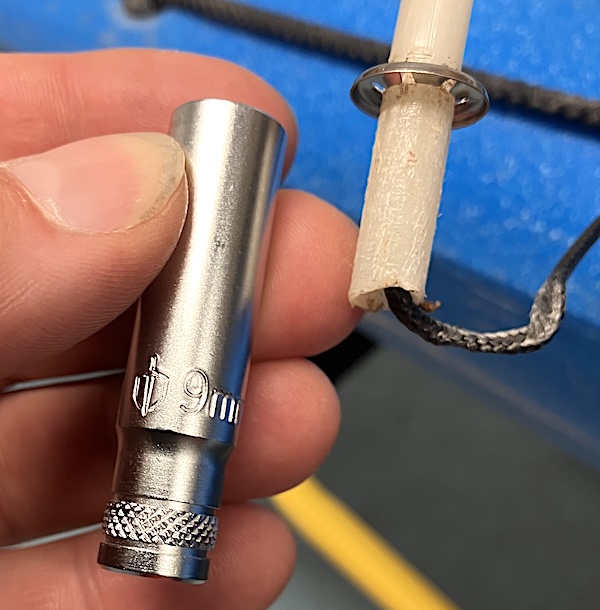
The washer is pushed onto the tube a distance of around 19 mm. Insert the tube into the skeg box so that it just dosen’t protrude downwards, then mark the point when it enters the top of the skeg box - this is where the washer needs to sit.
The washer can be pushed into place using an appropriate deep socket - the process is easy with a 9 mm socket, although anything in the range 9 - 13 mm would likely work. These star washers can fail over time and need replacing.
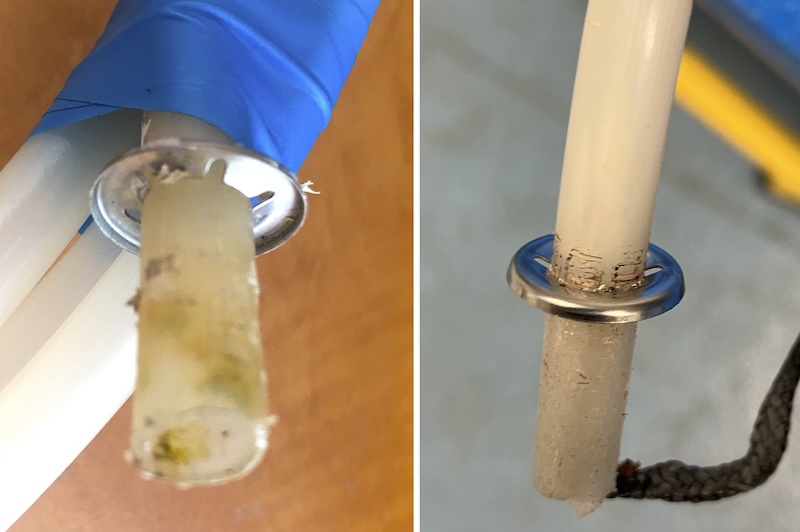
Soudaflex 40FC (or Sikaflex) can be used as a sealant/adhesive to seal the tube into the long hole in the plastic. Prior to bonding to the skeg box, it is useful to perform a test assembly without sealant and to mark the point where the tube enters the P-clip with a permanent market (OHP pens work well). A bead of Soudaflex is placed in a ring around the tube below the retaining washer, before inserting into the skeg box. Attaching to the boat with the P-clip holds this joint in place during the ~24 hour drying period.
4.1.3.4 Retaining washer and Sugru
When a 6mm tube is replaced in a plastic boat with an 8mm tube, the boat will not have the longer bore to seal the tube within and the old compression fitting will be too small to accommodate the new larger diameter tube.
Instead, place a retaining washer a short distance from the end of the tube (see above), then seal over the joint with Sugru (see above). It may be sensible to use tape (e.g. Flex Tape) to tape the tube to the deck of the kayak to keep it firmly in place. Flex Tape can also be used to cover the Sugru, providing a backup seal or a field repair.
4.2 Cord
P&H replacement skeg line can be purchased from kayak shops.
P&H have used several different cords over the years - in chronological order:
A blue ‘kite cord’
A thicker yellow Dyneema cord
A black cord
4.2.0.1 Yellow cord
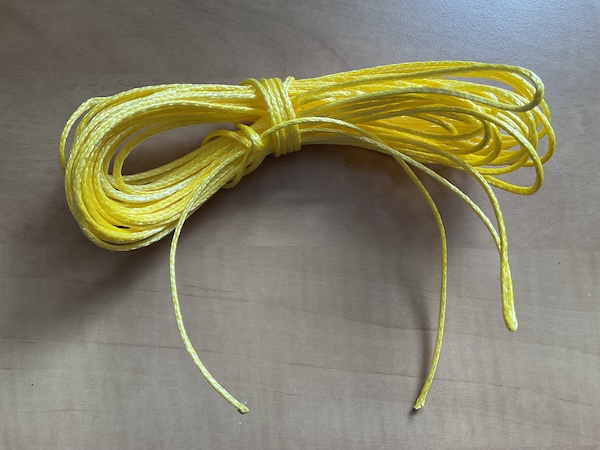
This cord is Yellow 2.5 mm diameter ‘D Core 78’ made by Alpha Ropes. This is a single braid rope with 12 strands of coated Dyneema Sk78 (HMPE with a specific gravity of 0.98 and a 150 C melting point). The cord has a quoted breaking strain of 6 kN (608 kg). At 10% of this load (60kg, which is rather greater than any loads expected in your skeg line, the stretch in the cord is only 0.43%.
The cord does not respond well to attempts to heat seal the ends. Instead, one source suggests that you wrap the end tight with tape, make a neat cut through the tape and cord, then put a few drops of superglue on the cord. Once the glue has dried this should give an end similar to that usually achieved by heat sealing.
4.2.0.2 Black cord
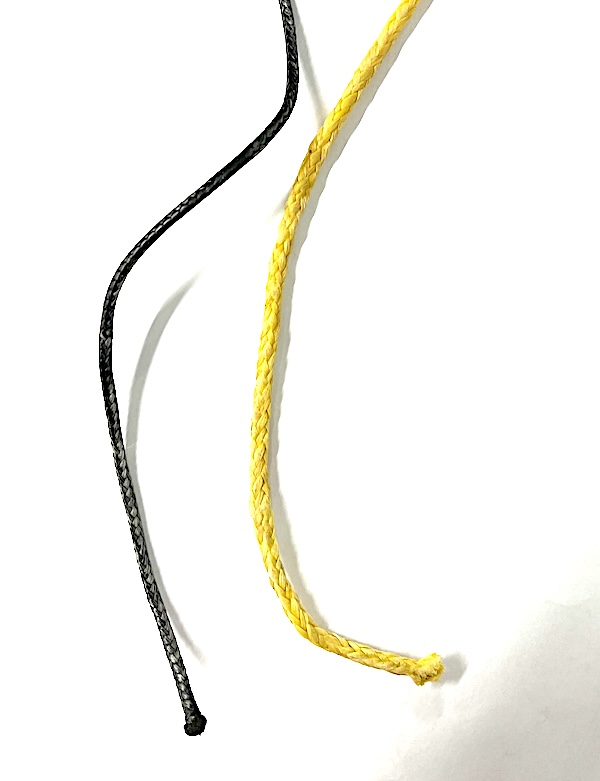
It is believed that the new cord is 2 mm Kingfisher Evolution (Evo) Performance Marine cord, made by DSM. This is a polyester cord with a 16 plait cover and a low stretch core. The quoted breaking strength is 90 kg. The cord is available on a ‘mini spool’ of around 25 m length for around £10, e.g. from Sea Kayak Oban.
Being polyester, the ends of this cord can be heat sealed after cutting with a lighter or a candle.
4.2.1 Cord replacement
One of the biggest problems in maintaining the P&H skeg system is passing the cord through the tube. Whilst it is preferable to keep the cord threaded if possible (try tying the line onto a washer to stop it disappearing into the tube), this isn’t always possible. And the cord will sometimes need replacing - in fact I tend to like to replace the cord on most systems that I work on - it doesn’t cost a lot, there’s often limited adjustability without replacing the cord and it’d be a pain to have one fail in use.
Several techniques have been suggested to replace the cord. Begin by disconnecting the cord from the slider, by untying or cutting (after removing the slider from the ratchet box). Remove the blade from the skeg box and untie the cord from the blade.
Several methods for threading the cord through the tube are given below.
Once the skeg line is threaded, tie one end off to the deck lines at each end to prevent either end disappearing back into the tube. Attach the skeg line to the skeg blade - see below - and finally, attach the cord to the slider, setting the cord length correctly.
4.2.1.1 Push the new cord through
I’ve heard it claimed the P&H have advised people to simply push the cord through the tube. I’ve not had much success with this!
4.2.1.2 Pull through with old cord
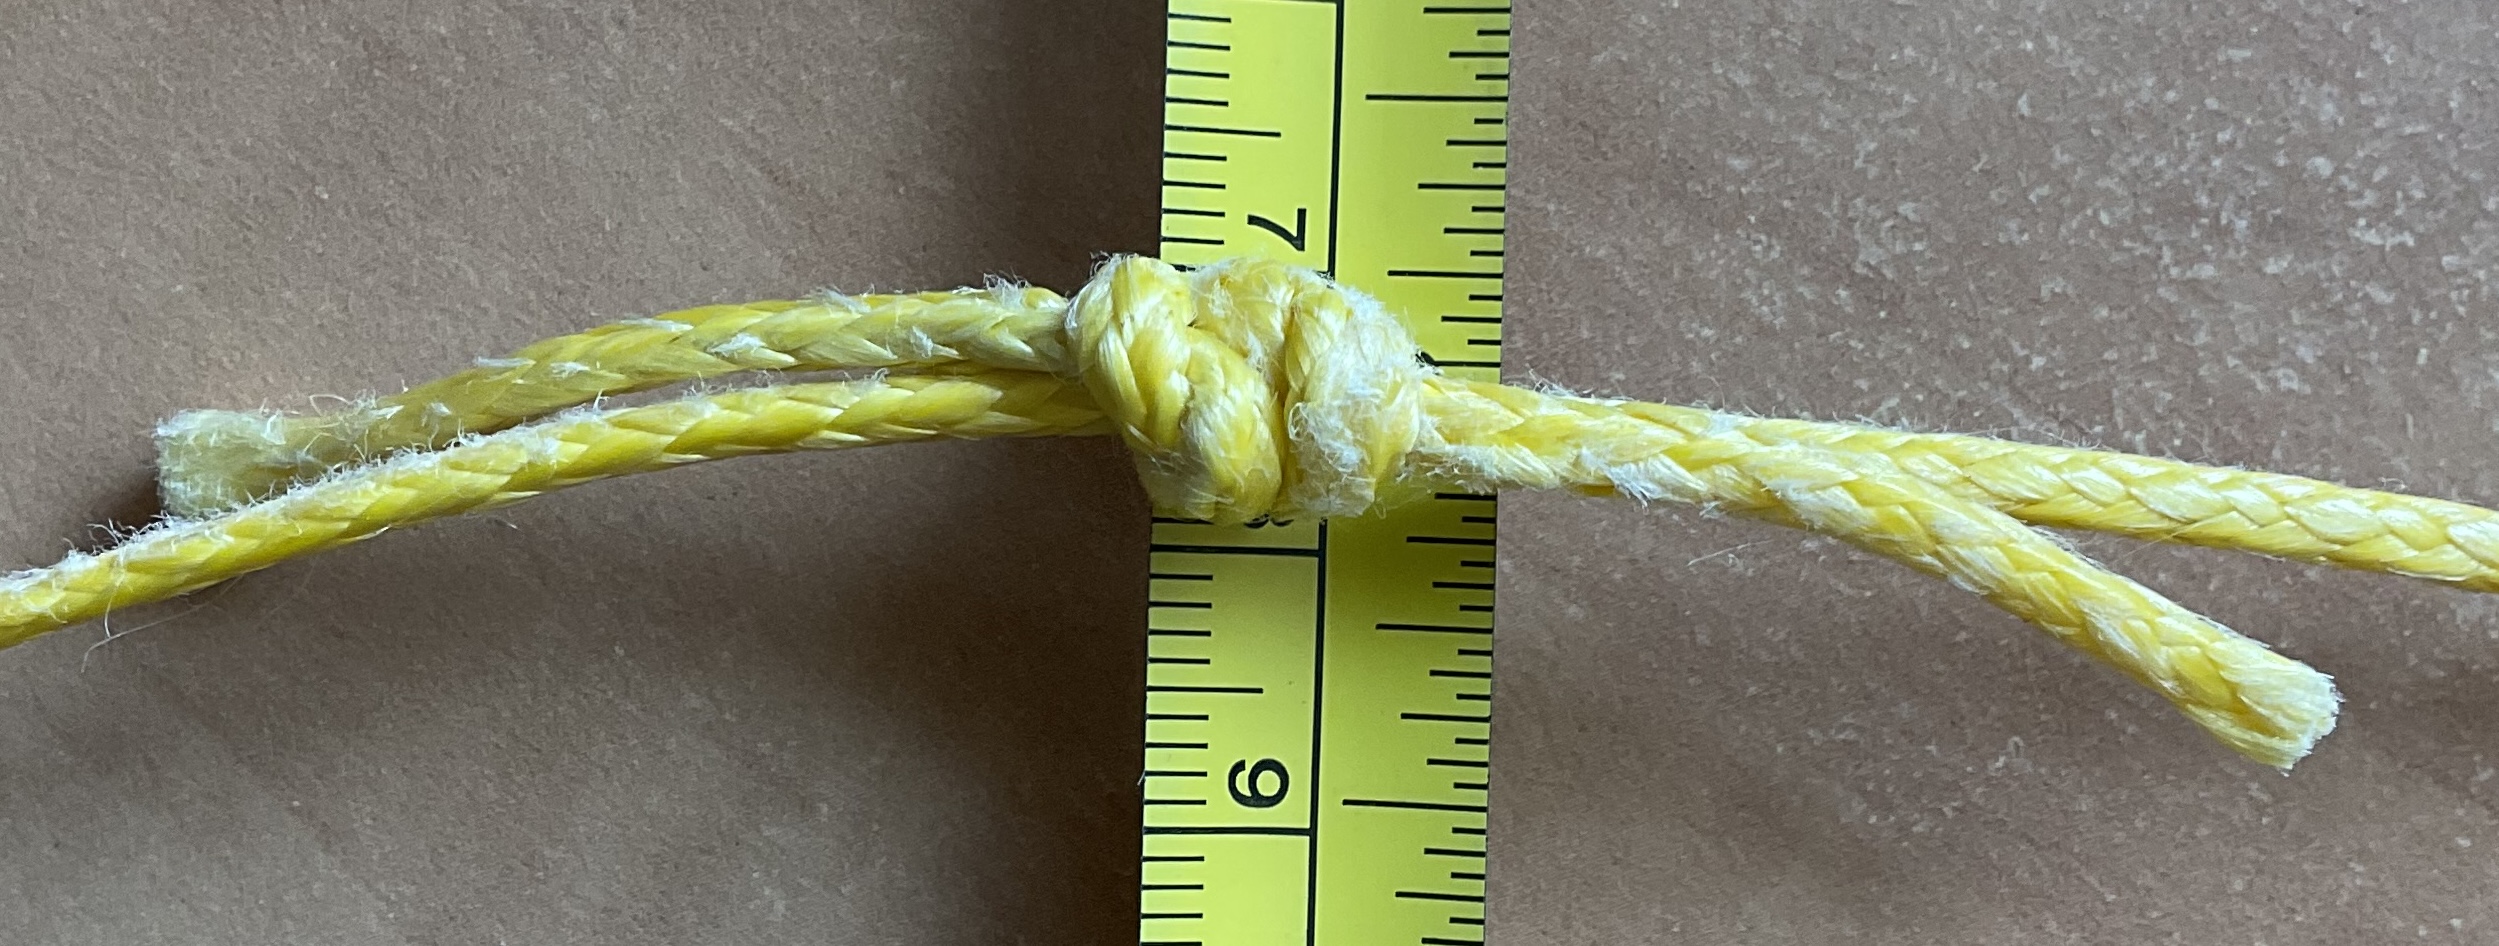
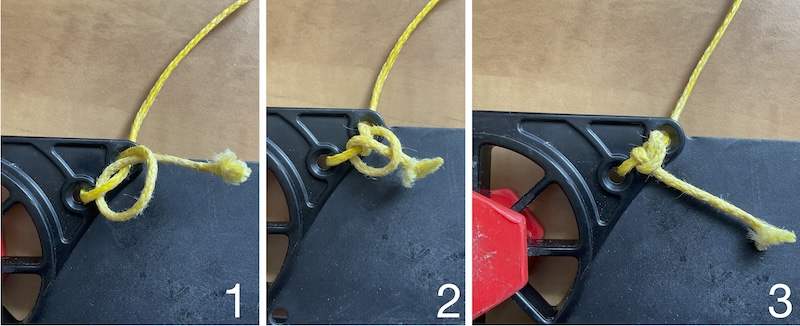
Tie the new cord onto the old with a single fisherman’s knot, pulled tight and with the ends trimmed close to the knot. Two options for knot are shown below:
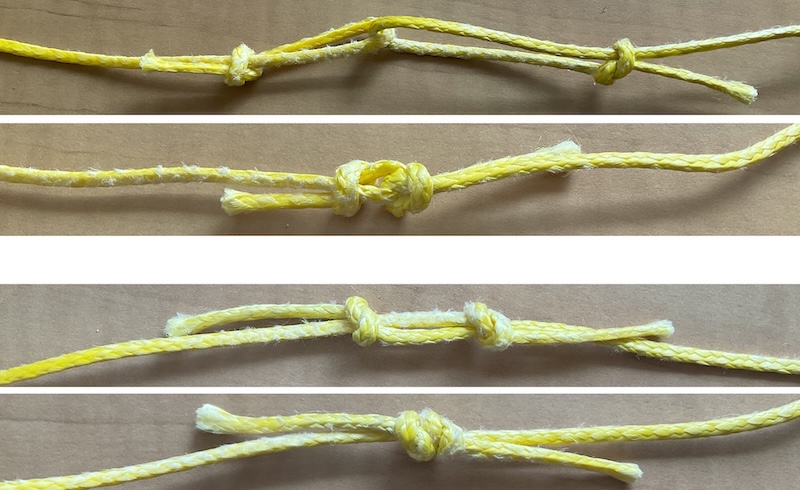
It can be hard or impossible to pull the knot through the system. This is not surprising - the knot is around 8-9 mm across and it needs to pass down a 6 mm diameter tube.
4.2.1.3 Remove tube partially or completely
Remove the tube from the bulkheads of the boat, and perhaps from the P-clip. Push the cord in from the skeg end of the tube. Whilst one person continues to push the cord in, shake the end of the tube aggressively, or spin it around. The centrifugal force that this generates helps the cord to thread.
If the tube is removed completely from the boat, it is usually possible to simply push the cord through. However, several of the systems for attaching the tube to the skeg box are fairly permanent, so this is not ideal.
4.2.1.4 Using wire or cable
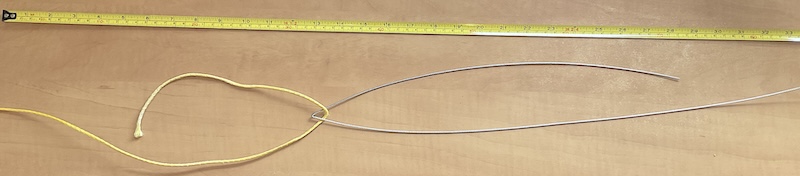
Perhaps the best method is to run a wire or cable through the tube, then use this to pull thecord back through the system.
The ideal wire is stiff enough to be pushed through the tube, but flexible enough to go round the corners easily, and be wound into a tight loop to be stowed in a repair kit. I’m currently using 1.5 mm 7x7 stainless steel wire rope, which seems to work well.
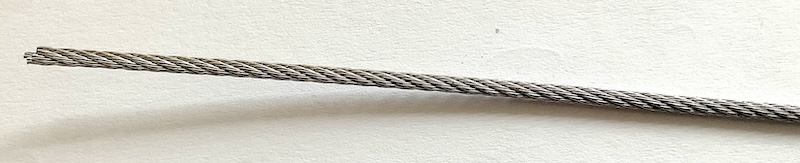
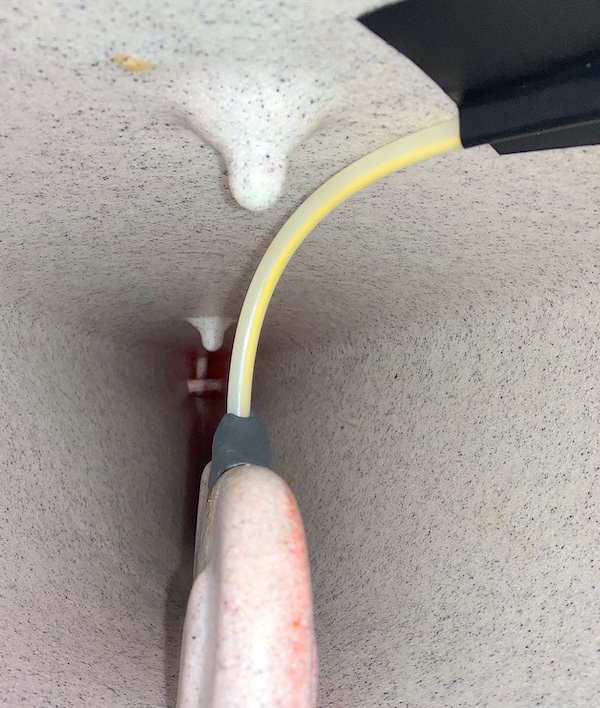
The rope has a sharp bend crimped into it with pliers around 40 cm from the end:

This can be passed through the tube (once disconnected from the ratchet box), bend first. Stop once the bend in the wire just emerges from the bottom of the skeg box.
Ideally, a cord of a little over twice the length of the tube is used. The midpoint can be looped around the wire loop before pulling the cord doubled back through the system. If this is impossible, simply looping the end of the cord through the wire and leaving a 20 cm tail seems to work. The friction of tail with the wire and the tube seems to be sufficient to hold it in place as it is pulled through.
4.2.2 Skeg line attachment to skeg blade
Feed the skeg line through the upper hole, thorough the lower hole then back through the upper hole again.
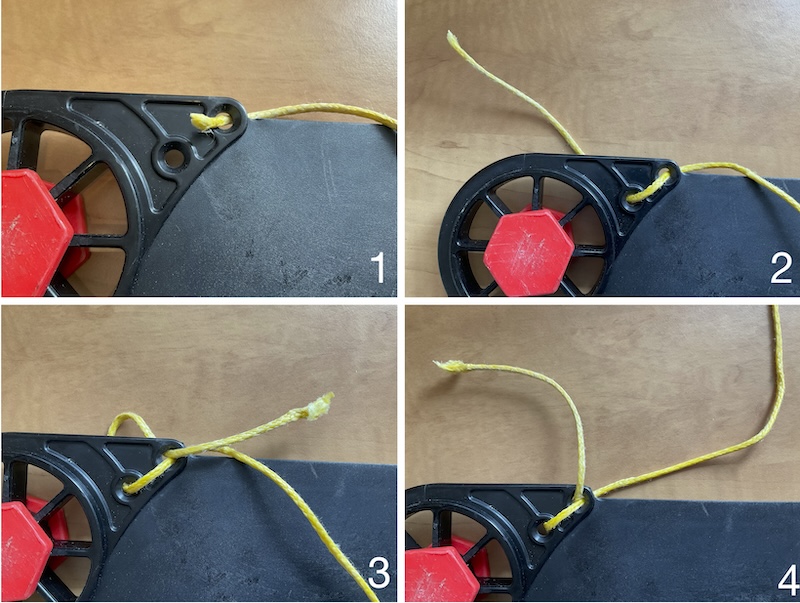
Use half hitches to tie onto the incoming cord, either onto the incoming rope or on the side of the blade between the cord holes.
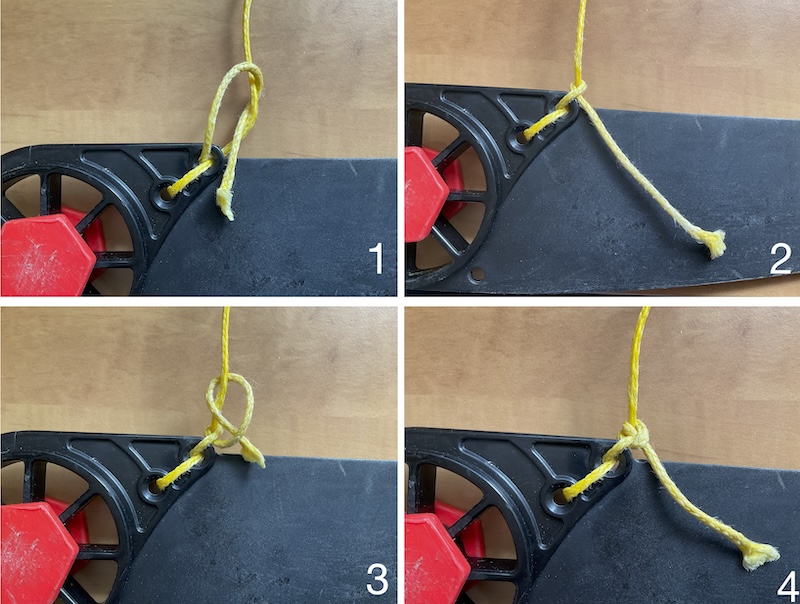
Finally, trim off excess cord leaving just a short tail (~1-2 cm).