7 Building a Course in Canvas
7.1 General Setup
Use
- Announcements
- Syllabus
- Modules
- Assignments
- Grades
- People
- Panopto Video
Do not use Pages, Files.
You should make use of Rubrics for grading.
Live teaching with Zoom or Teams – provide link.
7.2 Canvas Course Architecure
The “architecture” of a Canvas course should be Modules which map to either days or weeks (ideally) which are then broken down into required lessons, optional lessons and readings, and assignments. Assignments are any work with a due date which could be an actual assignment, a quiz, or a discussion. I would also encourage that a link to the recording of a live session or class on that topic is there as well. Lessons are either readings or watching a tutorial or both; a lesson should take no more than 25 minutes to work through. A recorded video lesson or tutorial (a slide narration, a chalk-talk, a code walk, a demonstration, or a live code development) should be no more than 10-15 minutes.
Modules can be organized as “lessons” where each lesson is a Page and the pager contains narrative, embedded video, or links to readings. Alternatively, a Module can be organized as activities. Figure ?? shows an example of a module organized around activities and contrasts that with one organized by lesson. As explained further below in (overlaying_time?), the time during the class when a module is covered can be part of the module header or in a separate schedule page under Welcome.
7.2.1 Activity-Based Organization
When organizing a module as activities, use a consistent set of labels:
- READ – read a chapter in a text book, read lectures notes, read a narrative
- WATCH – watch a tutorial or video
- FOLLOW – follow along a tutorial, programming example
- CHECK: a quiz or other checkpoint to self-assess understanding (not graded)
- DO: carry out an activity
This implements the Learn-Do-Apply approach to learning. Note that the activities should contain “Do” activities for practice while the Assignments ask students to “Apply” the new knowledge.
Each activity should contain the expected amount of time that a student should spend on it. This helps students plan.
Figure 7.1 shows the general structure of a Canvas module. Note the use of dates in the modules to help students find the right module during the course. While this creates extra work for the instructor at the beginning of the term, it is very helpful for students and reduces “learning friction”.
// UML diagram goes here
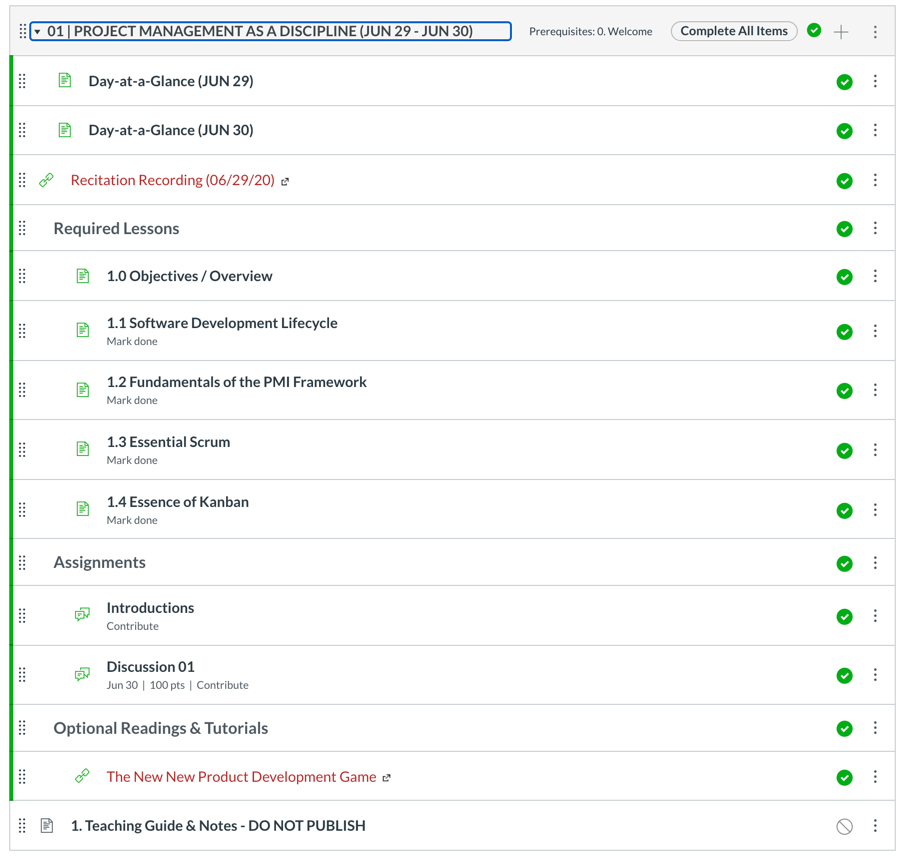
Figure 7.1: Example of Canvas Module
7.2.2 The Welcome Module
The Welcome Module (Module 0) is not part of the actual course work but rather introduces the course, requirements, faculty, support, and so forth.
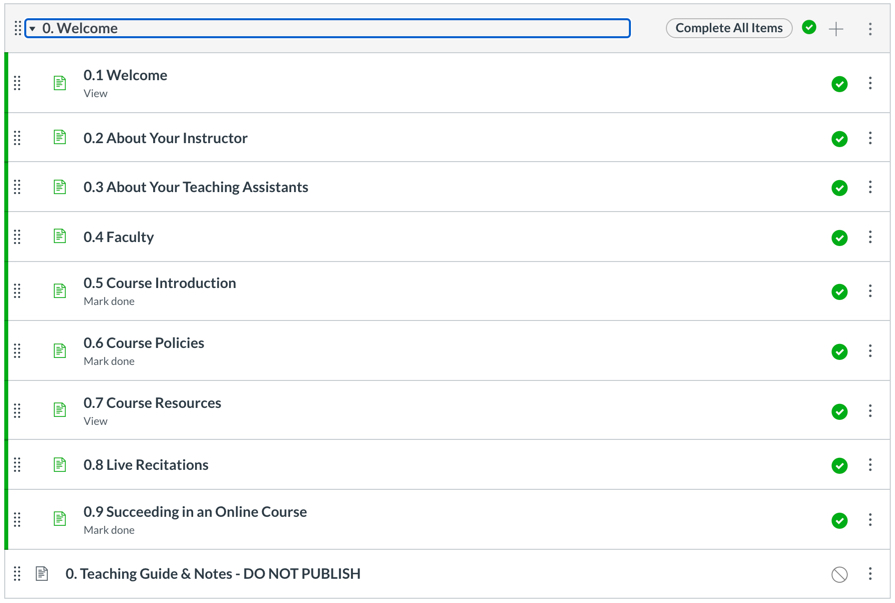
Figure 7.2: Welcome Module
7.2.3 Overlaying Time
Modules can either include the days or week during which they are taught or a separate page under the Welcome module can define which modules are covered during which week. Not having dates on the module title makes the course independent of its delivery time frame and easier to reuse. If dates are not part of the module title then not only should a separate document outline the time when each module is covered but Canvas’ pre-requisites feature should be used to ensure linear progression through the course as required.
7.2.4 Set Home Page
By default the home page (first page a student sees when entering the course) is the list of modules. You can create a new page under Pages, set that as “Front Page” and then on the Home tab pick “Choose Home Page” and select the new page. Consider making the weekly schedule the home page. Under Settings (at the end, click on More) you can also add Announcements to the home page automatically.
7.3 Discussions
For Q&A and discussions use the Discussions in Canvas, Piazza, or Teams. While Teams or Piazza are preferable, Teams cannot be access in China without a VPN. See Chapter 8 for more details.
7.4 Files, Links, Slide Decks, and Documents
Attach versus link (URL) to a shared drive, e.g., Google Drive, Sharepoint, OneDrive. Easy to make changes of document is linked to rather than attached (uploaded) to Canvas. But if another instructor wants to make a change then permission has to be provided.
Documents such as PDFs should be uploaded in case the URL breaks. But, copyrighted documents should be linked to and not uploaded to Canvas. Uploading also ensures that the resource is accessible to anyone, including students in countries with restrictions such as China and Dubai.
7.5 Settings
Unique icon for your course; keep consistent between terms.
7.5.1 Gradual vs Full Reveal
- publish all modules at the beginning of the course with all due dates for work is beneficial for students to go through at their own pace, but it makes it impossible to change the course “on-the-fly” or add/modify modules and assignments
- publish one week at a time but some students will need to work ahead due to their personal or work schedule
- publish two or three weeks ahead so students can better manage their time
New courses and those that are still being “tweaked” should publish the current and the following week. Mature and stable course can publish all modules up front. If only a few modules are revealed at least the headers for all modules should be visible so students understand the design and story for the course.
7.6 Embedding Panopto Videos
- set a custom “thumbnail” or preview; use Settings to upload a JPG
- to embed, go to Share and then choose embed; adjust the size to a width of 480 or 640
- embed in the Page in the HTML view; turn off the display of the title by changing showtitle=true& to showtitle=false&
- in the Page flow the text around video by adding this to the
<iframe>style attribute: float: left; margin-right: 20px;
Here’s what that looks like:
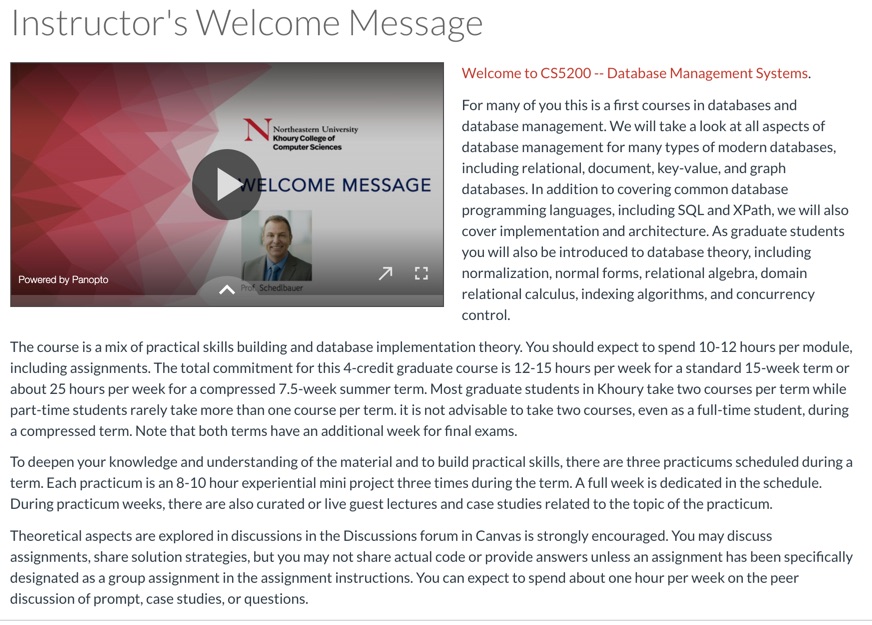
Figure 7.3: Flow of text around an embedded Panopto video without a title.
7.6.1 Automatic Transcription & Captions
Panopto (like Youtube) provides automatic closed captioning. The transcript can be downloaded and turned into lecture notes. This is required for ASA compliance and to support students whose primary language may not be English6
see http://somup.com/cY10V1QvCq for a tutorial.↩︎