3.3 Server
3.3.1 Output
Now we want to build our output, which will be updated automatically when an input widget changes.
For example, we want to build an app with a numeric input in the sidebar panel controls the ‘radius’ of a circle, and a text output in the main panel showing the area of the circle based on the radius input. We want the text output can be updated automatically when the radius value changes.
Two steps to do that:
- Register your output object in
ui.R. That is tell UI where to put the text output (outlook). - Tell Shiny how to render the output in
server.R. That is tell the server how to render the text (logic).
Exercise 5: output
Modify ui.R in 01-hello folder as follows. It is saying that I want to put a text output object in the main panel.
library(shiny)
fluidPage(
  titlePanel("Hello Shiny!"),
  sidebarLayout(
    sidebarPanel(
      numericInput("numInput", "A numeric input:", value = 7, min = 1, max = 30)
    ),
    mainPanel(
      textOutput("txtOutput")
    )
  )
)
Modify server.R in 01-hello folder as follows. It gives the instruction of how to calcuate the area of a circle and what text to print.
library(shiny)
function(input, output) {
  output$txtOutput = renderText({
    paste0("The area of the circle is: ", pi*input$numInput^2)
  })
}
Now let’s run the app in showcase mode by calling runApp(display.mode = "showcase").
Show case mode will show application code and metadata from a DESCRIPTION file in the application directory alongside the application. Shiny showcase will highlight lines of code in server.R as it runs them. The highlight will appear in yellow and fade out after a few moments. This helps reveal how Shiny creates reactivity; when your user manipulates an app, Shiny reruns parts of server.R to create updated output.
The unnamed function in
server.Rplays a special role in the Shiny process. The function has two arguments,inputandoutput, both of them are list-like objects. Theinputstores the current values of all of the widgets in your app. These values will be saved under the names same as theinputIdof the widgets inui.R. Theoutputcontains all of the code needed to update the R objects in your app.Shiny will automatically make an object reactive if the object uses an input value.
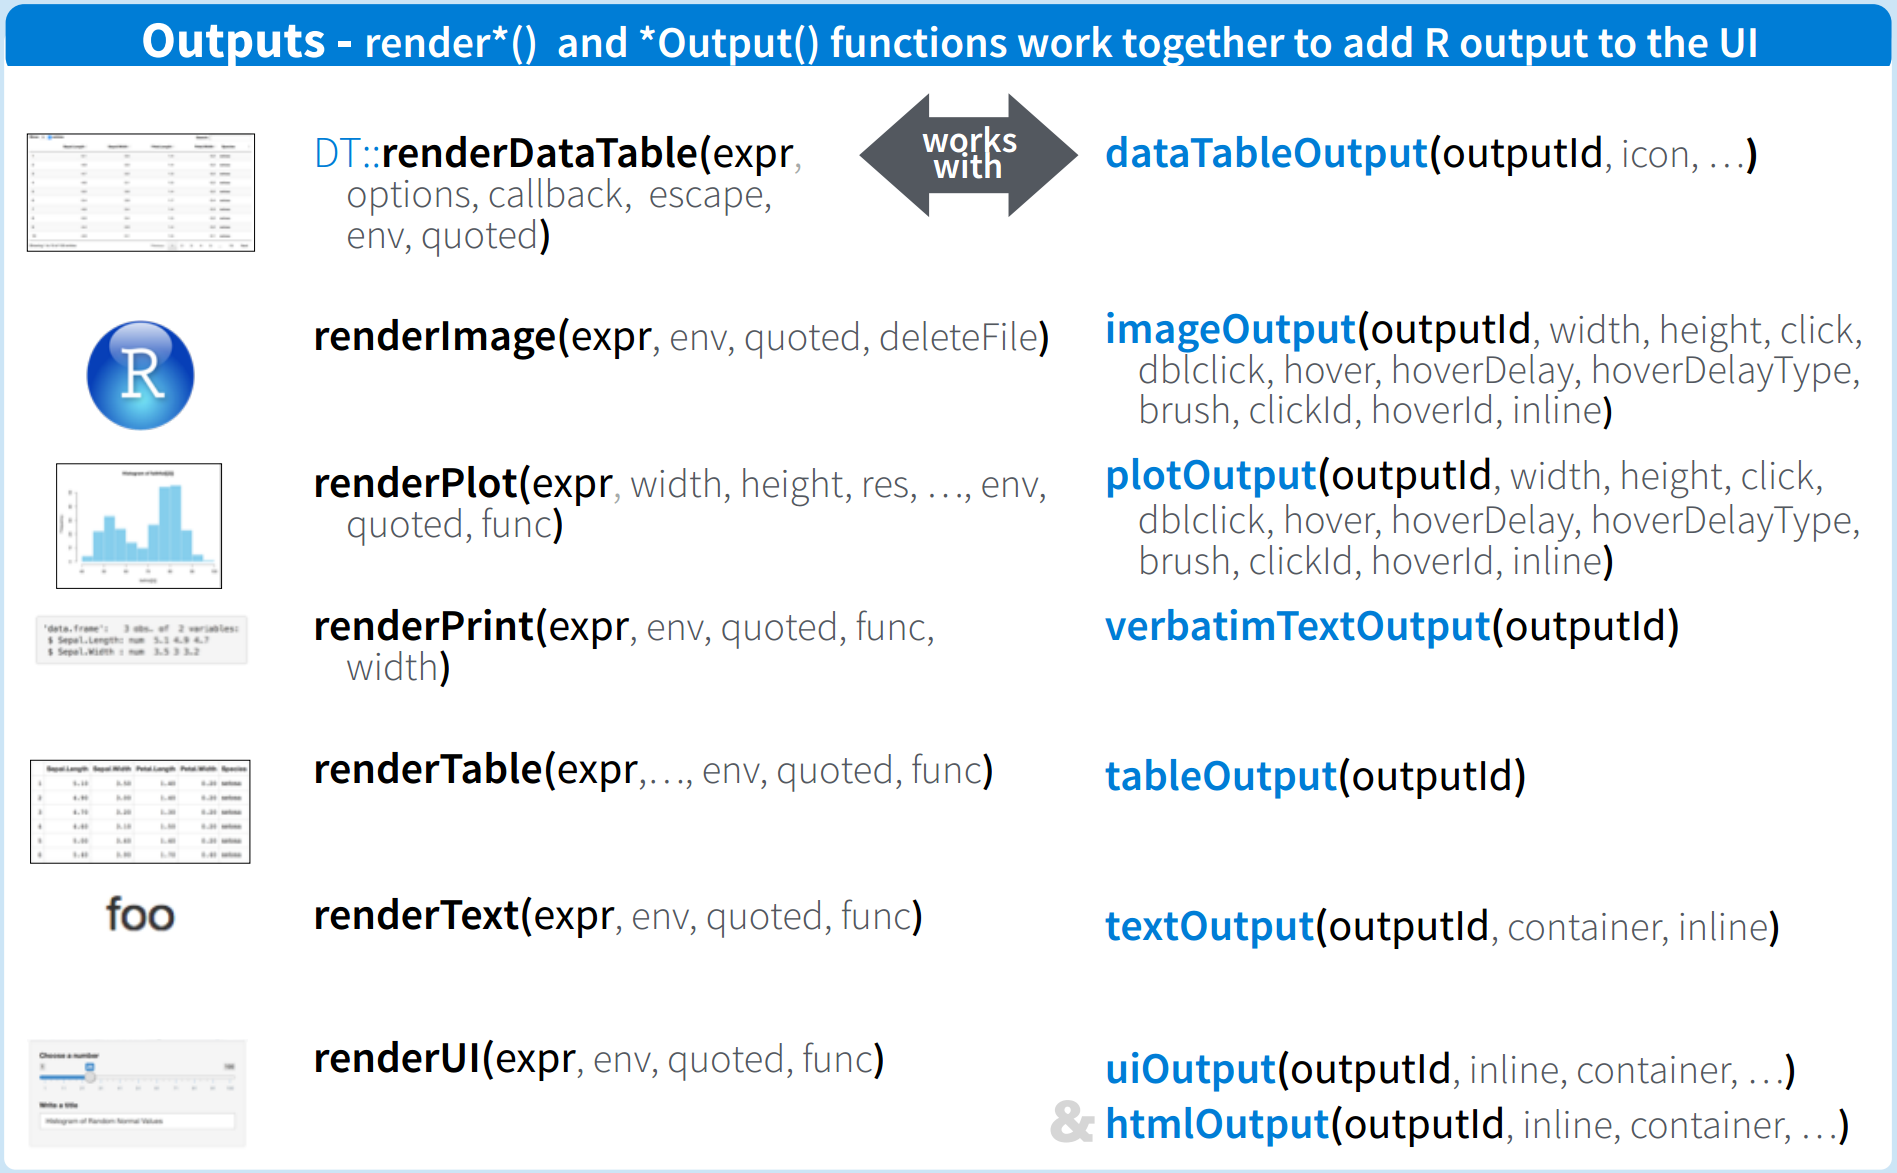
In the example above, we used textOutput to register a text output object in ui.R and then used renderText function to render it. There are many other pairs of *Output and render* functions defined in Shiny and they work together to add R output to the UI.
| Output function | render function | creates |
|---|---|---|
| htmlOutput/uiOutput | renderUI | a Shiny tag object or HTML |
| imageOutput | renderImage | images (saved as a link to a source file) |
| plotOutput | renderPlot | plots |
| tableOutput | renderTable | data frame, matrix, other table like structures |
| textOutput | renderText | character strings |
| verbatimTextOutput | renderPrint | any printed output |
Figure 3.3.1 gives a graphical demenstration.

Figure 3.3: Shiny render* and *Output functions
3.3.2 Summary practice
Exercise 6: A summary of what we have learned
Create a shiny app named ‘02-cars’ with the following requirements: 1. Layout: sidebar layout. 2. A slider in the sidebar panel with inputId “nrows” and label “Number of rows:”, which controls how many rows of the data set datasets::cars to use in the following analysis. The minimum value is 1, maximum value is 50 and default value is 10. 3. In the main panel, create a scatterplot with x axis speed and y axis dist on the top and a table showing the data on the bottom, using outputId “carsPlot” and “carsTable” respectively.
Solution will be given in next section.
Some people get confused about when to use , and when should not use. Actually it is quite easy to remember: when your component is as an argument to a function, you should use ,, otherwise don’t use comma. For example, you put several components inside a fluidRow, then you should separate the components by using comma; you put some expression inside function(input, output){} in the server.R file, then you don’t need comma to seperate them as they are in the body of a function.