Chapter 3 Basic workflow in R using RStudio
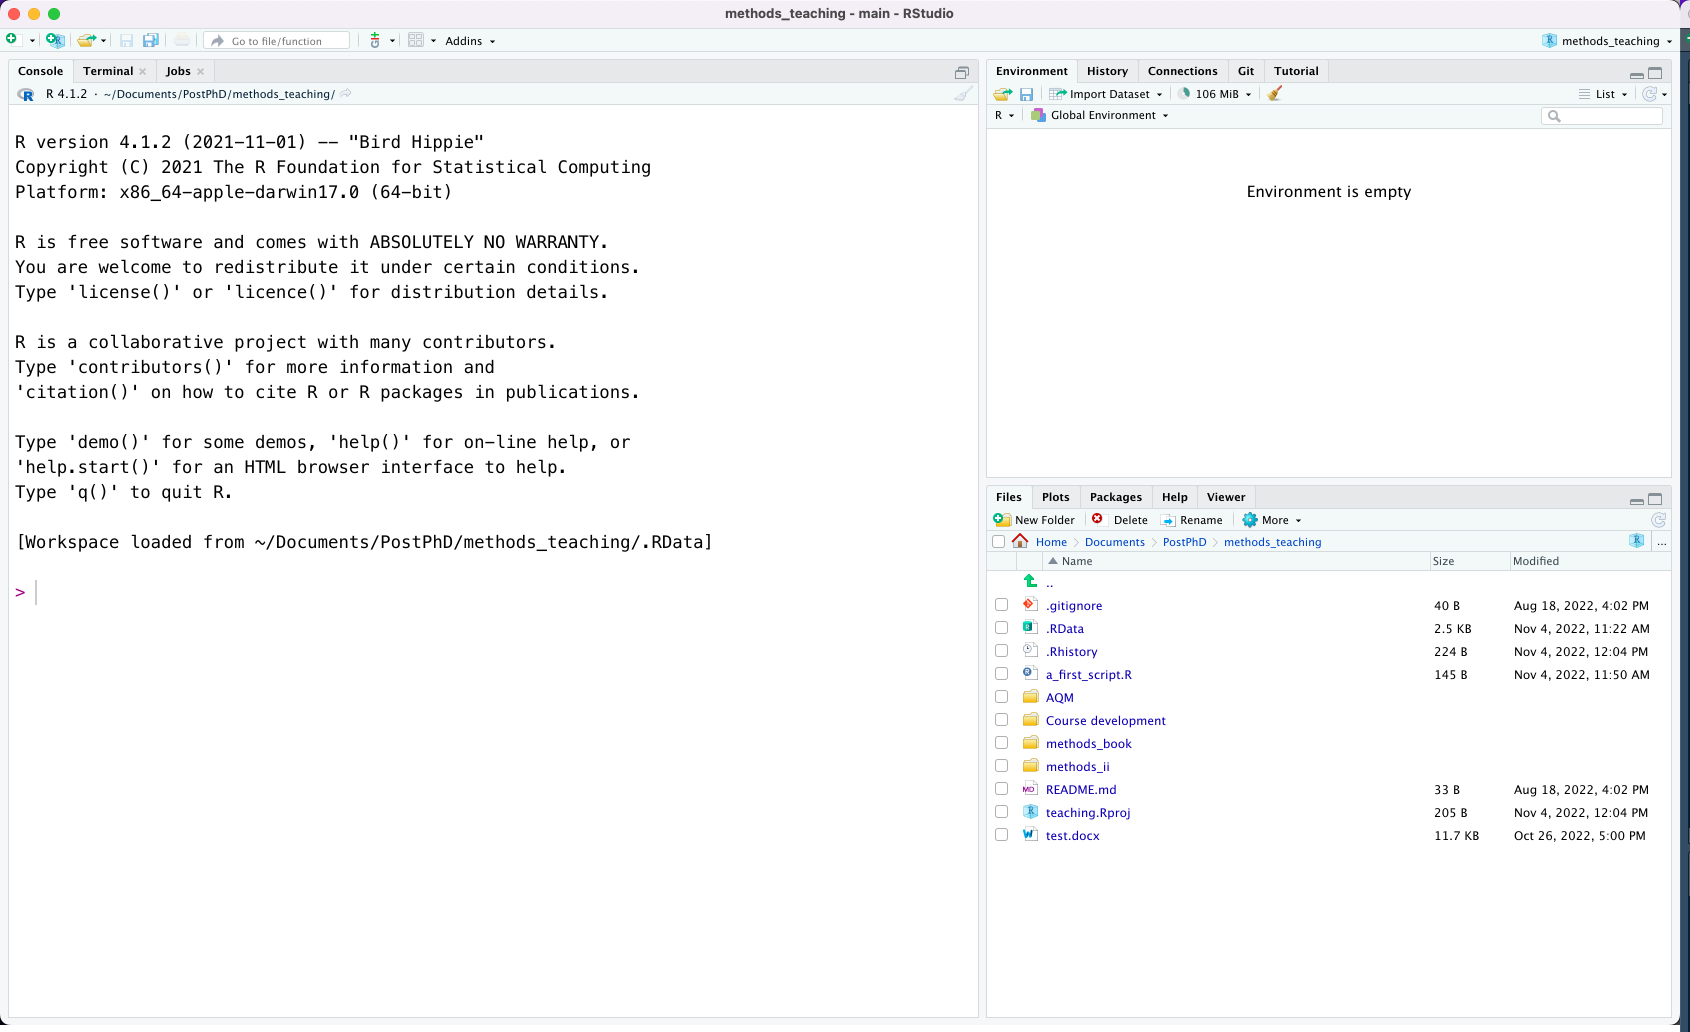
When you first open RStudio you will be greeted by a window with three different panes (i.e. sub-windows).

RStudio on startup with three panes
These three panes are 1. The console at the top left. This is where you can interactively run code. When you start R studio you will always see the R start-up message here which gives some basic information about which R version you are using and miscellaneous information about under what licence it may be used, and how to cite, etc. We will use the console in a bit to run our first lines of code. 2. At the top right, we have the environment pane. This is where you will see all of your objects, data, and functions (see next chapter) that you have available in your R session. 3. The files, plots, and help pane. In this pane you can view all of the files that are in your working directory, plots that you have made, what packages you have installed, and the help files for different functions. Don’t worry if you do not know what a working directory, package, or help file is. We will cover this in due time.
Each of the panes have different tabs which you can flip through to see other things such as the history, terminal, and other things. You can also customize the positions of the panes, as well as which tabs go in which pane in the preferences of RStudio.
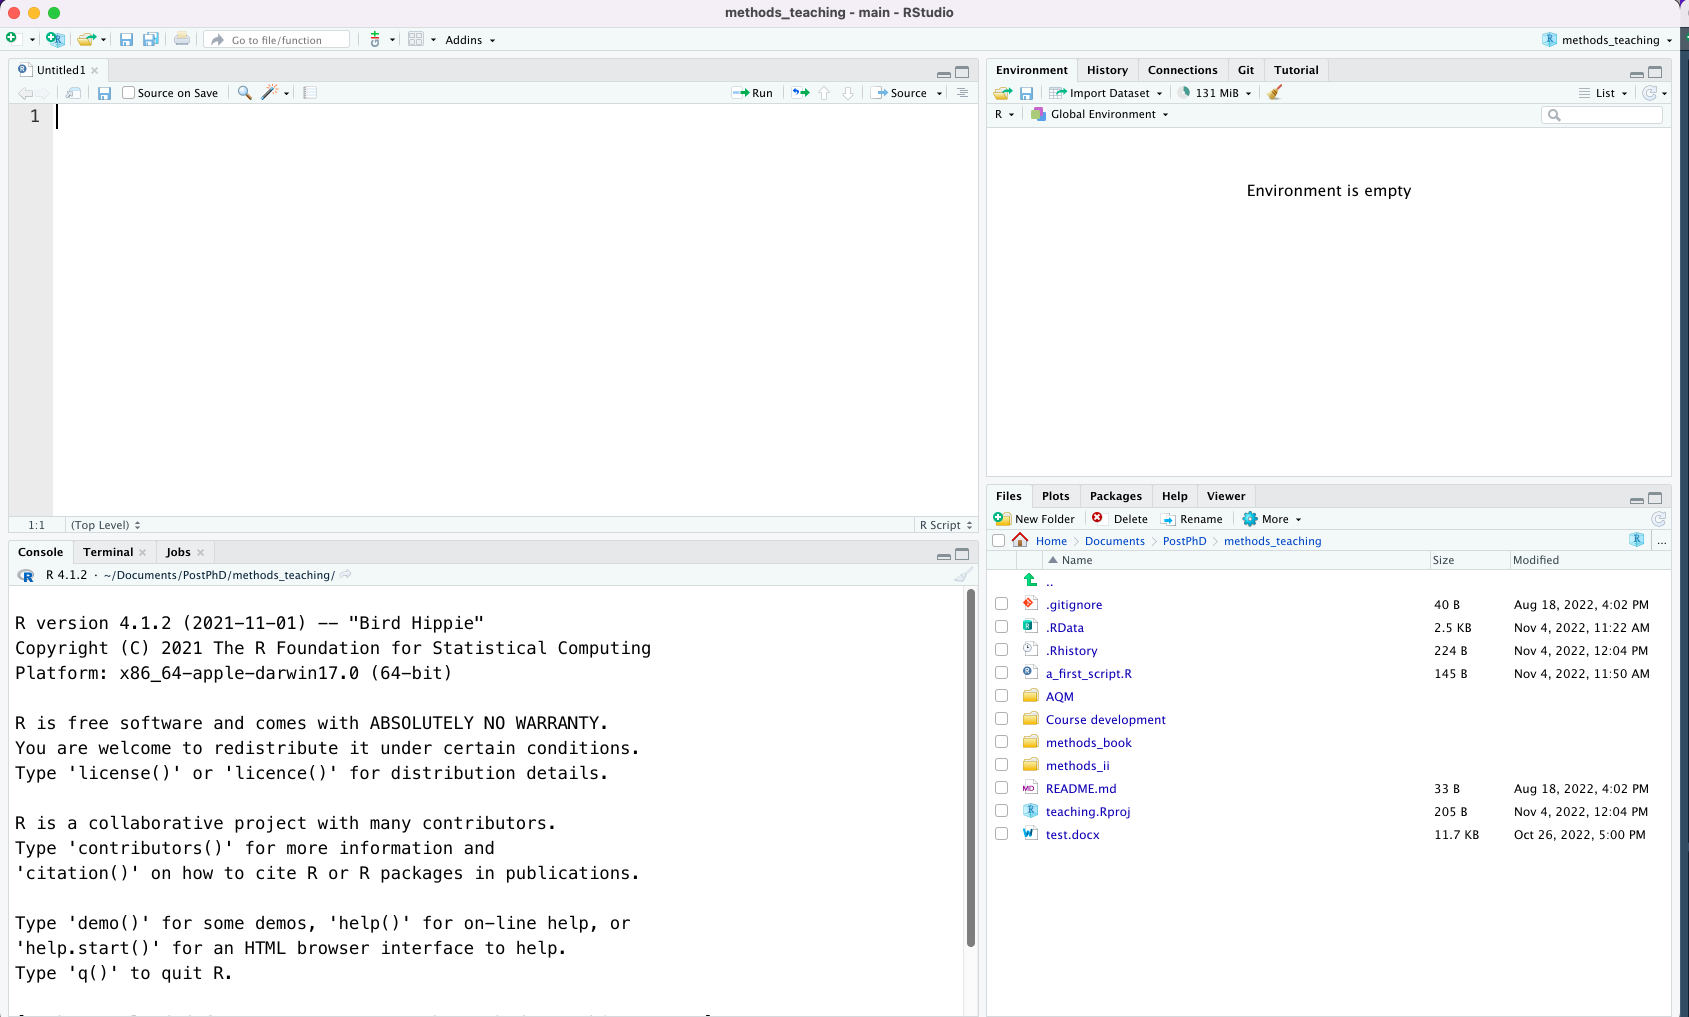
Missing from these panes is, however, the most important pane, the script pane. We can open up the script pane by opening a new script. We do this by pressing the File menu at the top of RStudio and then ‘New File > R Script’. Doing this will open up an empty R script at the top left of the RStudio window, and will move the console pane to the lower left corner of the RStudio window. (Note: if you opened RStudio by opening an R script file you will already have this fourth window when RStudio starts)

RStudio with four panes
It is here, in the script that we will do most of our work. A script is basically exactly what it sounds like. It is a script of instructions (code) that will be executed in the order that it is written. We will primarily work with scripts rather than directly in the console, as working in a script allows us to keep track of everything that we have done so far.
3.1 Running code
Let us immediately deviate from the rule above and run some code in the console. In practice, everything that we do in R revolves around code. However, do not let that word code scare you. Coding is actually much more benign than it may first seem. For instance, we can use R as a calculator by entering 1+1 in the console and pressing enter. When you do this you should immediately see the console spitting out [1] 2. And just like that, you’ve run your first piece of code, 1+1=2! Thus, running code is simply giving R an instruction which it will execute and give an answer.
3.1.1 Scripts
Now, we ran our first piece of code in the console, but as I said previously, most often we will primarily use the script. Running code from the script is slightly different than running it in the console, primarily because the code will not execute when you press enter. Instead you will just go to the next line of the script when you press enter. To execute code in a script you highlight the parts of the script you wish to run and either press Ctrl+Enter (Cmd+Enter on Macs) or the small bottom at the top of the script window called ‘Run.’ Let’s try it by writing 2+2 on the first line in the script, highlighting it, and pressing Ctrl+Enter. When you do this you will see that the code is actually run in the console and you should see
> 2+2
[1] 4
in the console. This is because even when we write the code in the script, it is still executed in the console. However, as you can clearly see too, executing a piece of a script does not change the script. The scrip thus remains constant, and if you keep writing your code in the script you will have a perfect record of what you have done. A nice thing about scripts is that you can also run multiple lines of code by highlighting a larger section of code. For instance, if we were to add 2*4 to the second line of the script and 3+8*2 to the third line of the script so that our script looks like this
1+1
2*4
3+8*2
we can run all of these lines of code by highlighting all three lines and pressing Ctrl+Enter. This will execute the code one line at a time in the console, and your output should look like this:
> 1+1
[1] 2
> 2*4
[1] 8
> 3+8*2
[1] 19
The point of this exercise is of course not that we should use R as a calculator, but rather to illustrate that running code is not something advanced. It is just an instruction to R to do something.
3.1.2 Commenting in a script
When writing a script, you may want to keep track of what you are doing on the individual lines and why you are doing it. You can do this by including comments in the R script, which you do with the # sign. In the case of using R as a calculator, this may of course seem silly, but once you start doing more advanced data processing, it may be super useful to know what each line of code does and why. This is especially true when you are re-visiting an old R script that you have not worked with in a long time and you are trying to figure out what you did and why.
To include a comment, simply write # after any piece of code you wish to comment on. Anything that follows the # on that line will not be interpreted as code and will not be executed by R. For instance we may add the following comments to our code above:
1+1 # I want to add one and one
2*4 # This line multiplies two by four
3+8*2 # This line shows that you can do multiple operations in one line
When we execute this code, you can see that the comments are still displayed in the console, but the results are exactly as before:
> 1+1 # I want to add one and one
[1] 2
> 2*4 # This line multiplies two by four
[1] 8
> 3+8*2 # This line shows that you can do multiple operations in one line
[1] 19
3.1.3 Keeping track of our work and saving scripts
The point of having a script is to keep track of what we have done thus far, and to be able to replicate the things that we have already done. Thus, whenever we have worked on a project we should take care to save our scripts. You can save your script by pressing Ctrl+s (cmd+S on a mac), or go to menu at the top and press ‘File > Save’ to save your R script. Don’t forget to save your script often.