Chapter 3 Adding figures & pictures
Include picture from online or your workind directory (more on the latter later)
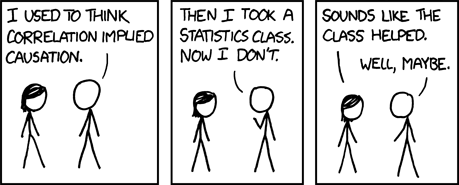
knitr::include_graphics("https://imgs.xkcd.com/comics/correlation.png")
3.1 Generating documents
Now that you have an understanding of the basics of Rmd along with some nifty tricks and can read the source file, let’s talk about how to generate output from the .Rmd’s.
The simplest way of turning the source into output is using the pre-defined shortcuts.
Task 4: Press Ctrl + ⇧ Shift + K (Windows/Linux) or ⌘ Command + ⇧ Shift + K (Mac OS) to turn generate a HTML version of this document.
Hopefully, nothing happend and maybe you spotter R giving you an error statement of some sort written all in red!
The reason for this is that, before we generate the file, we need to “run” all the code chunks so that R studio has access to their output.
There are several ways of doing this but the easiest is, once again, with a shortcut.
Task 5: Press Ctrl + Alt + R (Windows/Linux) or ⌘ Command + Alt + R (Mac OS) to run all chunks in this .Rmd file.
Task 6: Wait a few seconds for R to execute your command and then try creating the HTML document again.
The first time you generate a document like this, it can take a while for R to install and run all the tools necessary to produce your output.
After a moment, the result should pop out in R Studio’s internal viewer.
Take a minute to marvel at your creation!
…
OK, that’s plenty now! Close the viewer window and check your “Week_02” folder. Therein, you should find a file called “Week02_Rmd_intro.nb.html” (the .nb bit indicates it’s an R notebook file). This is your actual output. If you open it, it should appear in your default web browser because HTML files are the stuff websites are made from.
Next, let’s test the editability feature we have so lauded above! Check the value of the mean of the age variable. In the original file, it should be 28.85.
Task 7: Try changing some numbers in the age variable in the corresponding code chunk, re-run all chunks, and re-generate the file to convince yourself that the mean age will get updated automatically.
Lo and behold, the value is still 28.85… (seriously, change it to something else!)
Now, let’s imagine you don’t want a HTML file but a .doc (Word document).
In order to get that, you need to change the YAML header so that it reads exactly output: word_document.
Task 8: Generate a Word document from your .Rmd file.
If you don’t have MS Office installed on your computer but are using OpenOffice, change the header to output: odt_document.
Task 9: For your final task, get your notes from last week’s tutorial and turn them into a nice document written using R Markdown and render it as PDF, R Notebook, or Word (OpenOffice) document.
Well done!
That is all we have in store for you for this lab. We suggest you go over what you learnt today to help your newly acquired knowledge settle.
See you next week!