1 How to organize a project folder
It is exciting when we will start a new project. At the beginning, we should make things right! By that I mean we must organize our project folder properly.
Here are the steps for creating a sample project:
- Create a folder with a meaningful name for the project.
- In RStudio: File > New Project > Existing Directory > Browse > The folder just created > Select Folder > Create Project, this will result in a file with extension .Rproj
- Create two subfolders, R (which will contain R scripts) and Data (which will contain data sets) in the project folder.
- Create other subfolders, such as Image (which will contain graphs/pictures), if this is necessary.
- In the project folder, create other files, e.g. files for version control.
- In the project folder, after we have written R programs and saved them in the R folder, we create a file called integrate.R, which is an R script that integrates all the R programs in the R folder.
In the above, Steps 1, 2, 3 and 6 are the must.
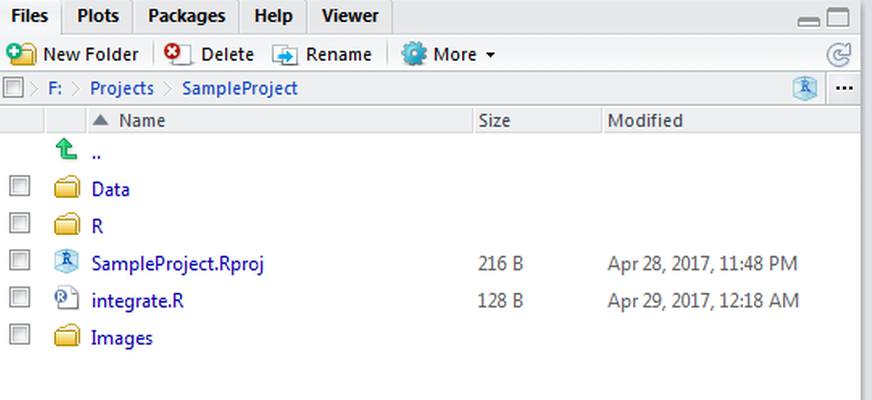
A minimal example is shown below.
The structure of the project folder:
The integrate.R script:
# Please run the R programs in order

source("./R/temp1.R")
source("./R/create_a_plot.R")
source("./R/create_a_table.R")
Note that “.” (the dot) is for the root directory (i.e. the project folder). So, here we use a relative path instead of an absolute one. This is a good practice, because if other people copy/clone this project they will put the project folder under a parent folder with a name different from mine.