Chapter 2 Introduction to R Statistical Software and Git
by Heather Kropp for ENVST 325: Introduction to Environmental Data Science Hamilton College
2.1 Learning objectives
Learn about version control with GitHub
Introduction to R, Rstudio, Posit Cloud
Learn to start a version controlled project
Learn the basics of R statistical programming
2.3 First some terms:
R: a statistical programming software that can be used to analyze data
RStudio: a user friendly interface for running R
Posit Cloud: a cloud computing environment for running R & RStudio
Repository: a collection of files that are version controlled
Script: a text based file containing code that can be run in a programming language. R scripts have a .R extension.
2.4 Setting up a Repository in GitHub
2.4.1 Create a repository
Log into GitHub and click on the Repositories tab and click the New green button (shown in red circle). Create a repository for this activity.

You can name it ENVST325_activity1 or anything that you want. You should avoid spaces in repository names. Make it public and make sure the README box is checked as shown below. Should you wish your repository to be kept private, please talk to me about setting it up for grading.
2.4.2 Create a personal token for Rstudio Cloud
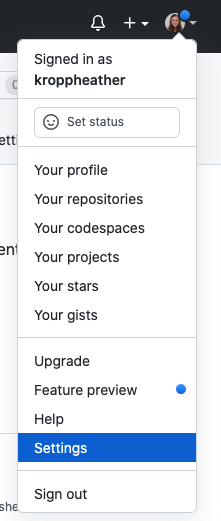
For each new Rstudio Cloud assignment, you will need to create a token that gives Posit Cloud permission to post to your GitHub. You can access the token through Settings. Click on your profile tab in the upper right corner:
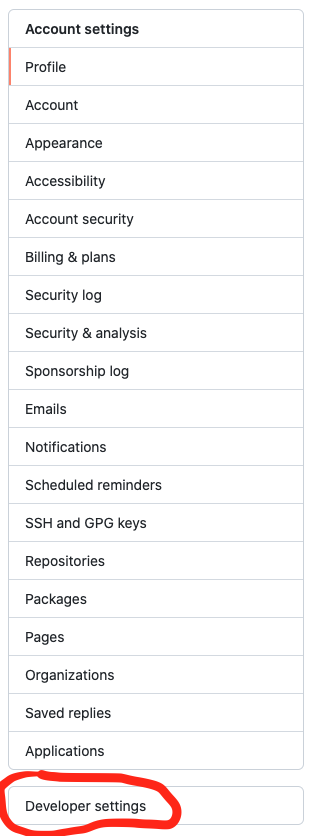
Developer settings:
Personal access token option and select the Tokens (classic) option and click the Generate new token button:

You will be prompted to re-enter your GitHub password/two factor.
You will create a new token for each new project. We will use a different project for each homework. It is good to include something like A1 in the description so you can keep track of your tokens.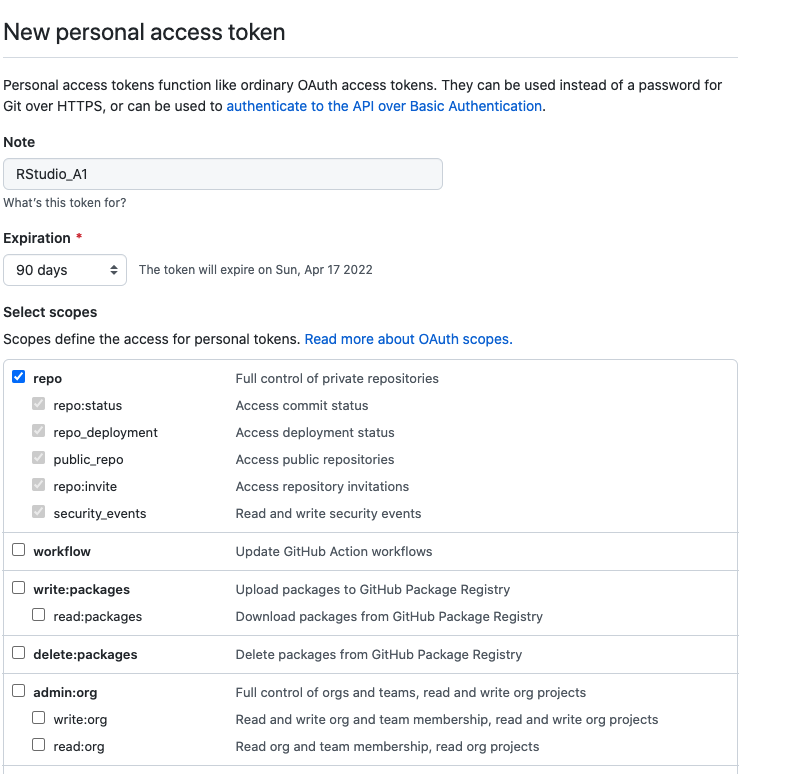
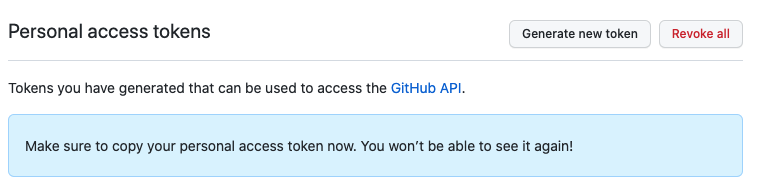
A token with a clipboard will be displayed below this message. It will have a lot of numbers and letters. Copy your token and make sure that you do not lose it from your clipboard. Do not post this token, copy it in your Rscript, or share it publicly. Leave this tab open until the end of the tutorial.
Below is what the page will look like. I have cut off my token in the image so that it is not visible.
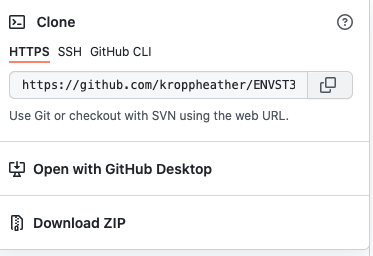
Open up GitHub in a new tab. Click on the repository you just made. You can find the url of the repository by clicking the green button with the label code. Copy it to your clipboard.
Now let’s head over to RStudio Cloud to link the repository to a project.
2.5 Start a project with version control in Rstudio Cloud
RStudio Cloud helps create a standardized computing environment for us as a class that is specifically meant to support working in R. This means that you can access the same computing environment and you only need to run a web browser on a personal or Hamilton computer. This will allow coursework to be readily completed from any computer whether you are on or off campus. It also means that you don’t have to worry about installing R or storing data on your own personal computer.
You will have received an invitation to join the ENVST325-SP22 workspace on RStudio Cloud through your Hamilton email. Once you have joined the workspace, you can access the projects section. A project is a collection of related R files and data.
2.5.1 Start a project linked with a repository
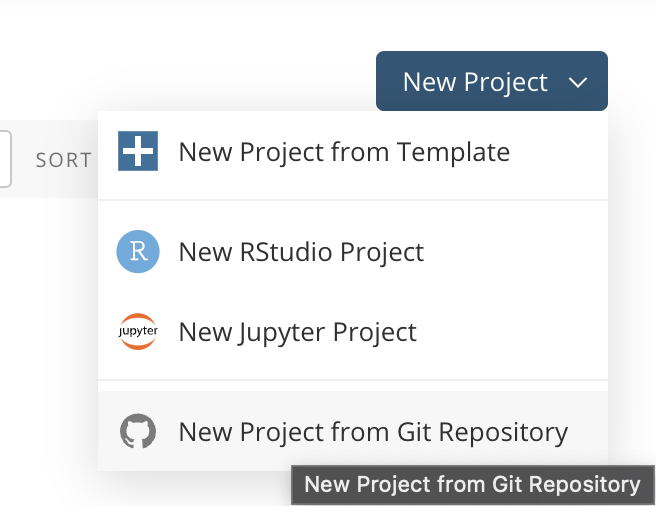
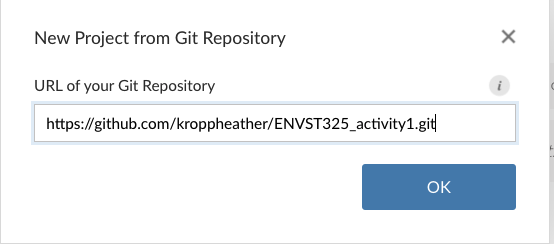
Click the New Project button and choose New Project from Git Repository:
2.5.2 Rstudio interface
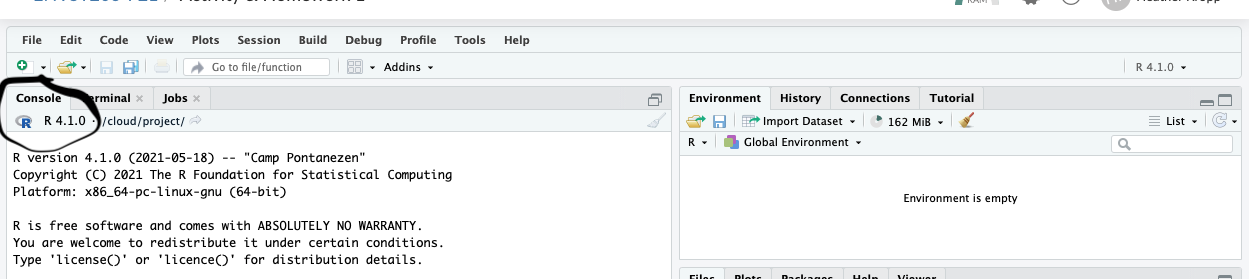
R is essentially a fancy calculator with many options for making plots and built in functions for math and statistics. The Rstudio interface has 4 main components: 1. script window, 2. console, 3. environment, 4. information tabs
When you first open RStudio Cloud, you may have to start a new script file to see the interface with all four sections.
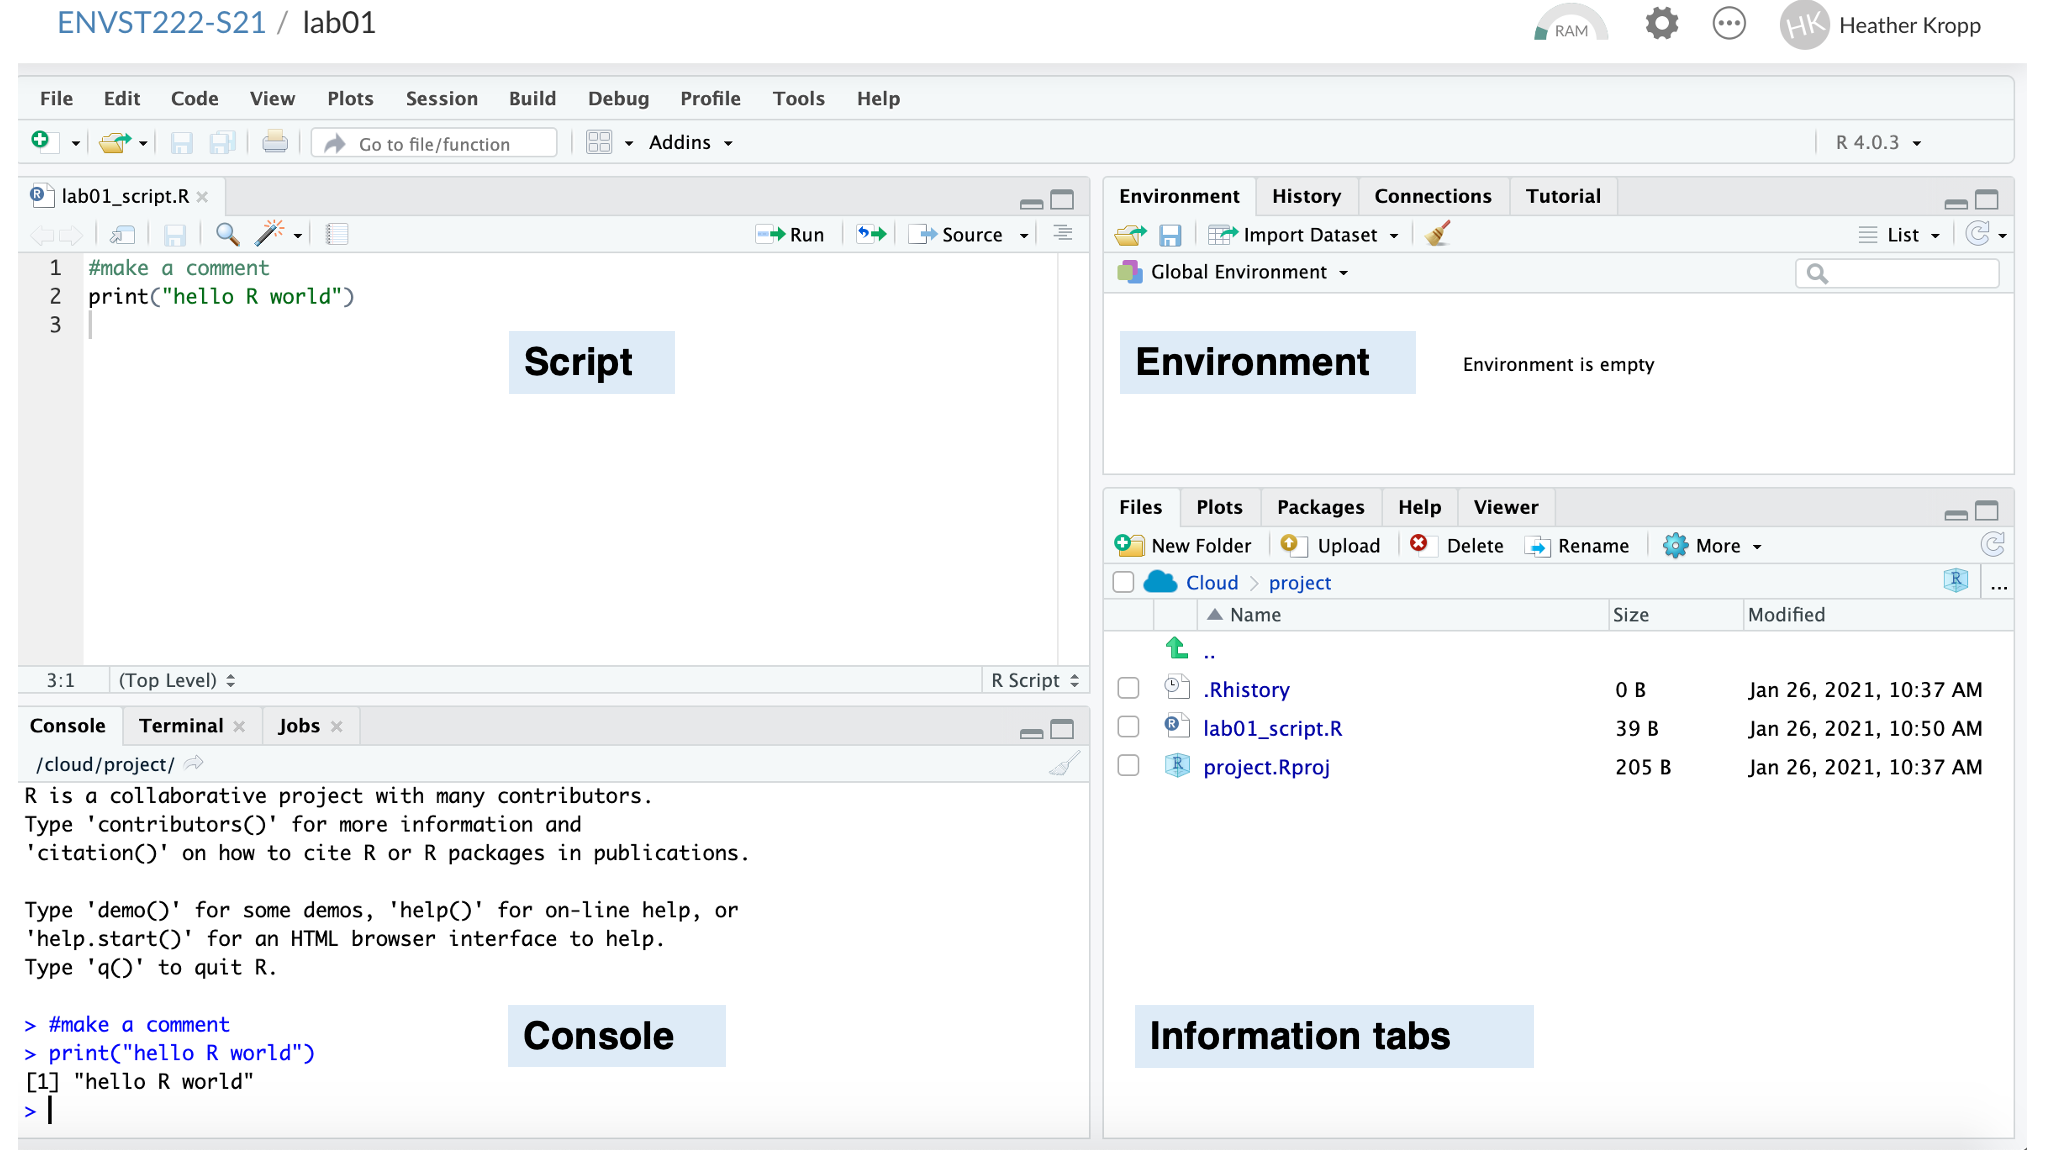
The console runs your R code. It’s the calculator! You can type code into the console and it will run. However, you won’t be able to access that code later, just like many calculators. That’s why we use scripts.
R scripts allow you to save code in a text file to run in R. R scripts all have a .r extension. By itself, the script will do nothing. You need to actually tell R to run your code in the console. When you first open up Rstudio, there is often a blank work space with just the console. You can tell you are looking at the console by checking the tabs, and you will see information about your R version at the start.
New scripts can be created by going to New File and clicking on Rscript. If you wanted to open an existing Rscript, you can go to Open File.

Clicking a new script will prompt you to save into the file system created in our project computer:
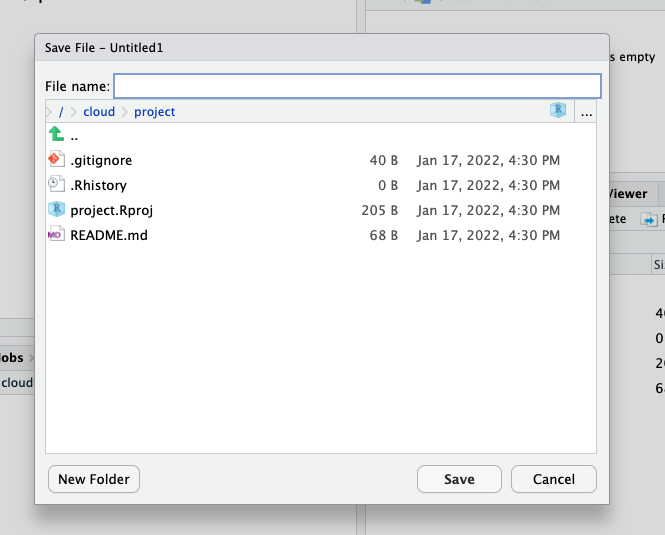
You will see that saving your script will create a new file in the Files tab in the bottom right corner. This tab will be important when we start working with more data files.
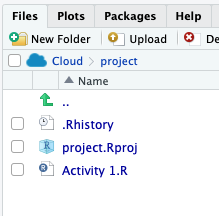
The script opens up above the console and is ready for you to code!
Try typing in and saving:
2.5.3 Version control
Let’s document the creation of your R script and make sure everything is properly linked with GitHub.
You will want to make sure that you set up your user credentials so that they match GitHub. Go to the terminal tab next to the console:
The terminal is a way to send commands directly to programs and the computer that your Rstudio session is running on. You can send commands to git (the program the computer uses to talk to GitHub) using the terminal.
You will type in the following lines of code in the terminal tab:

2.5.4 Commit your first changes to GitHub
Do this step after you change your user info and have made changes to the project:
In the terminal:
- Type
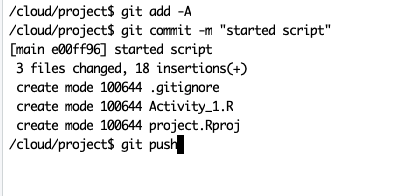
git add -A. This will tell git to add changes to all files for tracking. - Type
git commit -m "description of changes". This command helps label all of your changes. - Type
git push. This command sends the changes to github.
When you run git push for the first time, you will prompted to enter your username and and then your password here. Your password is your personal access token NOT your GitHub password. I know this is confusing. This set up is a part of improving security measures.
Your personal access token is acting just like your password. Do NOT share it or post it anywhere. Close your tab. GitHub will not let you view this token again for security. Remember you can always generate a new token if needed.
It won’t look like much happened. However, if you go to your github repository online, you will see your changes appear. You should now see your script file appear:
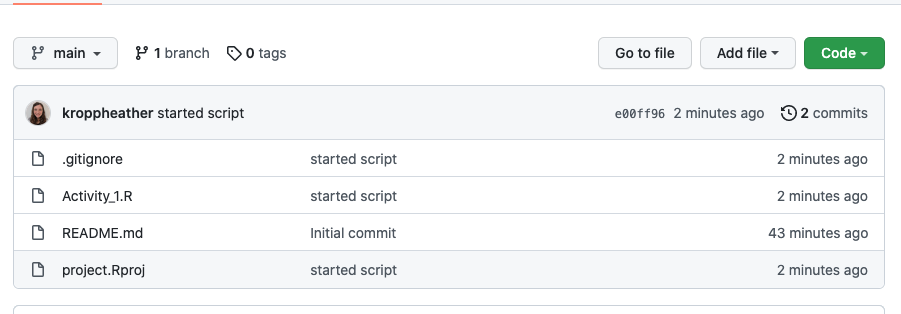
With your code visible online, you should never put passwords, username info, or sensitive information in a script.
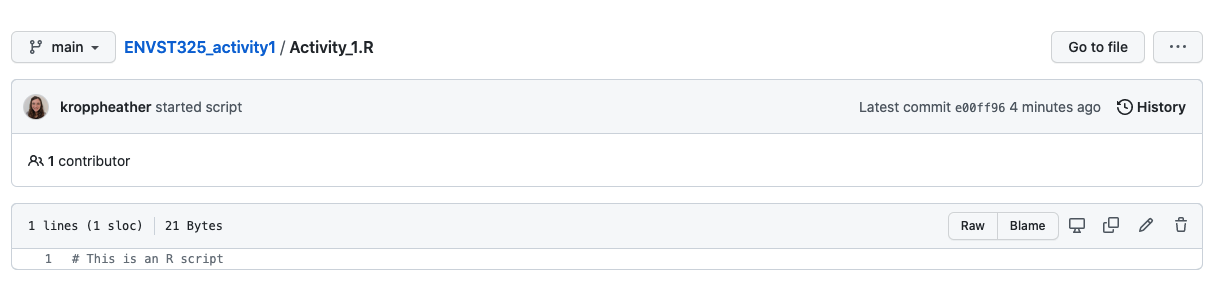
If you click on the file name, you will see the text I wrote show up in the file.
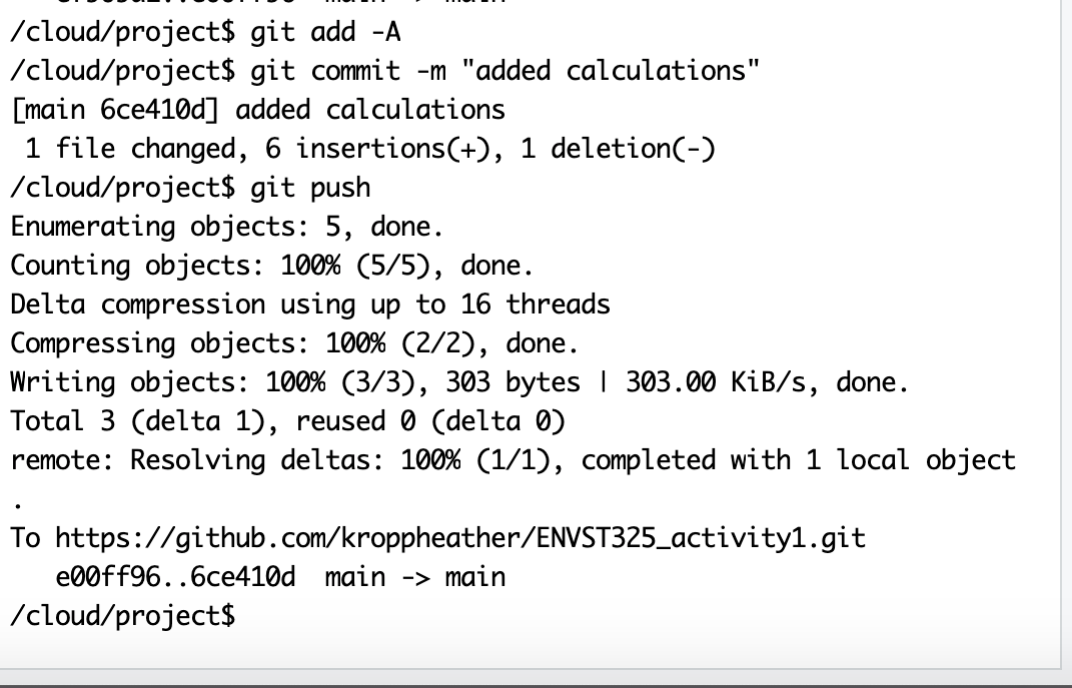
If you make more changes, going through the commit steps= will no longer give you an user prompt. Instead you will get see a bunch of text that let’s you know it was successful:
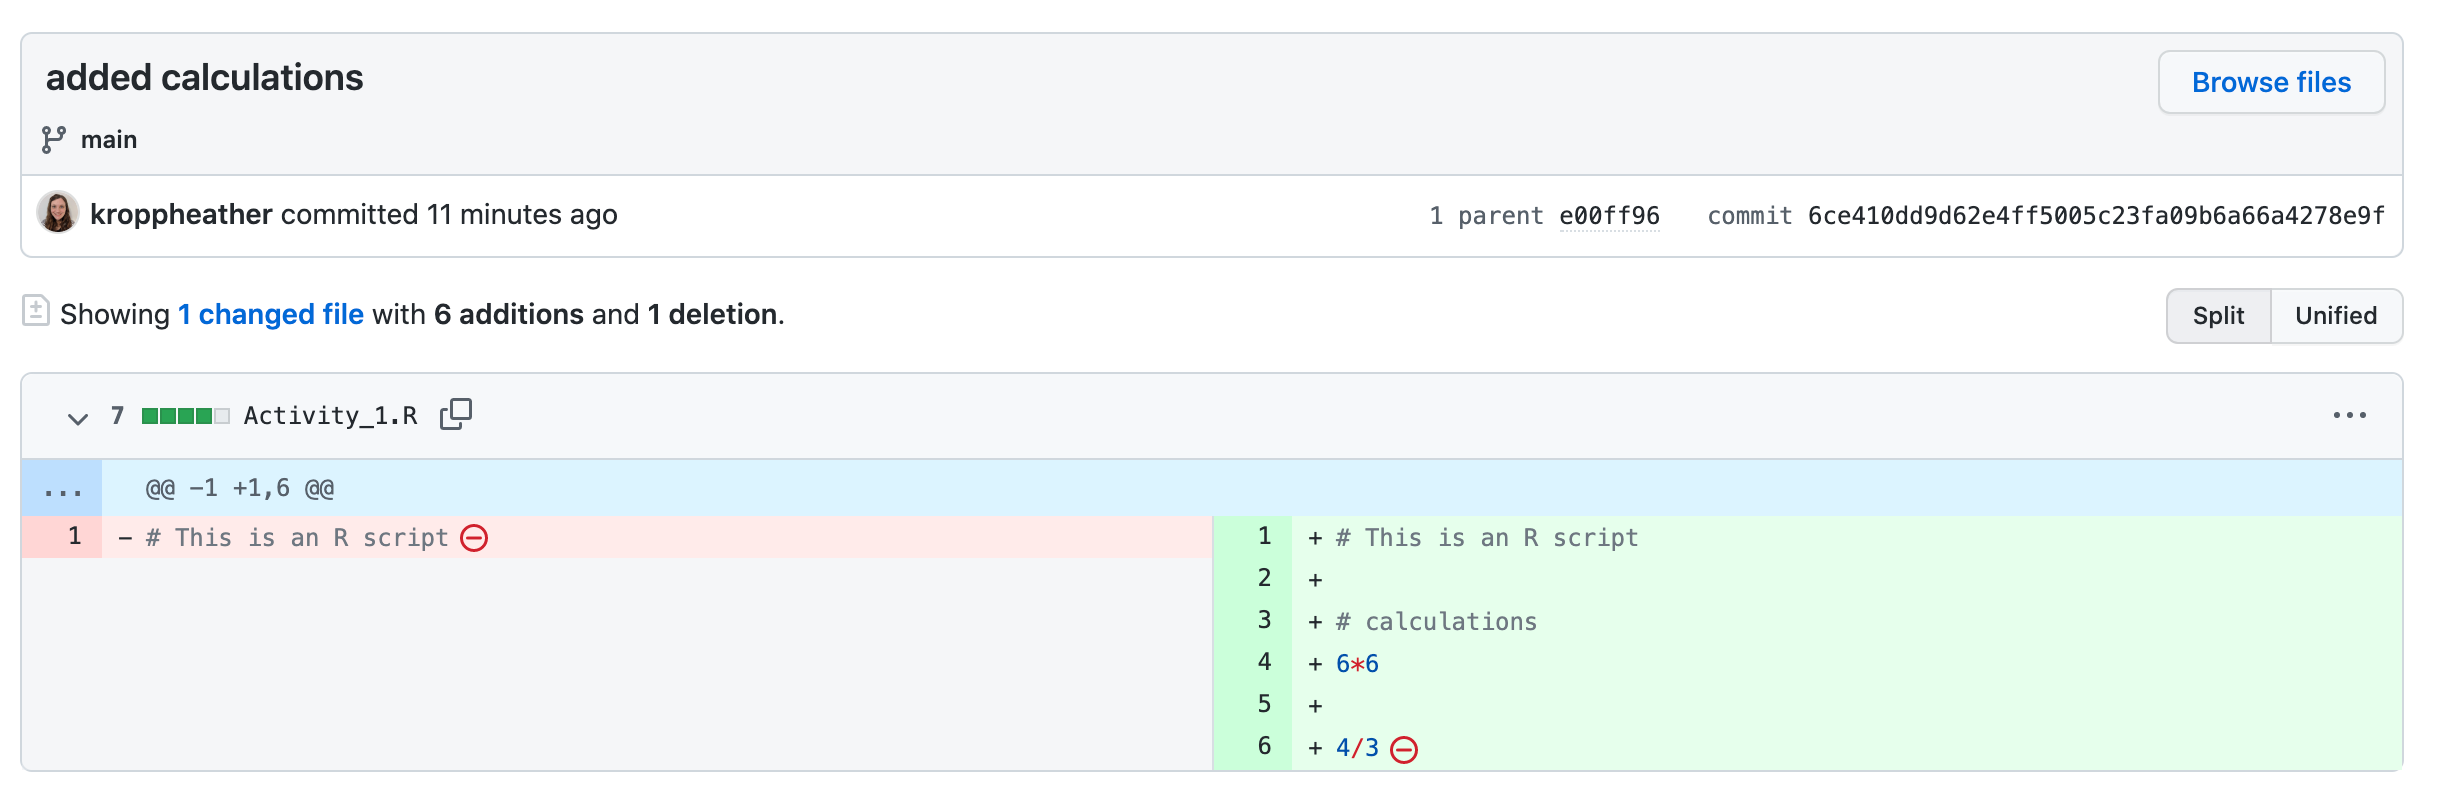
If you go back to your repository in GitHub, you can compare your changes by clicking on the commit id next to the clock. You will see a side by side change next to the previous version and your description that you included:
2.6 Intro/Refresher on R
R is essentially a fancy calculator. One of R’s core functions is calculating numerical operations. Many basic numerical operations in R follow typical mathematical notation used on keyboards and calculators. You can see some examples below. Note I’ve included both the code (grey boxes) and outputs (blue boxes) here for an example. You can run your code by clicking in the line or highlighting lines and click the Run button.
# remember this is a comment so it won't do anything. R just ignores it.
# you need to use these to document code and write notes
# 6 raised to the 6 power
6^6
[1] 46656[1] 215[1] -7Any text preceded by a # is called a comment. Comments help document and organize your code. They are useful for remembering why you did something or serving as a reminder for how code functions. R ignores these lines.
2.7 Variables
Typing in calculations can quickly become redundant and difficult when you have many observations. Creating a variable allows you to refer to the same object by typing its name. You can create a variable by first typing a name, then typing the assigner <- (= also works, but is not R convention). Anything to the right of the assigner will be refered to with the name you give. Below is an example where I know I will want to use the number 244435600 many times so I will give it a shorter, easier to remember name.
[1] 1222178000[1] 1222178002.7.1 Vectors
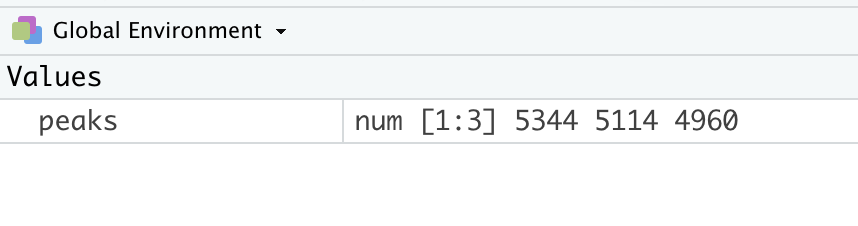
A vector is a one dimensional array of data. You can make a vector in R using the function c(). c stands for combine values into a vector where each value is separated by a comma. For example, here’s a vector with the elevation of the three highest peaks in the Adirondacks.
The function c involved text followed by parentheses. This is a detail to pay attention to for the R syntax. Syntax refers to the rules and structure of a coding language. What you learned about # and <- are examples of R syntax since these symbols have a specific meaning. The format of text followed by parenthesis (e.g. anyName()) indicates that the object is a function. Functions are a key part of R. They expect certain inputs called arguments (like our numbers in the c function used to create peaks vector). Functions will also perform a task that reduces the need for extra coding.
When peaks is run in R, there is no output shown in the console. The variable peaks was simply created.peaks shows up in the global environment. It is a data type numeric and it has 3 total objects. Numeric data are all numbers and can include numbers on both sides of the decimal. Monitor the environment section frequently to check that your code is working as expected.
You can now do calculations on each object in your vector. For example, if you want to convert the peak elevation to meters, you simply need to type in one calculation. You’ll notice, this calculation was not assigned as a named variable, and a vector of output is returned but not stored in the environment.
[1] 1628.772 1558.671 1511.734You can also apply vector operations on vectors that are the same length and a calculation for the element in each vector makes sense. For example, I can make a vector of the prominence (height from the base) and calculate the difference to find the difference between the elevation of the mountain and the prominence.
[1] 430 3014 4120You can also make vectors with other types of data beyond numeric. R supports data types such as dates, character strings, and integers. A character is any mixture of letters, numbers, and symbols. You can’t apply mathematical calculations to character. You can set up a vector of the mountain names by using quotes around each character element in the vector:
# quotes denote a character data type
peakNames <- c("Mount Marcy", "Algonquin Peak", "Mount Haystack")
You can subset a vector using [] syntax. If you want to refer to just the first item in a vector, you can subset as follows:
[1] 53442.7.2 Data frames
The final basic type of data that will be useful to keep in mind is a data frame. Data frames are a matrix with column names and sometimes row names. All observations in a row are associated. Each column must have the same type of data ( e.g. integer or character). Make a data frame with all of the high peaks information using the data.frame function. For the data.frame arguments, you specify each vector to include as a column and the name of the column (left side of each equal sign).
# make a data frame
# you must include the column name = data vector
# separating multiple columns with commas
highPeaks <- data.frame(elev = peaks,
                        prom = prom,
                        name = peakNames)
A helpful way to check that your code ran as expected is to track the objects in your global environment. Vectors show up under values and data frames are shown under data. If you click the blue arrow button you will get a preview of the data frame.
You can subset a data frame using the [] syntax, but you need to account for the two dimensional nature of data frames. The two dimensional format of a data frame is references rows and columns in the following order: [rows,columns]
  elev prom           name
2 5114 2100 Algonquin Peak[1] "Mount Marcy" "Algonquin Peak" "Mount Haystack"[1] "Mount Marcy"