3 Web interface
3.1 Cannot see a repository?
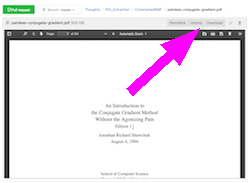
So often, you try to visit a repository, and find something like below:
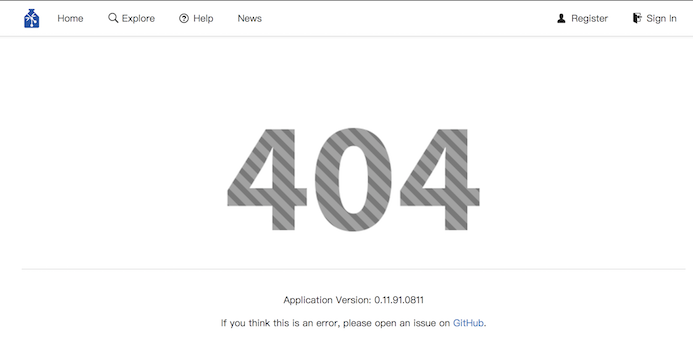
404 page
The solutions are:
- Sign in to Gin
- Check that the repository exists
- Make sure you have access to the repository
3.1.1 Sign in to Gin
It happens when you are not signed in to Gin.
Click on the “Sign in” button at the top-right corner of the page:
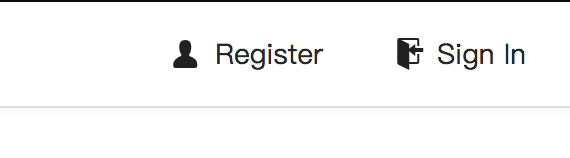
Sign-in button
(If you have not yet got registered to Gin, then do it first from the “Register” button on the right.
3.1.2 Check that the repository exists
If the situation persists, go visit your dashboard, and find the name of the repository from the list. If you click on it, the repository page should show up.
3.1.3 Make sure you have access to the repository
If you don’t find the repository in your dashboard, then it is possible that you don’t have access to the repository at all.
Ask somebody who has access rights to the repository for adding you as a Collaborator.
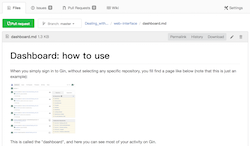
3.2 Dashboard: how to use
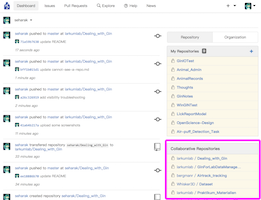
When you simply sign in to Gin, without selecting any specific repository, you fill find a page like below (note that this is just an example):
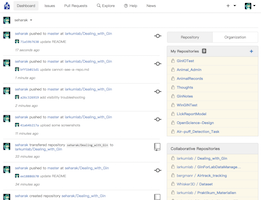
Dashboard overview
This is called the “dashboard”, and here you can see most of your activity on Gin.
The dashboard may be divided into several areas:
- Activity area: shows what you did with your repositories
- Collaborative repository area: lists up the shared repositories you have access to
- Private repository area: lists up your own repositories
3.2.1 Activity
Activity area
This shows your recent activity on Gin, e.g.
- your recent commits to your repositories
- issues and comments reported to your repositories
3.2.2 Collaborative repositories
Collaborative repository area
This area lists up the repositories owned by others and those you have access to.
Normally, most of your repositories will show up here, as they are owned and managed by @larkumlab.
3.2.3 Private repositories
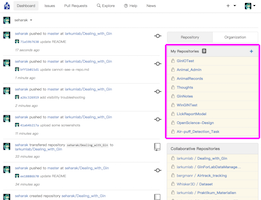
Private repository area
This area lists up the repositories owned by yourself.
In many cases, these are visible only to you unless you add a Collaborator to one of them.
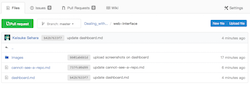
3.3 Browsing a repository
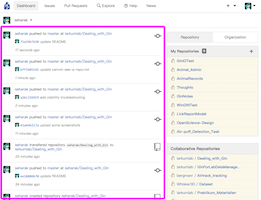
If you visit the repository page, it looks like below:
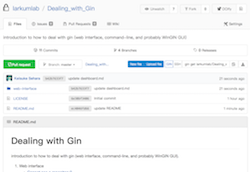
A typical repository page
From here, you can browse what is in the repository including:
3.3.1 Overview of the repository
On top of the page, you will find the header consisting of <owner name>/<repository name>:
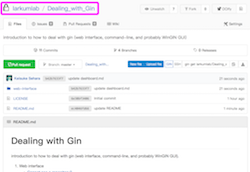
Repository name
This represents the identifier of the repository so that
you can specify a single repository inside https://gin.g-node.org.
Down to the bottom, you may find some document:
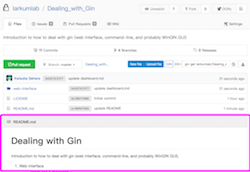
README file
This represents the (hopefully) detailed description of the repository about what it is or what it contains.
In fact, this description comes from the
README.mdfile in the root directory of the repository. The name of the file comes from a tradition of programmers community to contain the “read-me-first” file in the top directory of any code.You can add or edit it by adding / editing the
README.mdfile.Even inside the sub-directories of the repositories, the description will automatically show up if you add and edit a
README.mdfile in it.
3.3.2 Browsing files
In the middle, you can find a list of files and directories in the repository:
File list
By clicking on individual file/directory entry, you can browse its contents.
For example, you can see the contents of a sub-directory by clicking on it:
Directory view
Contents of normal files may be visible, as long as your browser supports it.
For example, you can browse to web-interface/images/dashboard.png, and you can have a glimpse of the original image file:

If you write the documents in the Markdown format (and I recommend to do so whenever possible), you can see the formatted-view of the document:
- Other text-based files (CSV, TSV etc.) may be seen in its raw format.
Binary files (Excel, Word, Spike2 etc.) will not be visible, so you must download it to see the contents.
3.3.2.1 A small side note
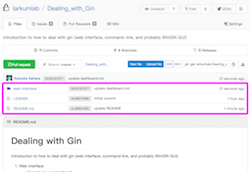
On the left columns of the files list, you can see some information like below:

Commit description
Sadly it is not about the description to the file itself but describes the commit that updated this file most recently.
In the case of the image above, the directory “web-interface” was updated by the commit
with the commit ID being b42b7633f7, and with the commit message update dashboard.md.
3.4 Downloading files
Although the files may be browsable on the web interface, you might want to interact with them on your desktop, using one of your favorite programs.
It is possible to download files individually from the web interface.
Note that this “individual download” feature differs from what Git-people call “cloning of the repository”. Git-clone involves downloading of the whole repository, whereas this individual download concerns only with the current single file.
3.4.1 Download button
When you open a single file, you will see buttons on the top-right of the file:
Location of buttons
These buttons represent the actions that you can execute on this specific file, including:
- Obtaining the link to this specific version of the file (Permalink)
- Browsing different versions of this file (History)
- Downloading the file (Download)
- Editing the file (the pencil symbol; it may not be available in the case of read-only repositories, or Gin does not have a way to edit the file e.g. PDF)
- Deleting the file from the repository (the trash-can simbol; may not be available)
For downloading the file, click on the “download” button:
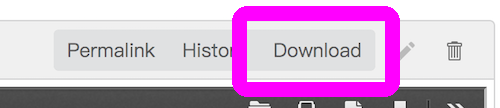
Download button
Then your browser will start downloading the file.
3.5 Uploading and editing files
3.5.1 Overview
The Gin web-interface, with all its buttons, allows you to create and edit text-based files, or upload files, set of files or folders.
In all case, one needs to set the target for these files and commit new changes.
3.5.2 Create a new text-based file
TODO
3.5.3 Edit a text-based file
TODO
3.5.4 Uploading a set of files
When you click on the “Upload file” button, the file upload view will appear:
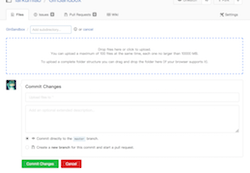
File-upload view
The dotted region in the middle of the page is the upload area:
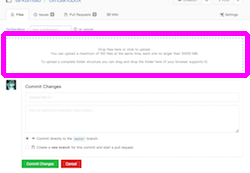
The upload area
You can add the files to be uploaded by either:
- Clicking on the area: the file chooser dialog will appear so that you can select files from it.
- Drag and drop individual files or a directory containing a set of files. In the latter case, you can upload the whole directory structure easily.
In either case, the upload process will start immediately, and you will see the progress on the area:

Progress of upload
You can specify the directory to be uploaded from the directory selector.
After completion of the upload processes for all files, you can proceed to finish the commit process.
Note, by using this upload view, you can only upload 100 files at once, with each file being less than 10 GB in size. If you want to upload more files at once, or upload larger files, you will have to use the command-line interface or WinGIN.
3.5.5 Location of buttons for uploading
When the web interface shows a list of files in a repository, you can see blue buttons in the middle, above the file list.
Note that, if you don’t have the “write” permission to the repository, these buttons will not appear. If you still want to create or upload files, contact the person responsible for the repository to add you as a Collaborator.
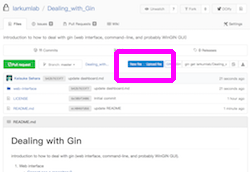
Where you can find the buttons for file-creation / upload
There, you have two types of buttons:
- “Upload file” button: used to upload a set of files.
- “New file” button: used to create a new file in the repository.
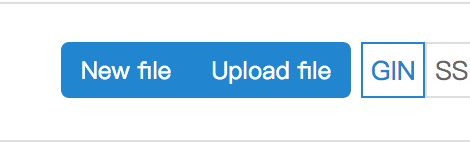
Two buttons for new files
3.5.6 Specifying the directory to be uploaded
3.5.6.1 Targeting a (new) subdirectory
On top of the view, an empty text field will show up:

Directory selector
This is for specifying the directory to upload the file(s).
For instance:
- Enter the name of the subdirectory (within the repository) in this field:

A subdirectory is specified
- Gin will automatically create a new directory with the given name (in case it does not exist) as you commit uploads:
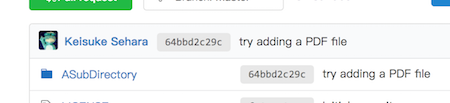
Created subdirectory
- Inside the subdirectory, you will find the uploaded file(s):
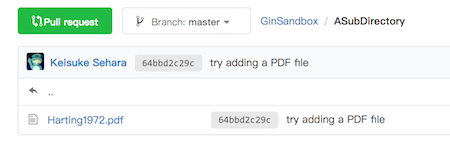
The uploaded file in the sub-directory
3.5.6.2 Specifying a directory path
You can also specify the path to the directory of interest, by connecting a hierarchy of directories by a / (slash):
TODO
3.5.7 Committing new files
TODO